
My name is Sze and I am going to be a senior at Staten Island Technical High School. When I was a little kid, I thought the only explanation for the extraordinary capability of electronics was the act of aliens. But as I age on, I realized that these “capabilities” can be manipulated by human beings. I learned to program video games in computer class, and understood the “magical” light switches are actually controlled by a circuit, a concept I learned in physics class. I felt a step closer to my technological dominated world, but yet there was still a thin barrier because I cannot manipulate and create these electronic gadgets myself. My goal for this summer is to break this barrier and make gadgets on my own.
I picked Drawdio for my starter project because my sister had shown me a link to a Drawdio once and told me it would be really awesome if I can make one for her. And coincidentally, I saw it on BlueStamp’s starter project ideas book, therefore I picked it without any second thought.
For my main project, I picked “Solar MP3 speaker with modification to LED light sensor music box” because music is my passion and it would be really cool if I can listen to music with something I made. But during this project, I further modified it to “Musical LED sensor Ferris Wheel” because I couldn’t find an inexpensive acrylic box. So, I designed a acrylic Ferris Wheel and cut it out of acrylic plastic sheets.
_____________________________________________________________________
Reflection:
I came to Bluestamp as rising senior in high school with no knowledge of basic electronics. I didn’t know how to solder, and didn’t know the existence of capacitors or transistors or oscillators. But through my project, I am proud to say I am capable of soldering “well”. Through numerous failures of over soldering LED strips which resulted in burning the LED strip and causing it to be unable to light up, I learned to estimate when to stop soldering. Through my starter project, I learned the existence of “capacitors and transistors”and understood how they acted as an amplifier adjust the current to a point so that it can flow through the speaker without buring it. I stopped my AutoCad skills from rusting when I used them to design my Ferris wheel. I found my passion for designing on the computer when I saw my design came alive in reality.
I am not 100% sure that I want to be an engineer but I am sure that I enjoy building and want it to be part of my future.
_____________________________________________________________________


_____________________________________________________________________
FINAL VIDEO
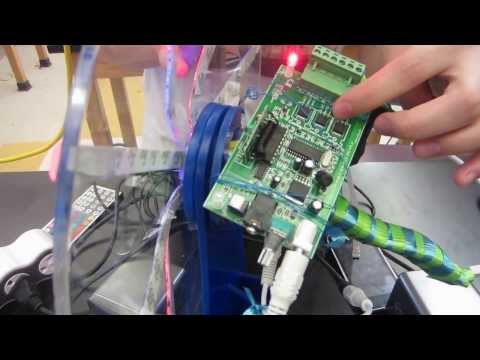
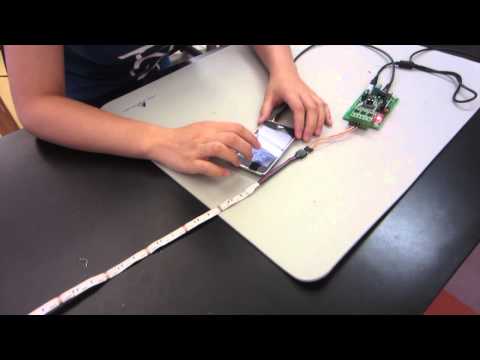
This is Sze again! And this is my final video of my Musical LED sensor Ferris Wheel. I attatched 4 LED strip to the sound sensor and 4 LED strips to LED controller. So the 4 stips will light up to the detected sounds and 4 will be controlled by me with a remote. The way that the sound sensor works is that it filters the sound waves into high and low frequency. Depending on the frequency, the lights will be dimmer or brighter. After I permeantely glued the parts together, attched LED strips to it, and wraped the wires with ribbions, I completed my project.
_____________________________________________________________________________________________________________________
Second Milestone
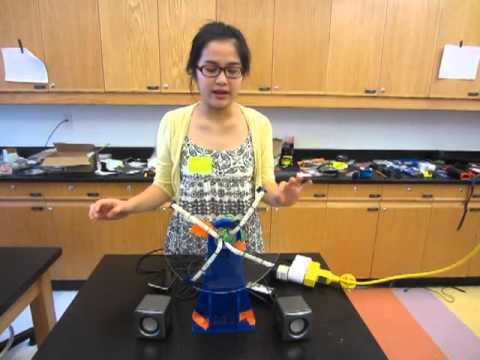
My project started to take shape after I accomplished my milestone 2. In this milestone, I made a CAD drawing of my Ferris wheel and got the parts razor cut. After that, I put the LED strips through the cylinder and got a rough idea of where things should go. I tested the Ferris wheel by powering the system with a 12 V adapter and attached the system to speakers. The Led lights started to blink accordingly to the rhythm of the audible music. But it still needed some modifications where the wires come out of the cylinder in the back. I need to add 4 more LED light Strips to make the Ferris wheel look more complete. And permanently glue the parts together.
Here is a link to the CAD design I made for my Ferris Wheel.
CAD Design
_____________________________________________________________________
First Milestone
I successfully completed all the parts of my milestone one .
-I removed all the covers of the sound controller and amplifier.
-Soldered in 4 led strips connection to the sound controller.
-Found the wire that connects the ipod to the sound controller.
This milestone took longer time than I expected because I realized that the wires I needed were not in the material list and I couldn’t figure out how to power up the amplifier. After waiting for the wires to come in and realizing the amplifier is malfunctioned, I made a change to my project idea. I decided to replace the amplifier with real speakers to save time. Instead of making a led light box, I am going to make a ferris wheel with LED lights as spikes. I call it “Sze’s Musical Ferris Wheel”.The Ferris Wheel uses less acrylic plastic so it is less expensive but still efficient. My next milestone is to come up with a CAD sketch of the ferris wheel dimension and start building the ferris wheel.
_____________________________________________________________________________________________________________________
Link to my “Bill of Materials”
https://docs.google.com/document/d/1wtl5ySKXQBMFBcRuurhNssn7SGxYWZ-iumDBkHog6U4/edit
_____________________________________________________________________________________________________________________
Sources:
http://www.instructables.com/id/Light-Box-1/?ALLSTEPS

_____________________________________________________________________
Tutorials:
1. Gather all materials
Take the cover off from the sound controller, amplifier and light controller
Test LED lights and connect 4 strip with a length of 3 “led segments” to the sound detector ( the side opposite to the adapter slots.)
(See reference link below to understand how to cut LEDs)
2: Measure each parts and determine the dimension of the ferris wheel that you are going to need. Make a CAD drawing of the design.
3. Add 4 more LED lights with a length of 5 “LED section” by connecting it to LED controller to make the project look more complete.
Solder in the Led lights’ end to connect to the sensor.
Get the acrylic plastic to be cut.
Tape the LED lights to the wheel and let the wires go through the cylinder.
Glue the base, back and stopper to the wheel.
Test.
Connect the sound detector and LED lights controller to the speakers. T
Test if the LED lights up according to the music.
Test each color button on the LED lights remote to verify proper connections were made.
3: Add a big shrinking tube to the back of the LED wires that are connected to the sound controller.
Add a smaller size shrinking tube to each LED lights attached to the LED controller in the back.
Heat the shrinking tube with a Heating Gun to shrink the tubes.
Peel the paper in the back of the LED that covers the LED’s adhesive side.
Stick the adhesive back to the wheel. Power the LED controller, sound detector, and speaker using an adapter.
Connect the ipod to the Sound detector and speaker.
_____________________________________________________________________
Drawdio

What is a Drawdio?
Drawdio is a device that makes sound when you draw something while touching what you draw. The reason is because the circuit board on the pencil is attached to the lead. The wire iron tape connects the circuit to the pencil so you will become part of the circuit when you grip the pencil. Then you draw, the conductive graphite drawings become part of the circuit and when you touch it with your finger, the circuit is closed and therefore producing sounds.
How does the circuit board works?
The whole circuit is powered by a 1.5V AAA battery. A large electrolytic capacitor then smooths out any ripples caused by the power surges. Then the oscillators convert these power into frequency or pulses. The resistors and the capacitor filter out the undesired frequency . Afterwards the amplifier amplifies the filtered out product before letting it flow to the speaker. Finally, the sound coming out from the speaker is audible to human ears.
Drawdio is the first soldering project I worked on. Through this project I realized how much the PCB board and integrated circuit fit like a puzzle. The project went well until I reached the last step. I successfully completed the circuit using my hands, it made noises when I gripped the pencil while I touched the tip of the lead. But for some reason, it won’t work on paper. I tried holding a penny while I draw because copper is conductive, but the speaker didn’t make any sound. It was very frustrating; I felt like I was 2 steps away from the finishing point in a race and somehow I managed to fall and can’t get back up. After brainstorming for an hour I figured out the source of the problem : the paper is not conductive enough to close the circuit. So I tried wetting the paper , knowing that it will make the paper more coarse and perhaps coarse enough to let the current through. I felt so accomplished when it worked. But I searched up that it worked not only because it made the paper more coarse, but because water itself is an ionic compound and is a good conductor. Therefore, electrons are able to flow easier in the wet paper compared to in dry paper. And after numerous trials, I learned that drawing thicker lines with the pencil also help to reinforce the circuit as well because graphite is conductive so thicker graphie lines increase conductivity. I learned about how each integrated circuit parts work. Oscillators, capacitors, transistors are no longer foreign words to me because I now know the function of these parts.