Face Detection Door Lock
My project is a Face Detection Door Lock which uses OpenCV and Python to detect faces and open a door lock for people who are recognized.
Engineer
Suchit B
Area of Interest
Computer Science
School
Dougherty Valley High School
Grade
Incoming Senior
Reflection
Throughout this project, I was able to work on skills like using Arduinos and independently problem solving. It was a really good experience for me to experience both sides of design: mechanical and programming. I have had an extensive coding experience in the past and it was a great experience for me to learn how to build hardware. Throughout the process, I ran into roadblocks like not understanding what the parts I have to add to my circuit were and putting wires in the wrong areas. However, by reading Stack Overflow and watching YouTube videos, I not only bettered my understanding Arduinos, but I also learned how to solve problems in the future. One thing I wish I had accomplished but ran out of time to do was using a camera attached to my Arduino for the face detection. BlueStamp has been a great experience that has allowed me to love engineering even more!
Second Milestone
For my second milestone, I focused on the creation of the door lock and integrated the program to detect faces with it. In this milestone, I finished the lock mechanism and instead of creating a physical door lock, I implemented the same system into a lock box so I could use the same technology without having to make an actual door. I used an Arduino to complete this task and glued a servo on the edge of the box to act as a stopper to lock the box. Some potential modifications I have would be to use PhotoBooth to take pictures for the algorithm to detect. By doing so, I could eliminate the use of external photos to accomplish this task.
First Milestone

For my first milestone, I got the program to detect faces to work. The program works by training itself on pictures of the person. After training itself on pictures of multiple people, it takes in test photos and determines whose face is in the picture based on the prior data. The algorithm is called Local Binary Pattern Histogram and works by looking at all the pixels in a photo and comparing them to pixels around the selected pixel. After looking at the neighboring pixels, it determines which pixels have a higher RGB value and puts this info into a table. These values are all averaged out and put into a histogram. With this histogram, the program is able to look at the histograms compiled by the test data and determine whose face is in the picture by cross referencing the histogram created from the training data. One challenge I faced was putting OpenCV and Python on the same version. I did not realize this was the error that was not allowing the program to work until I looked through numerous Stack Overflow pages and updated versions. My next step is to integrate this same program on the Raspberry Pi and utilize the camera to take pictures.
Potential Algorithms
EigenFaces
Looks at multiple images of a person and determines significant features like eyes and nose. Good for detecting faces quickly but has less efficiency under different illumination.
Local Binary Pattern Histogram
Looks at all the pixels on the face and determines how it relates to pixels around it. Efficient because illumination does not matter, which is why I chose this algorithm to use.
Fischer Faces
Uses high level math to determine features of a person that distinguish that person from other people. Is faltered by different illumination as well.
Starter Project: TV-B-Gone
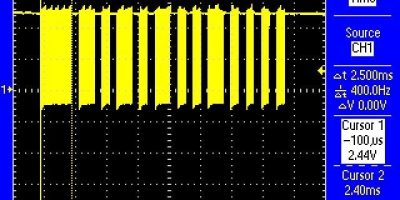
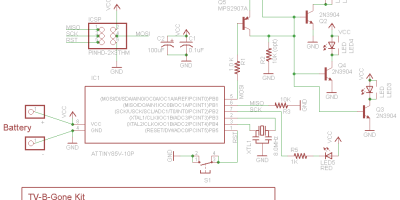
My starter project is the TV B Gone kit that turns off TVs. The way the kit works is it mirrors the infrared signals used in TV remotes and sends the command to turn off the TV to the receiver. When the switch is pressed to send the signal, battery power gets transferred through the positive wire and goes to the IC chip. The IC chip then uses an algorithm to determine the infrared sequence to turn off the TV by running through the most popular signals used in every country and sends these electrical signals to the transistors which essentially amplify the signals to turn on the infrared LEDS. One challenge I ran into was the orientation of the LEDs. The LEDs used to transmit the signals and to indicate whether the kit is working are polar, which means the orientation of the LED is crucial for the circuit to work. I found this out the hard way by soldering the LED the wrong way. I ultimately fixed it by resoldering it and changing the orientation of the LED.


