Hi, my name is Shanwen and I’m a rising sophomore at Dougherty Valley High School. For the three weeks I was here, I chose to make a mini piano as my starter project and a 3D printed LED bracelet as my main project.
Reflection
I had a great experience at Bluestamp Engineering. I have been to many engineering camps like Bluestamp, but yet Bluestamp is different and unique compared to others. First, Bluestamp has taught me a lot about independence and patience. Our instructors encouraged us to troubleshoot and find out things on our own instead of relying on educated teachers for help. Although this may be frustrating at times, it teaches us to go discover things on our own because in the future we won’t always have a mentor telling us answers. Another element that made Bluestamp unique was that they invited guess speakers to several companies to talk to us. They shared things like how they started a business, how they got into engineering, colleges they applied and got into, and much more. The speakers allowed me to build my knowledge and gain information that I could apply to my life in the future. The instructors were very pleasant to work with, which improved my experience at Bluetamp.
Intensive Project: 3D printed LED Bracelet
My main project is a 3D printed LED bracelet based off of this project by Marcus Olsson. This project consists of a 3D printed bracelet being lit up by LED’s. The electronics are basically an RGB LED strip that has a microcontroller telling it what to do, and a small battery powering the device. Overall, this was not a really hard project, but i did run into multiple problems that took weeks to figure out. After a great deal of trouble shooting with my project, I found out I was having so many problems because I was using a windows computer while Olsson used a Mac. I used the libraries that he had written with the Mac Arduino version, which could explain most of the unknown problems. I was originally planning to create my own design for the 3D printed bracelet, but I did end up just using his designs due to my shortened time at Bluestamp.
- 3D bracelet model files can be found here
- The Libraries need for the project: NeoPixel, TinyWireM, Tiny303 *These libraries only work for Apple computers*
Bill Of Materials
| Item | Vendor | Qty | Cost | Link |
| Trinket – 3.3V Logic | Adafruit | 1 | $6.95 | http://www.adafruit.com/products/1500 |
| 144 LED/M Neopixel strip | Adafruit | 1 | $59.95 | http://www.adafruit.com/products/1507 |
| Smal battery (~110 mAh) | Adafruit | 1 | $5.95 | http://www.adafruit.com/products/1570 |
| Neodymium magnets (3 mm) | SparkFun | 1 | $1.50 | https://www.sparkfun.com/products/8643 |
| FLORA Accelerometer/Compass Sensor | Adafruit | 1 | $14.95 | http://www.adafruit.com/products/1247 |
| Adafruit USB LiIon/LiPoly charger | Adafruit | 1 | $5.95 | http://www.adafruit.com/products/1304 |
Milestone #1
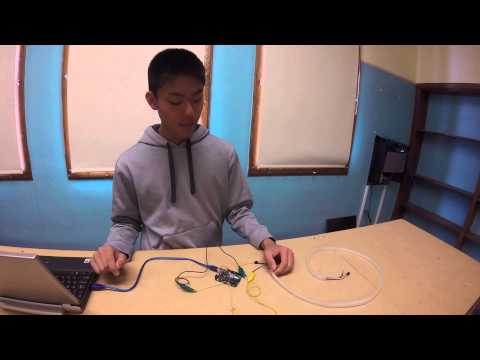

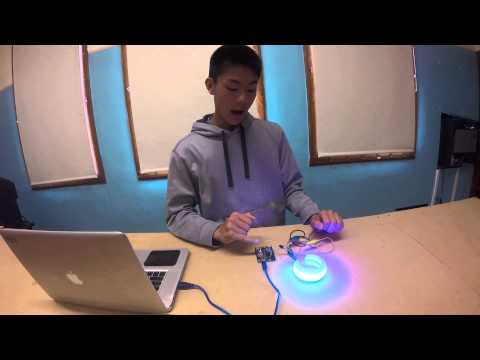
For my first milestone, I got my LED strip to light up, and I got to program it a bit. And the reason I am using an Arduino Uno instead of my Trinket is because for some reason I am having trouble uploading my code onto the Trinket , so I am just using the Uno for now. The reason I need to use the Trinket in this project is because it is much smaller and can fit in the bracelet. My LED strip is an RGB LED strip. RGB stands for red, green, and blue. To program an RGB LED, you use the three different values to change colors. For example, if you wanted to make the color purple the values would be: 180, 0, 180 since red and blue make purple. White would be: 180,180, 180 because all the colors are the same value. The program I had above is going through the color of the rainbow. Once it gets to purple, it will show white, then it will restart back at red. What I plan to do next is to include the accelerometer into my program, which would make the bracelet react to movement.
Starter Project
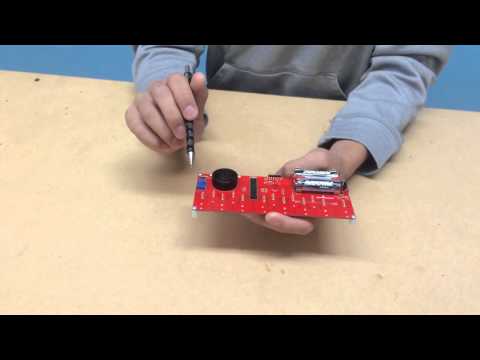
As my starter project I decided to make the mini piano. The mini piano wasn’t really that hard to put together and it works great. The piano includes parts such as capacitors, resistors, a potentiometers, LED’s, A microcontroller, a speaker, and a header. The piano uses cap sensors to sense when the keys are being pressed. Cap sensors detect the capacitance (voltage that an object carries) of your fingers to trigger the notes. A potentiometer allows you to change the resistance of the current in a circuit. In this case, it allows me to change the piano between three different octaves by turning the potentiometer’s knob. The microcontroller includes a preloaded tune that plays when you press the push button. The header allows the microcontroller to be programmed using Arduino, to play a different song.