LED Candle
My main project is an LED candle that can be blown out. I achieved this by using sensors and an Arduino.
Engineer
Marjorie M.
Area of Interest
Quantum Physics, Biology, Aerospace Engineering, Astronomy
School
Drew School
Grade
Incoming Sophomore
Reflection
Throughout the duration of Bluestamp Engineering, I learned the basics of coding in Arduino C, and wiring using the Arduino. I also learned other essential skills like soldering, and basic information and the uses of different parts used when creating circuits. With the help of instructors, I was able to work through difficult problems and learn new things about engineering in general.
Final Milestone
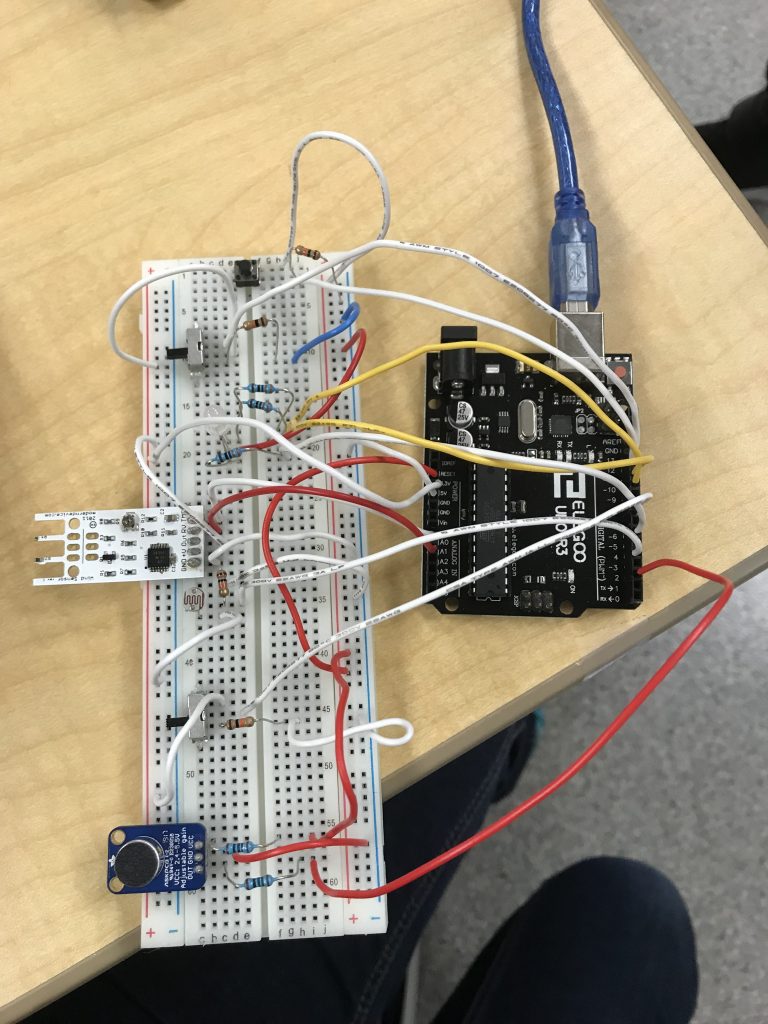
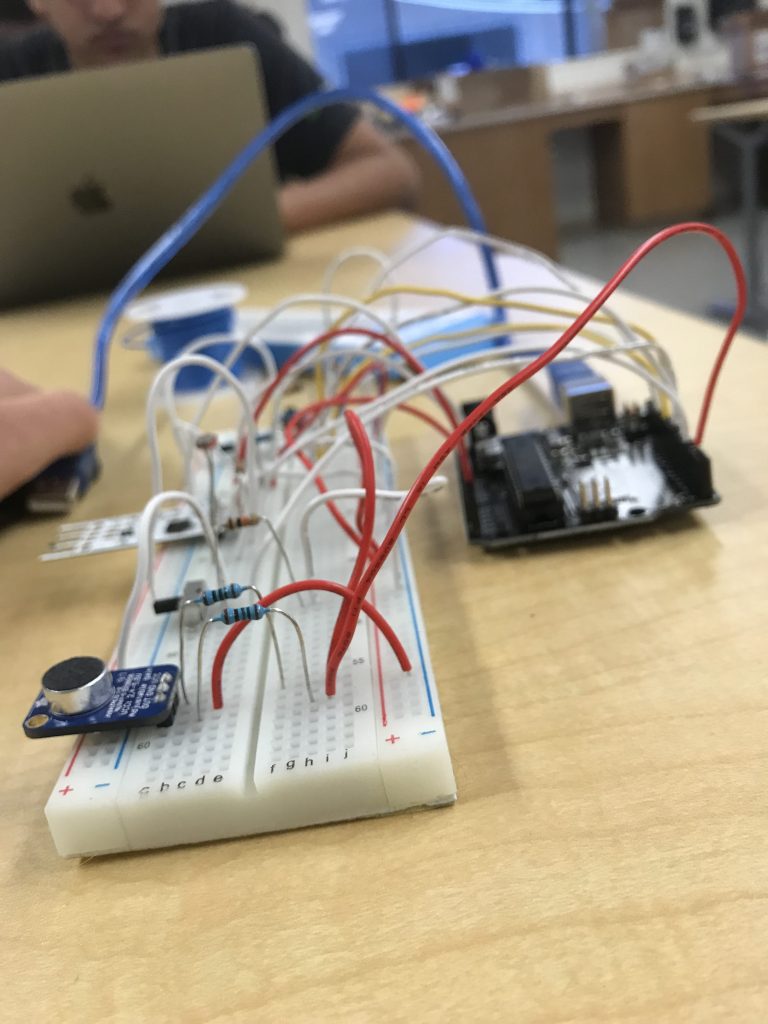
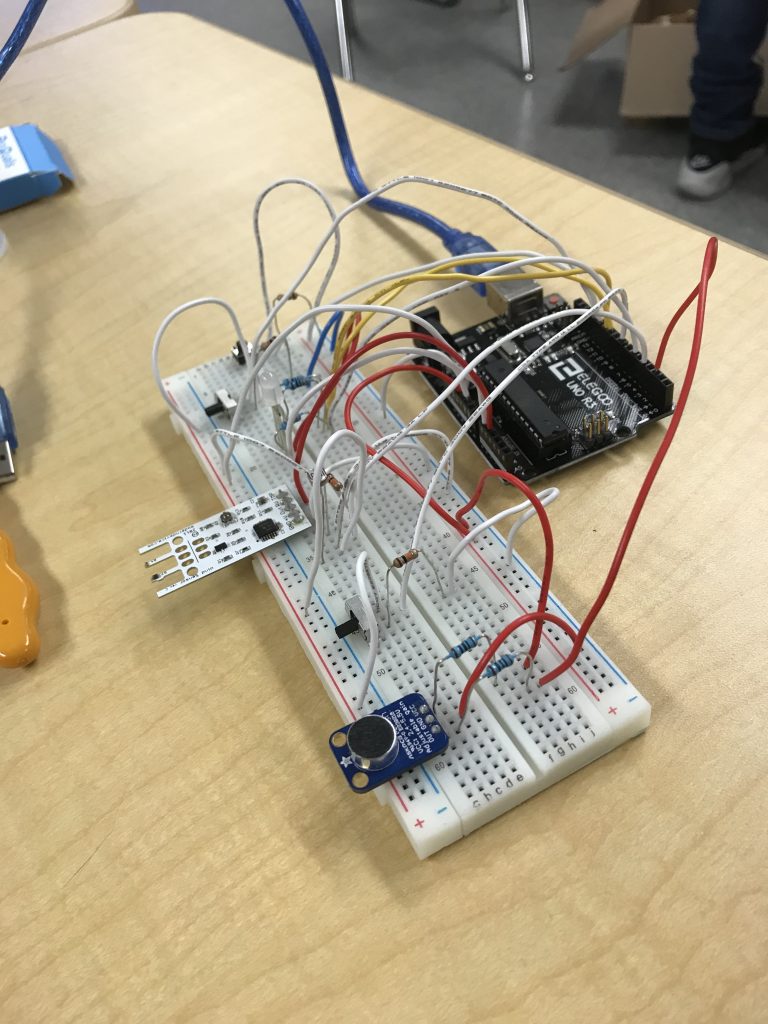
For my final milestone, I added a photoresistor and two toggle switches, and soldered everything onto a PCB board. Transferring everything onto the PCB board was difficult because I had to be careful to get the circuits soldered on correctly, and I had to figure out a good layout for my wiring. This meant that I worked a bit slower than I thought I would. The photoresistor can detect light and when it is dark enough it will trigger the Arduino to turn off the LED. One of the switches is used to turn this feature off or on. I added this because I wanted to be able to control whether the darkness could have an effect on the LED’s state. From this project, I gained basic coding skills in Arduino C, which is the coding language that the Arduino reads. I also learned basic wiring skills and I was able to practice and improve my soldering skills. Some things that I could do to add to my project would be to create an outer shell to make it look more like an LED candle and to add a feature that allows me to change the color of the LED. The code I wrote for this project, my bill of materials, and my build plan can be found on the bottom of this page.
Second Milestone
For my second milestone, I added a microphone in order to add a “clap on” feature to my candle. I also changed the code for my candle in order to accommodate this feature and add other features to give my candle a bit more polish. I incorporated code that makes the LED flicker so that it looks more realistic. I also made it so that the LED dims and flickers if the user doesn’t blow hard enough on the wind detector. When I blow on the hot-wire wind detector hard enough, it detects wind speed which triggers the Arduino to turn off the led as long as the speed is above a certain threshold. If the wind speed falls between a certain range beneath this threshold, it will dim and flicker slightly. Pressing the button and making noise serve the same purpose which is to reset the candle by turning it back on. The code for these two components of my candle is virtually the same, with only minor changes. The mic detects sound and, if the noise level is high enough, it will make the LED to come on. The candle will also passively flicker without being triggered to do so which requires code that is more complex than I originally thought I needed timing-wise. I also utilized the “random” function any time I wanted my candle to flicker to make it feel more realistic. A challenge was getting the flicker to work correctly and to happen the correct time. Because of this challenge, I learned how to run two “if” statements in a way that makes them seem to be running simultaneously (even though they actually aren’t). Another challenge I faced was getting the mic to work properly. The mic was not sensitive enough, but luckily it came with a potentiometer built in. This made easier to adjust the sensitivity of the microphone. For my third milestone, I hope to add different settings in order to incorporate more colors of the RGB led, I also hope to add a photoresistor so that it can automatically turn on in the dark. Some additional changes I could make will be to create an outer shell for my candle and put everything onto a PCB board.
First Milestone
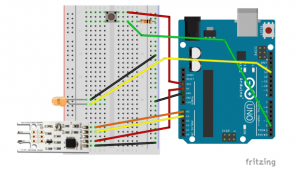
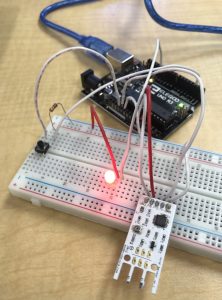
My main project is an LED candle that you can blow out. This project uses a hotwire wind detector to sense when someone blows on the “candle.” The Rev C. wind detector heats up a component to a certain temperature; it then measures how much power it takes in order to keep the temperature of the component the same as the wind cools it off. This can be used to determine wind speed. The button is used to turn the LED on again after blowing it out. My first milestone was to complete the wiring and code for my project and have it work successfully. Although an example code for this project was provided, I decided to code this project myself. I wanted to do this because this is my first time using an Arduino, and I thought it would be a great way to learn some basic coding for the Arduino and get used to the coding interface. I used online resources and the example code to figure out what I needed to do. I wired everything based on a diagram and instructions that I found online. My next milestone is to add modifications to this design. I plan to test an alternative to the wind detector by using a microphone instead (or in conjunction with) the wind sensor to pick up noise instead of wind speed. I will also try to add extra code to make the candle “flicker” so it looks more realistic, and use an RGB LED. To start I will rewire the setup to work for an RGB LED. Next, I will add the mic and create new code for this. I will then modify and expand the code to account for different events depending on wind speed or sound, this will be dependant on the sensor I use. I would also like to modify my code by adding the calibration code from the internet and using this to calibrate my wind sensor for more accurate detection of wind speeds. This code needs troubleshooting because several errors are displayed when I attempt to use it. My last milestone is to create a casing for the “candle.”
Starter Project
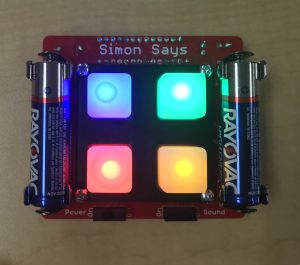
For my starter project, I made a Simon Says game. The “Simon Says” game is a memory game with a pattern of blinking lights. The pattern gets longer every time you get it correct. There is also a buzzer providing sound effects. When you input the wrong pattern, the buzzer goes off and the game ends. Batteries power the “Simon Says”, and the two switches control which circuits are open and which ones are closed. They basically control where the electric current from the batteries go. When the switch is turned on, the current goes to the capacitors. The capacitors protect the microcontroller from fluctuations and “noise” in the current, which could damage it. The capacitors are not polar which means that orientation doesn’t matter when you insert it into the PCB board. Adversely, a polar element needs the current to run through the element in a certain direction, so orientation does matter. The microcontroller is programmed to control which LEDs are on and off, and trigger the buzzer (as long as the corresponding switch is tripped). The piezoelectric buzzer is polar. The buzzer works by moving pulses of current through a crystal or ceramic element that deforms back and forth at the same rate as the pulses of current. This causes a metal plate to vibrate, creating sound. The LEDs are light emitting diodes; because they are diodes they are polar. The microcontroller can detect when the buttons are pressed and use that information to either continue the sequence or end the game. The resistor resists the electric current which is used, in this case, to keep the microcontroller from resetting. It was my first time soldering, so it was a good learning experience for me. This meant that it was a little difficult to start at first. Understanding how everything worked was also a challenge because for some parts of this project are very versatile and so it took more digging online to be able to understand the purpose specifically for this project. I also came into this project not knowing very much about the parts used in it which meant that I had to research almost every part and understand how it works within the project which took some time.
Build Plan:
https://docs.google.com/document/d/1Psn-ziPn3BlAqpo7ulf2QLsI8lFbXVCganJvjRp7IBw/edit
Bill of Materials:
https://docs.google.com/spreadsheets/d/1tQYyyDgzMBeFFL_vuiuYWSeSf8o1cIucbHEI-Vje1EM/edit#gid=0