Remote-Controlled Mini Tank
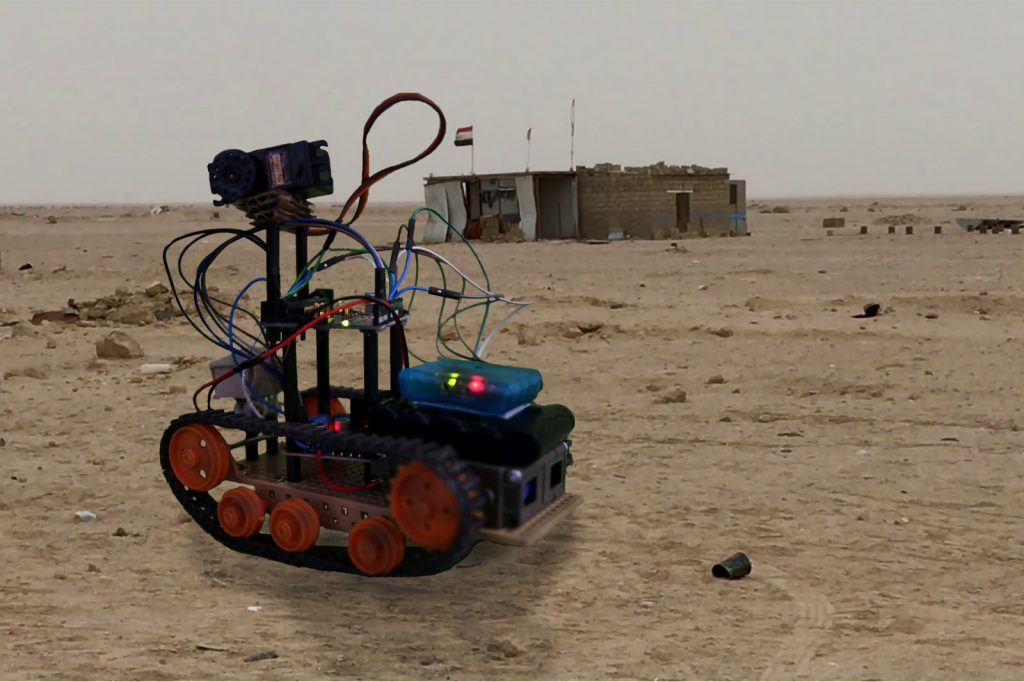
My project is a remote controlled mini robot tank. A Playstation 2 controller is used to control the movement of the tank, which can move in all four directions. The tank is powered by a 6v battery pack, and this power is split between the motor driver (controls the motors) and the Arduino (general control of tank and stores programmed information).
Engineer
Luke C
Area of Interest
Mechanical Engineering, Entrepreneurship
School
Marin Academy
Grade
Incoming Senior
How It Works
When a button is pressed on the controller, a wireless signal is sent to the receiver on the tank. That signal is then carried via wires to the Arduino, which stores the code I wrote. The Arduino acts as the ‘brain’ of the robot, because it tells the motor shield, which is located just beneath the Arduino, how to spin the motors (forward, backward, different speeds, etc.). The signal is then sent to the motor shield, then to the motors, which spin the gearbox and finally make the wheels spin.
Final Milestone
My third and final milestone is a fully functional, wireless robot tank. I finalized the wiring of the tank so that both motors worked equally well.
The main problem I encountered was that the two motors spun at different speeds. I programmed one motor spin slower in order to compensate for the other, but this still did not work. I ended up taking apart the tank to replace the motor, which turned out to be faulty.
Second Milestone
My second milestone is a tank that responds to the wireless controller. I set up most of the wiring so that the Playstation 2 controller connects successfully with the receiver and can make the left motor spin.
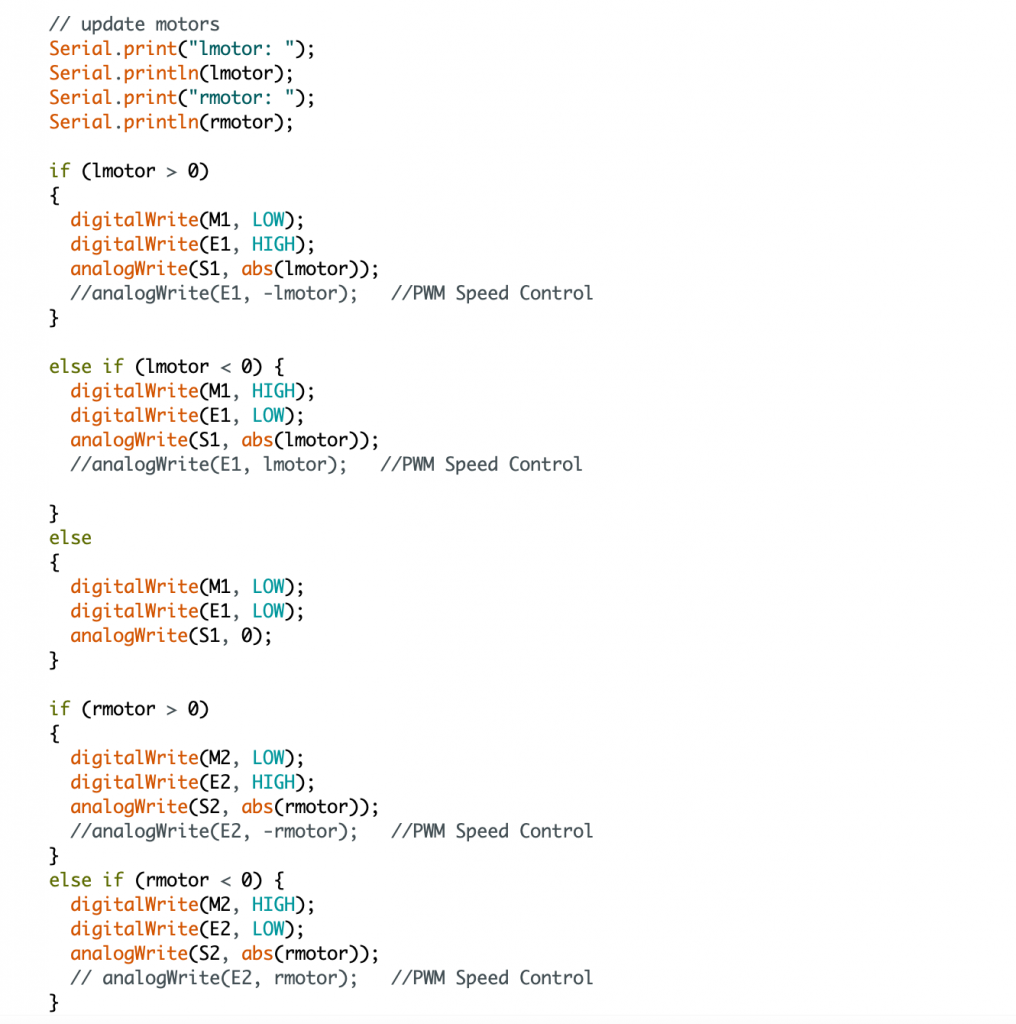
I found some code on the internet about how to control an Arduino with a PS2 controller, but since the motor shields were two different brands, they did not operate in the same way. Therefore, I had to change my code, turning the two outside pins on the motor shield (which control the PWM) into analog pins instead of digital pins. This gave me the power to make it so that the motors would only rotate when the I pressed the button on the controller, instead of just whenever the tank is powered on.
Although the motors did not work at first, I discovered that I was missing a common ground between the Arduino and motor shield, which is vital.
First Milestone
My first milestone is a fully put-together chassis, including the Tamiya baseplate, treads, wheels, and gearbox. I also figured out the wiring for the Playstation 2 controller receiver. The placement of the jumper cables is extremely specific, since each pin on the receiver has a different function.
Starter Project
My starter project was a Useless Machine, which turns itself off as soon as it is turned on with a switch. The way it works is that a rotating motor spins the claw upwards when the switch turns on the machine. Once the claw hits the switch, it reverses the direction of the motor. Another hidden switch under the top of the machine is hit on the claw’s way down, which turns the machine back off.
I chose this project, because I thought it would be a nice warmup to electrical engineering.
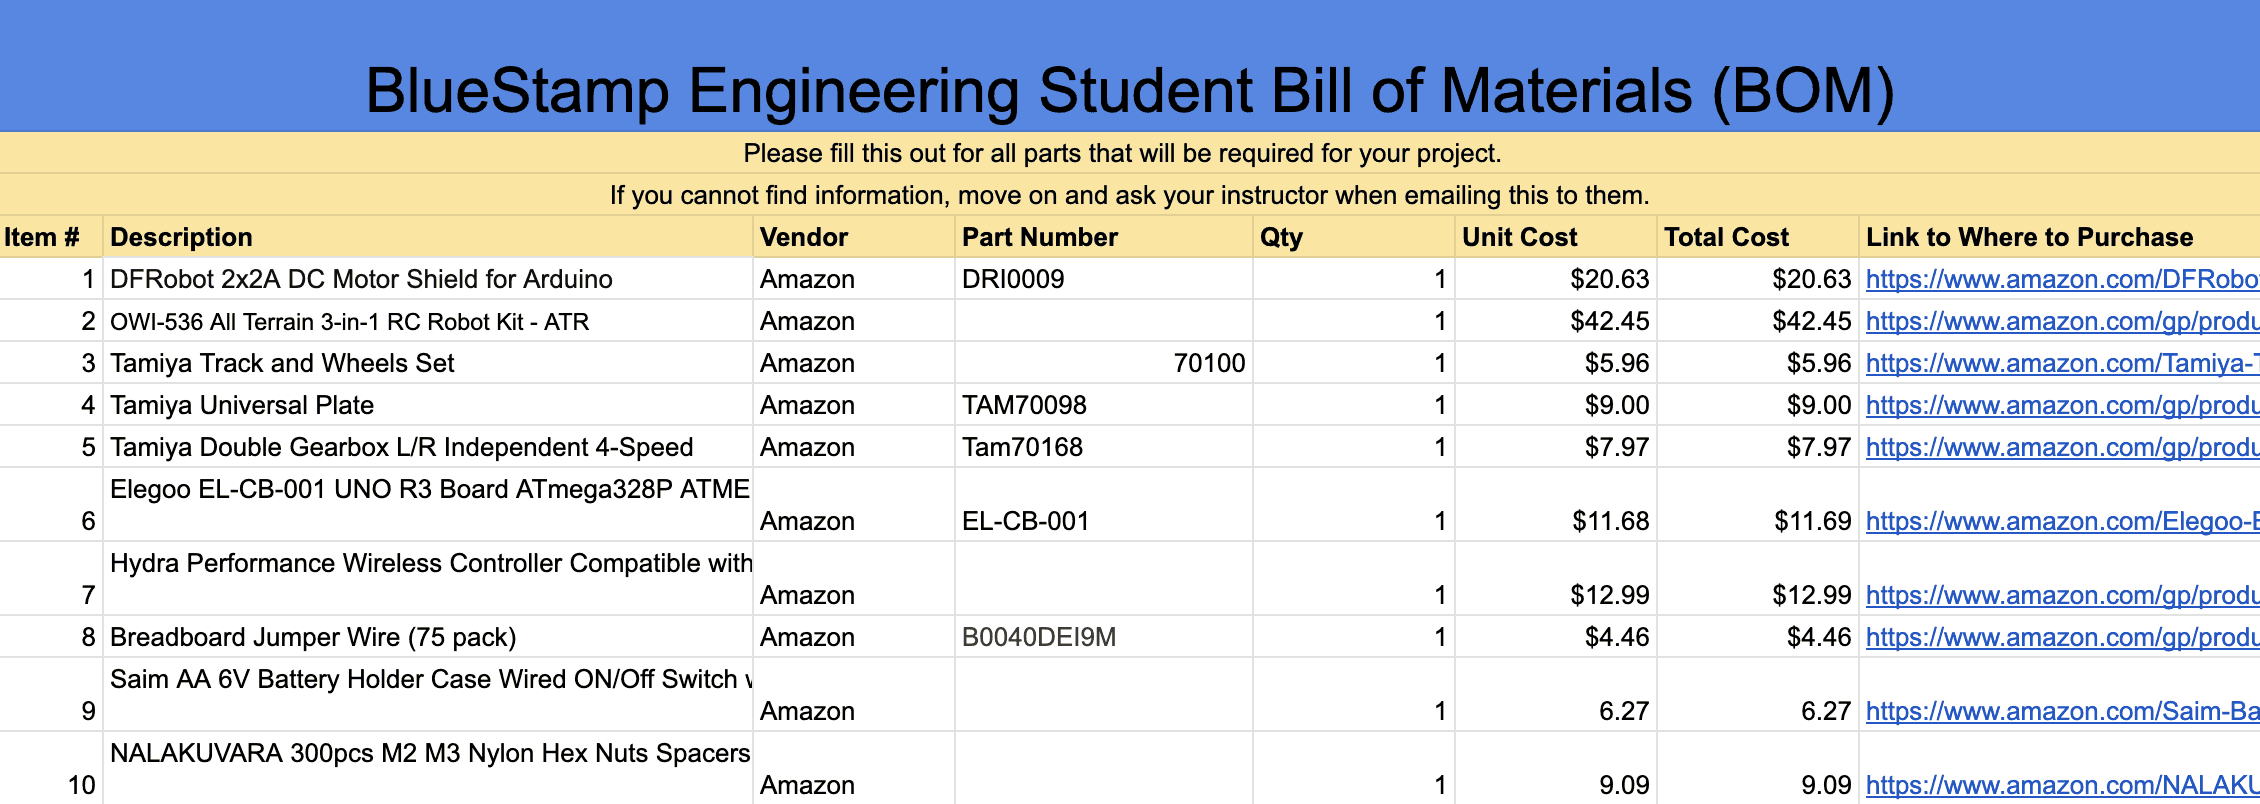
Bill of Materials
Tank In Action!