
Prologue:
Hey guys, my name is Kevin and I am an upcoming senior at Lowell High School! For my starter project I did the MK171 Voice Changer and as my main project I made an owncloud storage system. These projects were both challenging in their own ways so I hope you enjoy!

________________________________________________________________
Intro to my main project: Cloud Backup Server
The cloud backup server basically serves as a replica of the dropbox system, it allows users to store data into the hard drive. However, unlike dropbox the user has complete control over how the server is run, the security settings, and how where there files are being stored. To create the backup system I had to use a Raspberry Pi, which serves as the hard drive, a HUB, which serves as usb ports, and a 1 terabyte external hard drive for storage. If I ever encounter any problems there are many online resources which are available to help you out.
Bill of Materials
|
Part Name |
Quantity |
Price for 1 |
Vendor |
Link |
|
Raspberry Pi Model B Starter Kit |
One |
$63.31 |
MCM Electronics |
|
|
Portable 1 Terabyte External Hard Drive Storage |
One |
$74.99 |
Amazon |
http://www.amazon.com/Passport-500GB-PortableExternal-Storage/dp/B006Y5UV4U/ref=sr_1_14?s=pc&ie |
|
USB Port HUB |
One |
$29.99 |
Amazon |


_______________________________________________________________
Epilogue: Main Project
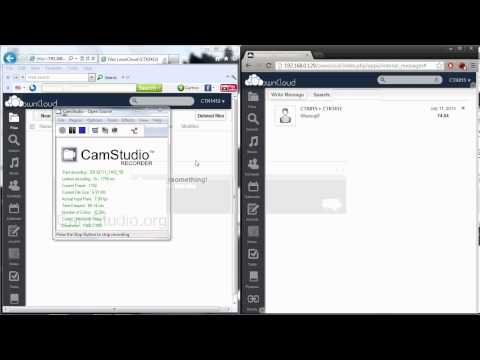
So I have completed my first main project, the Cloud Backup Storage System. Using owncloud it creates a server that is more reliable than most other cloud services available as well as being able to save yourself a lot of money. My setup was extremely simple, all I had to use was a raspberry pi, a HUB, and a 1 terabyte external hard drive. First I created the server by downloading apache, php, and the owncloud software. Afterwards everything was straight forward, through trial and error I was able to download and install working 3rd party apps that would improve the user interface. Now all a user has to do now is to click the upload or new button and they would be able to store things inside my cloud system. My owncloud storage system was complete after that. However, along the way I encountered a few problems that I had to find a solution to, for example while setting up my owncloud website I did not set the data directory to my desired location. To resolve this issue I had to go into my config file and manually change the data directory. Another issue I encountered was while installing apps into my owncloud folder. Some 3rd party apps would cause my server to continuously crash and so I had to painstakingly try one app after another to test whether they would crash my server. The problem did not lie within any of my settings but that most apps have not been tested for all of the existing bugs. The last major problem I experienced was while uploading files onto my cloud. I realized the problem was that owncloud could only read files that had been configured a certain way. It was easily fixed by using software online that would convert files to whichever one I wanted. This concludes my first main project, the owncloud storage, and personally I would recommend others to implement it into their work not only because of the cost benefits but also how you now have control over the server that hosts your files.
Video demonstration of my project
________________________________________________________________
Chapter 3: Main Project-Cloud Backup Server Milestone 2
So after I completed my owncloud I had to change the data directory to my external hard drive. I did this by first going into /var/www/owncloud/config/config.php file as root. Then I looked for the ‘datadirectory’ => and changed it from the default ‘/var/www/owncloud/data’ to my external drive, ‘/media/Disk1’. Doing this changed my storage location from my raspberry pi to my external hard drive. Afterwards I had to enable app download, so again i entered more code into my configuration file, the three main thing that had to be added was ‘appstoreenabled’ => true which enabled the owncloud appstore, ‘appstoreurl’ => ‘http://api.apps.owncloud.com/v1’ which gave the link where I would download the apps, and ‘appcodechecker’ => false which made sure not to block 3rd party apps. (All the code for my config.php file will be provided below) Then I began downloading apps, to do so I first had to download the zip file then extract them into the app folder in /var/www/owncloud/app as a root user. This made them appear in my owncloud app page, however, one problem I encountered while installing apps was that some of the apps had bugs and when installed into my app folder would not let my website to load and so I would have to remove them. After downloading and installing the apps I would have to enable them. This introduced many new kinds of functions onto my owncloud server such as the theme changer, video streaming, image viewing, and shortys which are like bookmarks. Afterwards I started uploading my files and by doing so I encountered another issue. The problem was that some files were configured incorrectly to how owncloud preferred it and therefore couldn’t be read in owncloud. To fix this problem I re-configured the file or converted the file using software found online. This sums up all that I have achieved these past few days.
My config.php code-

My Raspberry Pi Apache2 Code-
Video demonstration of my project
________________________________________________________________
Chapter 2: Main Project – Cloud Backup Server Milestone 1
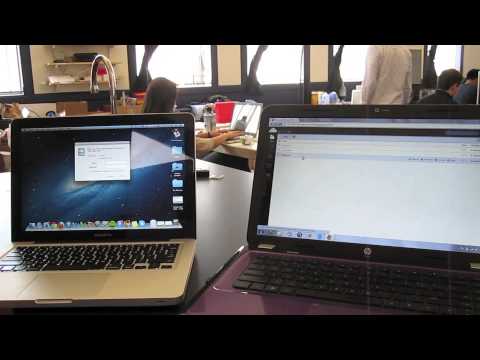
For the past week I have been working on my main project, the cloud backup system, and finally today I have completed it. So first off using the an article from instructables, http://www.instructables.com/id/Raspberry-Pi-Owncloud-dropbox-clone/?ALLSTEPS , I installed PHP and apache onto my raspberry pi and configured them to the right settings. Afterwards I downloaded owncloud using $ sudo apt-get install owncloud and using my ethernets IP address i typed it in, <IP ADDRESS>/ owncloud, to access and to set up my account. During this process I encountered an error in the instructables, in step three the command ,$ sudo nano /etc/apache2/sites-enabled /000-default, should actually be , $ sudo nano /etc/apache2/sites-available/default. It took me awhile to find that a lot of your configuration settings were accessed through your apps menu and so then I was able to enable settings like allowing external storage. Then I had to configure the locales to en_US.UTF-8 by running dpkg-reconfigure locales. Finally after getting my server setup I downloaded the owncloud client from http://owncloud.org/sync-clients/ onto a separate computer. With Windows I found that using either map network drive or the sync client would allow you to connect to the server. On Mac you can use the connect to server option to connect to my server. Then through my administrative account i created a text file saved it and after a minute or so it appeared on the other computer.
Other sources I found useful to build my cloud system.:
-
http://askubuntu.com/questions/99651/apt-get-warning-no-support-for-locale-en-us-utf8
-
http://www.engadget.com/2012/09/04/raspberry-pi-getting-started-guide-how-to/
-
http://www.glump.net/howto/web/building-a-home-file-server-with-owncloud-and-subsonic
Video demonstration of my project
________________________________________________________________
Chapter 1: Starter Project-Voice Changer
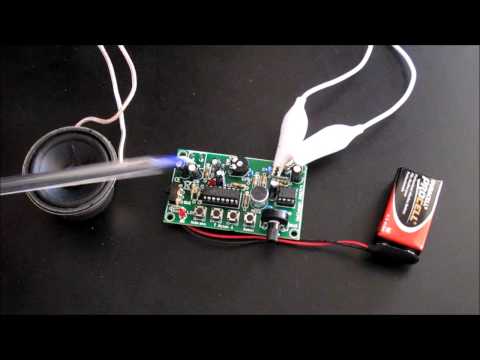
So today I completed my starter project, the voice changer. Through learning how the entire circuit board works I learned many components to electronics. The voice changer begins working as soon as soon as the power switches on and voltage is running through. The LED ensures that it is functioning and that the voltage can only travel one direction and the zener diode keeps a consistent voltage at the reverse biased breakdown point. As you speak into the mike signals are transmitted and depending on which button you have pushed, it will complete a circuit which will change the frequency of your voice. Then as the signal travels through the circuit board the trimmer (volume setting) will allow you to raise or lower the resistance to increase or decrease the sound of your morphed voice. Then the signal travels into the speaker and then you can hear your voice.
Video demonstration of my project.
To build one for yourself, click the link below.
http://www.apogeekits.com/voice_changer.htm