
I’m Kegan from San Francisco and I graduated from Lowell High School in May. I will be attending UC Berkeley in the fall.
My starter project is the miniPOV. I chose this project because it seemed challenging and would give me a good introduction to electronics and coding. Since it is programmable, I would also be able to use it in the future as a toy to impress others.
My main project is the Self-Balancing robot (called the ArduRoller). I wanted to do a robotics project since it offered a broad range of engineering experiences (both electrical and mechanical). The project was also a challenge since there was limited documentation, and I would have rather tackled a challenge than an easy project I could have done myself.
Main project: Self-balancing robot

Schematic: ArduRoller_Schematic (pdf)
Code: https://github.com/kegankawamura/BSE_ArduRoller (original code at https://github.com/fasaxc/ArduRoller)
Mechanical Drawing (link to file: http://www.ponoko.com/design-your-own/products/chassis-6210)

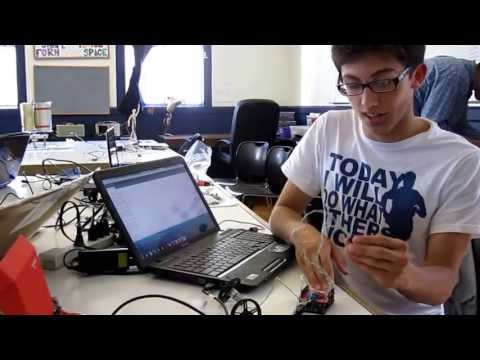
Completed Project: Final Video
The Self-Balancing Robot has three main components that allow it to balance.
1. The Arduino 2. The IMU 3. The PID controller
The Arduino acts as the brain of the robot. It hold the code and allows the motors to communicate with the IMU. All electronic components connect to this prototyping board. The IMU (inertial measurement unit) is a chip composed of a gyroscope and accelerometer. Together, they create an effective device that can measure its orientation. Using this chip, I am able to measure the tilt of the robot. Finally, the PID controller is a feedback mechanism used in the code to stabilize the robot’s tilt. Essentially, it sets a certain, desired value for a certain variable and measures the difference between that value and the current value (aka the error in the current value). Using that difference, it manipulates a controllable variable to try to achieve that desired value. In this case, the IMU measured the error in the tilt of the robot and the PID controller within the Arduino affected the speed and direction of the motors to try to correct that error.
Second Milestone: Using orientation to move the motors
A key part of the project is to establish a relationship between the data sent out of the IMU and the movement of the motors. The motors will move according to the orientation of the robot (via IMU), so to understand how they work together is very important. I used a function in the IMU library to obtain the angle of the board, and according to that angle I wrote some code that will either move the wheels forward or move them backwards. It is sort of an indirect communication since it has to go through the Arduino, but it still worked. This code, which was nothing more than a test to understand how the code worked and if the board and motors will actually work together, proved to actually be very useful as a foundation for more complicated movements (such as the code used for balancing) and tests to make sure that neither the IMU or motors were damaged when the code didn’t work.
First Milestone: Translating data into IMU orientation
One of the essential components of the balancing robots is the IMU (inertial measurement unit), which consists of an accelerometer and a gyroscope. The accelerometer measures orientation by measuring the direction of the force of gravity, and the gyroscope helps measure rotation. Together, they create a useful device that makes accurate measurements.
The IMU I used requires a library to work (or else the code will be very difficult). Along with this library, there is a sample code that can be used to represent the orientation of the board with a 3D box on a computer screen. I was able to hook the IMU up to the Arduino I am using to create a representation of the board on the computer. One problem is that there is a slight drift in the Yaw (z-axis rotation), but it should not be a huge problem for my project.
Starter Project: Mini POV (persistence of vision)
A POV is a device that uses afterimages of light to create the illusion that there is an image or a word hanging in midair. The miniPOV3 is a simple version of that. The battery connects to eight LEDs, each connected to identical resistors, and a master microcontroller that controls when the LED turns on or off. The microcontroller can be programmed by connecting the serial port on the mini POV to a computer. The code is online, and customization is fairly simple. To customize images/words, one simply needs to add lines of 0s and 1s (0 means the LED is off; 1 means the LED is on) to create an image (an easy way to check what the POV would show is to look at the lines of code sideways and highlight all the 1s). To use the POV, simply turn it on and shake it back and forth quickly to observe the image.
One of the most notable improvements made in the miniPOV3 is the use of a serial port instead of a parallel port. The serial port is a lot more common than a parallel port, making use easier than before. The problem with serial port, however, is that it sends signals at about 10V, compared to the parallel ports 0-5V. To correct the voltage, three 5.1V zener diodes were used to drop the voltage to about 5V. This allows the serial port to be compatible with the microcontroller.
Summary of Experience
I do not regret my time in high school, but reflecting back on it there are many things that I wish I could have accomplished. I am (or was) not the type to actively do my own projects or seek knowledge outside of school work or extracurricular activities, and watching others do that in science competitions or student clubs makes me wish that I had been more productive with my time. I have a passion for science, and, if anything, that was what I actively pursued. Although I was very good with the schoolwork, I had very little experience in applying that knowledge. Strangely enough, applied science was something that I wanted to pursue as a major in college. This led me to engineering, but with my lack of experience and knowledge of the subject I honestly did not know what engineers could do.
I signed up for the BlueStamp program for many reasons, but the two that drove me most were to learn more about engineering and to accomplish something that I wish I could have done while in high school. I think my experience in BlueStamp has accomplished both of these goals, but it has also given me the confidence to pursue my own engineering projects in the future, without help from instructors. I would say that having the proper guidance and opportunities to ask questions gave me an initial “push” to venture towards new projects. I’m sure many people could learn the same things over the internet or by asking around, but I’m sure it would have taken them more than six weeks to get to the level we were able to achieve. In addition, I was able to meet a variety of entrepreneurs and engineers through the talks they gave us. Being in this environment has given me a good image of what the engineering world is like; an image that I did not have beforehand. The program not only helped me make a robot, but it also became my introduction to a whole new world.