Water Gun Intruder Detector
A new and improved security system. Using a fun toy to create the unexpected; a water gun that fires from a motion detector, takes a photo of victim, and then tweets it to the world! It can be hidden in bushes or left out in the open. It’ll catch the smallest critters to the baddest burglars.
Engineer
Kasvi S.
Area of Interest
Robotics, Programming, Mechanical Engineer
School
Design Tech High School
Grade
Incoming Freshman
Demo Night
Reflection
BlueStamp was a very eye opening experience. I got to have first hand experience of the different aspects of engineering. The challenges I faced made me experience the work of a true engineer. And how things will never go your way . Even when you have tried every single thing possible. You need to keep on going because there is always a way to fix your problems. At the end the final product is amazing, as it really shows all the hard work you put into it. At BlueStamp I was able to get a taste of mechanical, software and electrical engineering. I entered a new world of Arduino. I have never even heard or used Arduino before and now I am able to code using Arduino’s IDE. I learned the endless possibility there is what you could do with an Arduino. I gained further knowledge about about Bluetooth modules, motion sensor, transistors, resistors, capacitors. All these real components used in out in the world. In addition, I learned about different fields of engineering by all the wonderful guest speakers. I gained self confidence in myself to push through the problems and keep on trying even when it you have been working for days and there is no progress. I learned to try to solve problems myself and ask thoughtful question to my peers and mentors to decipher the problem. I gained lots of research skills. Overall, BlueStamp gave me this one of a kind experience. I know I won’t stop engineering and I hope to pursue it as a career in the future.
Final Milestone


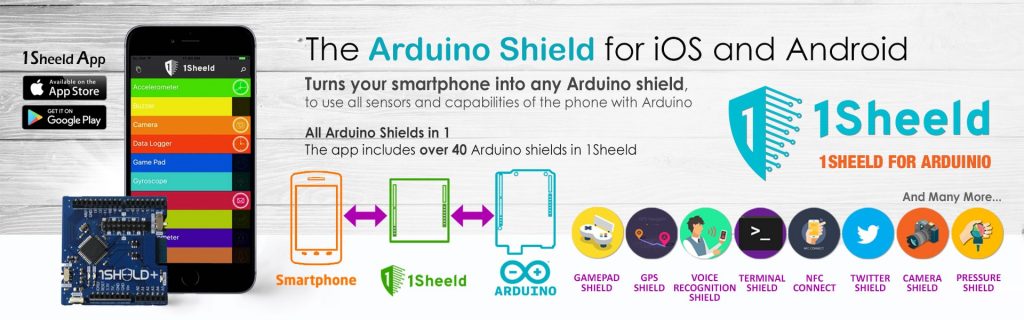
What is a 1sheeld?
1sheeld is configured shield for the Arduino. It is connected to a mobile app that allow the usage of all of Android smartphones’ capabilities such as buzzer, clock,WiFi, GPS, camera and so much more. It turns the smartphone into an open platform.
*Note: this project uses 2 Arduinos. The Arduino that has 1sheeld connected needs to have the code below uploaded. While the other Arduino needs to have the code from 3rd milestone. *
Link to Code (this code should be uploaded to the Arduino that has the 1sheeld connected):
Link to Learn about 1sheeld:
https://www.hackster.io/Burger/motion-activated-security-cam-e21c5e
Third Milestone

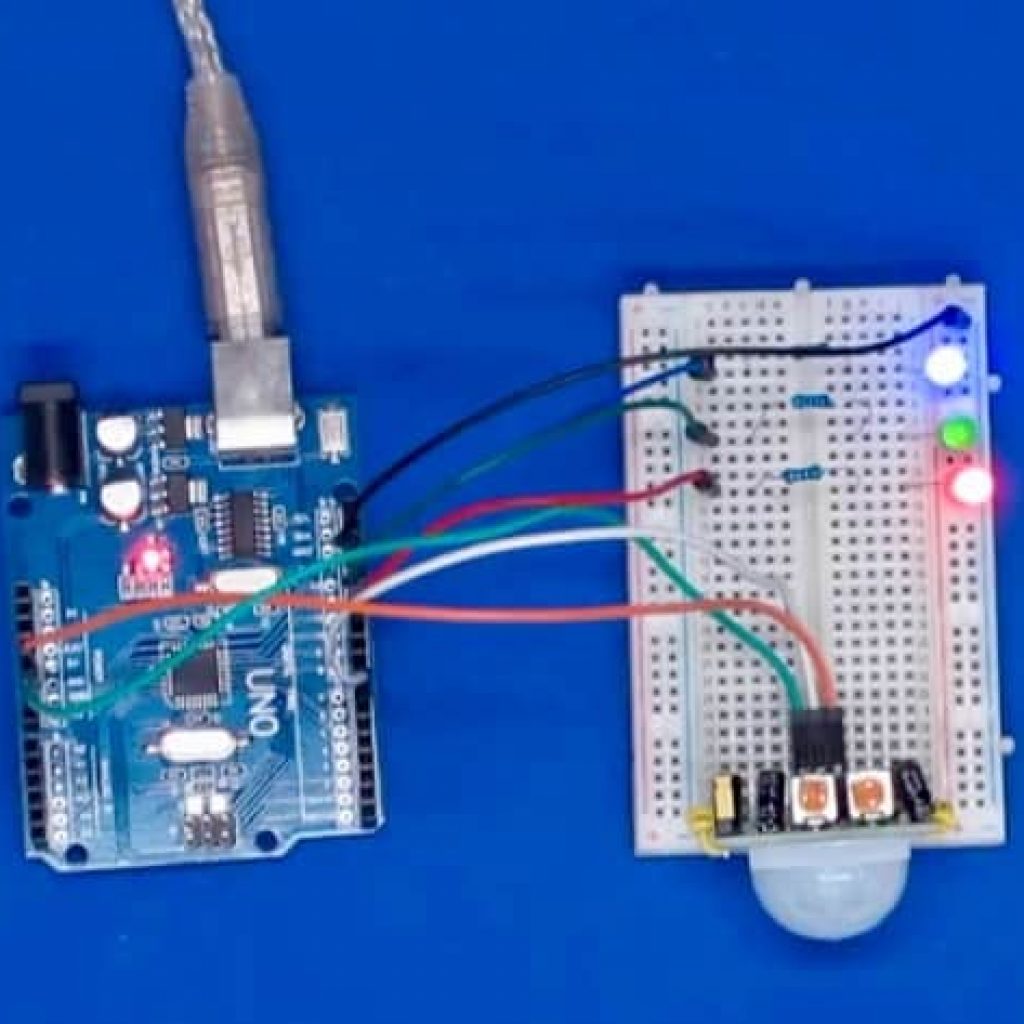
My 3rd milestone was getting the water gun to communicate with the motion sensor so when motion is detected the water gun fires. The components I used are USB cable, Arduino UNO board, jumper wires, PIR motion sensor, water gun with motorized pump, MOSFET transistor, breadboard. The MOSFET acts like to switch so when voltage is applied to the Gate (pin 1) of the MOSFET then the Drain (pin 2) and Source (pin 3) connect to form a circuit and then the motor in the pump will run. The voltage is supplied to the Gate when motion is detected by the PIR sensor. During this milestone I faced a lot of challenges. Like getting the water gun to work with the PIR sensor. At first I was able to control the gun with the Arduino UNO board itself but not with the PIR sensor. It took me a while but I finally able to find a code that work. Mostly I played around with the Arduino board and the motion sensor to see what works and what didn’t. But during this milestone I learned a lot like I learned how a transistor works and the way it acts like a switch. To continue, I grew a deeper understanding of how a motion sensor works with an Arduino board. Also, I was able to determine which pins are output and input. In addition, I learned how to write code for a motion sensor like when value is equal to high then digital write… For my next milestone I plan to add a camera so when a person walks by it not only shoots the person but also take a picture of them then it posts it on twitter.


What is a MOSFET?
MOSFET is a type of transistor. A transistor acts as a switch or amplifier. I used the switch functionality. It works like a switch because a small current source, when applied to the transistor, allows the larger current source to flow. The difference between the MOSFET and other transistors is MOSFET is a voltage controlled switch; in other words when voltage is applied it causes the MOSFET to turn on and function as a switch.

Link to Code:
Link to Learn about MOSFET:
https://www.elprocus.com/mosfet-as-a-switch-circuit-diagram-free-circuits/
Second Milestone

My second milestone was getting the HC-05 Bluetooth milestone communicating with the Arduino Uno board. The components I used are LED, 220 ohm resistor, jumper wires, Arduino Uno board, USB cable, portable charger, and HC-05. The software necessary in this milestone is Arduino IDE. I utilized an app called LED controller which controls the LED turning on and off. When I use the app to tell the LED to turn on, HC-05 sends a signal to the board which then send a signal to the LED. HC-05 module is a Bluetooth Serial Port Protocol module, designed for transparent wireless serial connection setup. Bluetooth is a wireless technology that exchanges data over short distances. During this milestone I encountered numerous challenges like getting the app to download and the code to upload on to the board. I tried using different Arduino Uno Boards but I kept having the same error. I did some research and found out that when uploading code to an Arduino bard which is connected to a Bluetooth module, code will not upload because the HC-05 has only one hardware serial. Also, I learned that the app I was trying to download could only download on an Android operating system. Initially, my second milestone was getting the gun to work with the motion sensor but my pump in the gun broke so I had to wait for a new gun to come in. Instead of waiting for the new gun I decided to learn how the HC-05 works and that became my second milestone; HC-05 work with the Arduino Uno. Throughout this milestone, I learned how the HC-05 Bluetooth module works.


What is HC-05 Bluetooth Module?
HC-05 module is a Bluetooth Serial Port Protocol module, designed for transparent wireless serial connection setup. Bluetooth is a wireless technology that exchanges data over short distances.

Link to my Code:
Link to learn more about HC-05:
https://maker.pro/arduino/tutorial/bluetooth-basics-how-to-control-led-using-smartphone-arduino
First Milestone
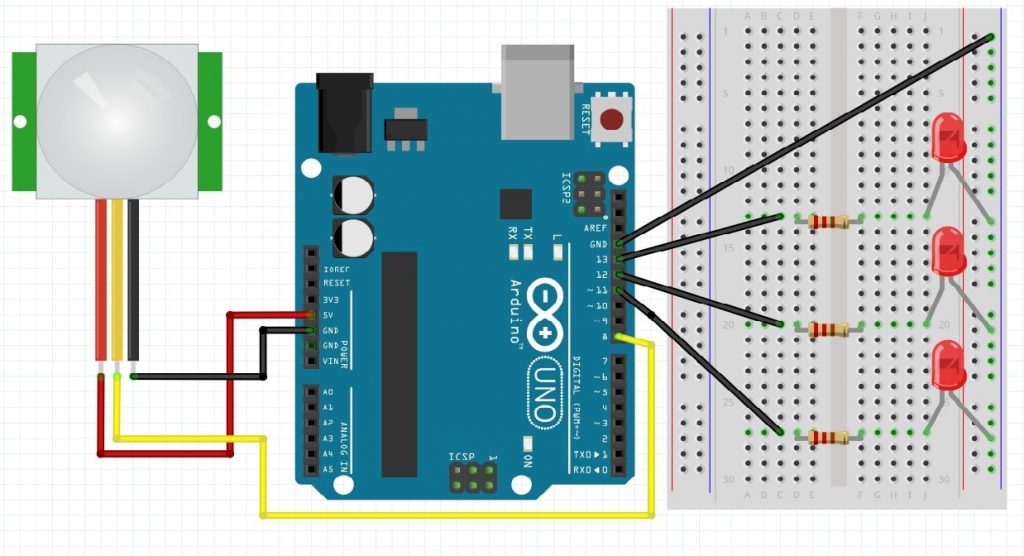
My first milestone was getting the PIR sensor to communicate with the microcontroller. The components necessary for this milestone are Arduino board, jumper wires, USB wire, PIR sensor, LEDs, 330 ohm resistors, and breadboard circuit. In addition, the software I used is Arduino IDE. A passive infrared sensor (PIR sensor) is an electronic sensor that measures infrared (IR) light radiating from objects in its field of view. Motion can be detected by the change of infrared light in the surroundings. The way my first milestone works is when the red LED is lit that means wait or in another words the PIR sensor is getting ready, then when the green LED lights up that mean the PIR sensor is ready and finally when motion is detected the blue LED lights up. The code uploaded on my microcontroller sends a signal to the PIR sensor and jumper wires which then send a signal to the resistors and in the end to the LEDs creating a functioning circuit. During this milestone I did encounter many challenges like initially I was using a Huzzah Feather it became very hard to get the Feather to communicate with the PIR sensor after many days of working with the feather I decide to switch to the Arduino Board. In addition another challenge I encountered is uploading the code and for a few days without realizing I was using a broken PIR sensor. Throughout this milestone I learned about Arduino IDE, Huzzah Feather, PIR sensor, Arduino Board. For my next milestone I plan to have the water gun working with the PIR sensor and the board.

What is a PIR Sensor?
A passive infrared sensor (PIR sensor) is an electronic sensor that measures infrared (IR) light radiating from objects in its field of view. Motion can be detected by the change of infrared light in the surroundings.

Link to my code:
Link to learn more about PIR sensors:
Starter Project
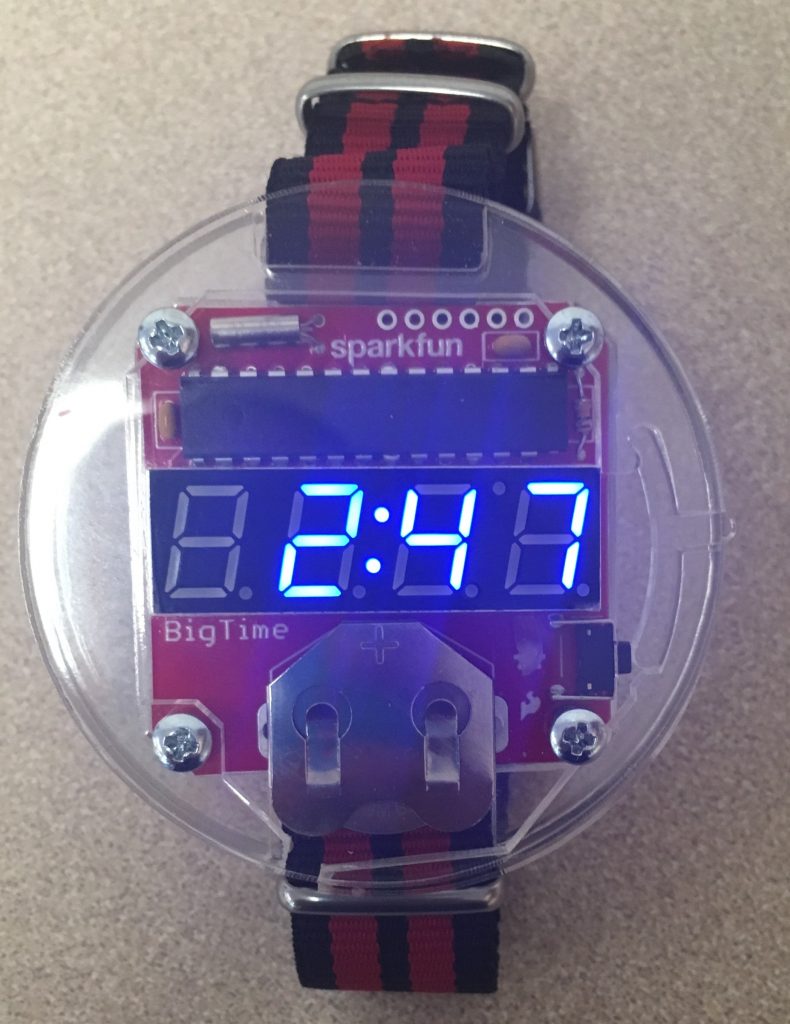
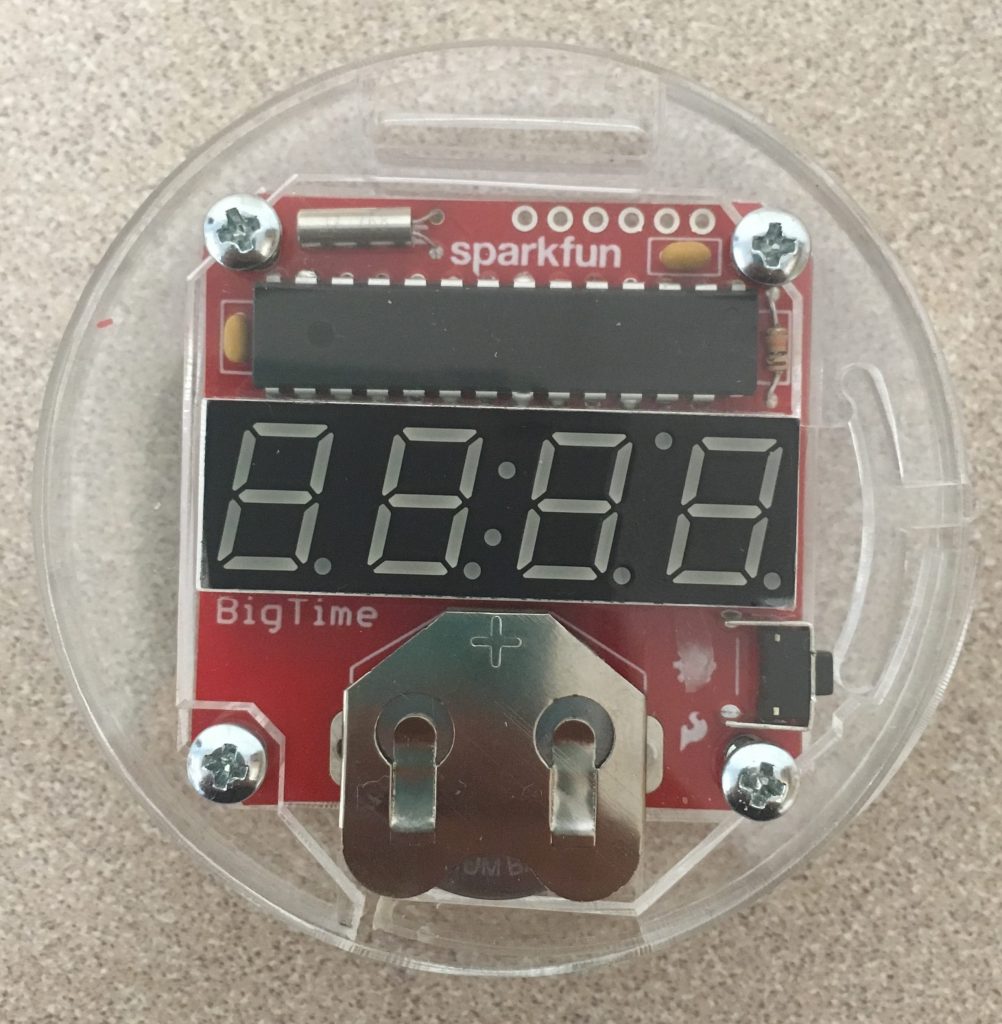
My starter project was the BigTime Watch. The components of this watch are ATmega328, 7-segment display, 0.1uf capacitors, 10k ohm resistor, 32kHz crystal, button, strap, coin cell battery, battery holder, enclosure, screws and threaded inserts. Each components has a key role in operating the device. The ATmega328 is a micro controller in other words it is the brain behind the watch. The capacitors store energy. The resistors control the current flow. The 7 segment display basically display the decimal numbers. The 32kHz crystal oscillator generates an electric signal of precise frequency depending on the crystal. The battery powers the watch. The button controls when the watch turns on and off. The enclosure acts like a casing around the circuit board. This watch works by since the ATmega acts like the brain using the 32 kHz to keep time. When the button is pressed it send a signal the 7 segment display causing the time to be displayed. During this project I did encounter a few challenges such as making sure that I don’t accidentally solder two wires together and I had trouble fitting the enclosure the right way. Overall, I learned to carefully solder and the uses of all materials.
What is Soldering?
During the starter project, something I learned is soldering. It was a key technique to complete this project. Soldering is when 2 or more items are joined together by melting using a material called solder. Solder is a soft metal made of mainly tin and lead.
