IoT Weather Display
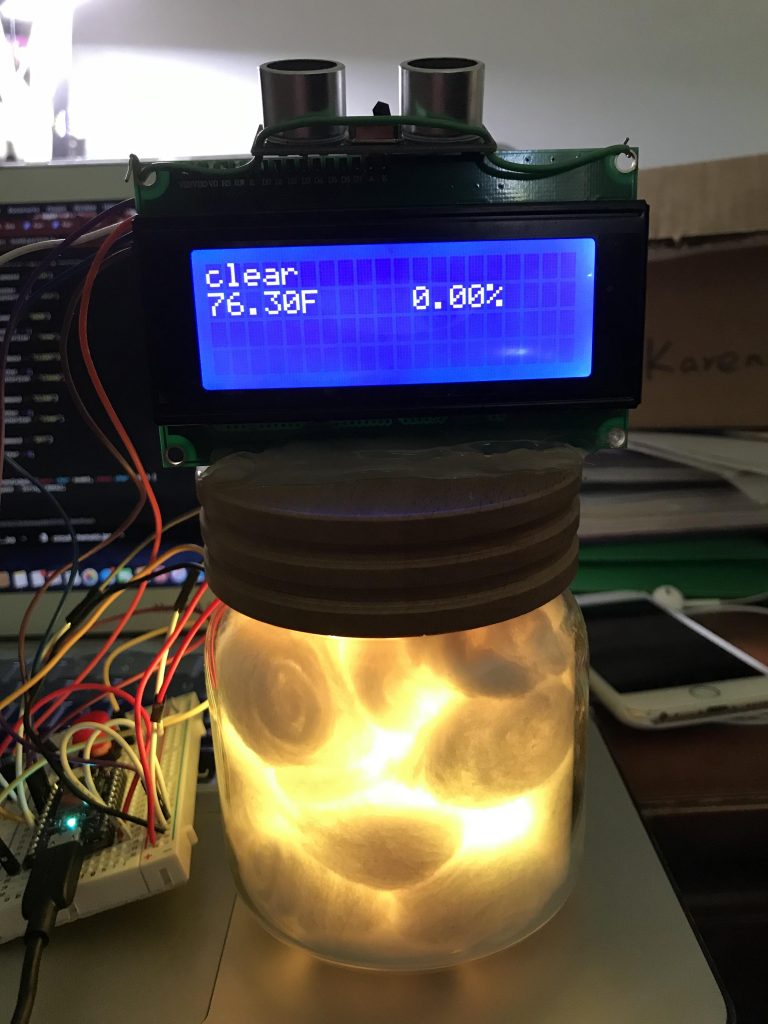
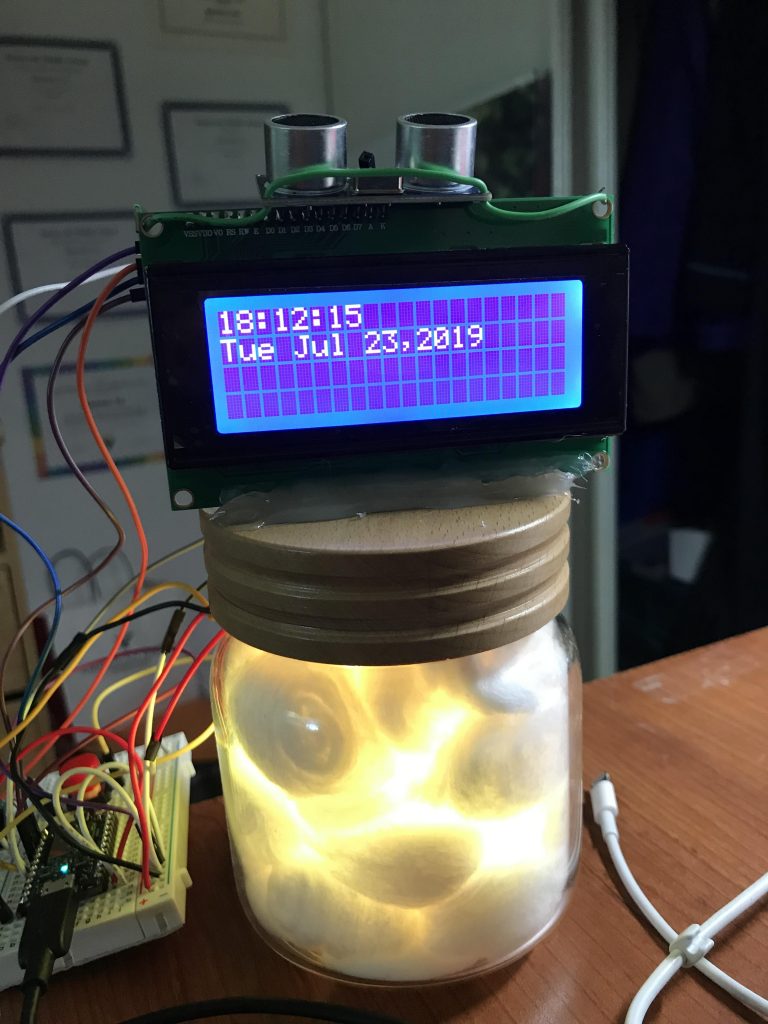
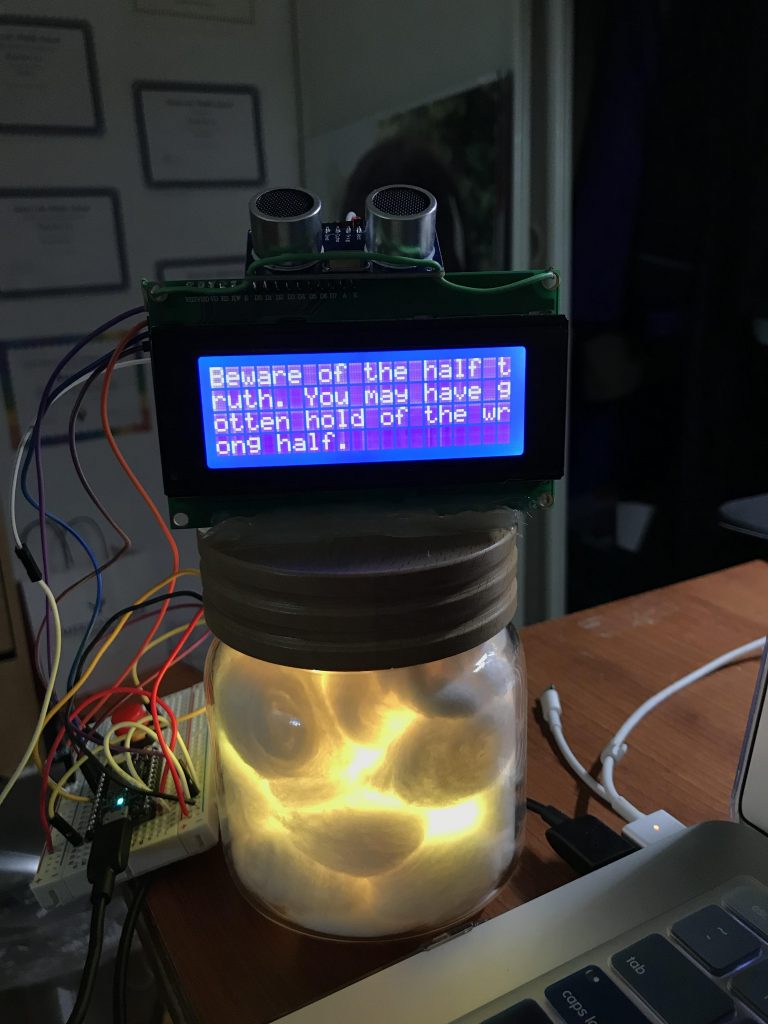
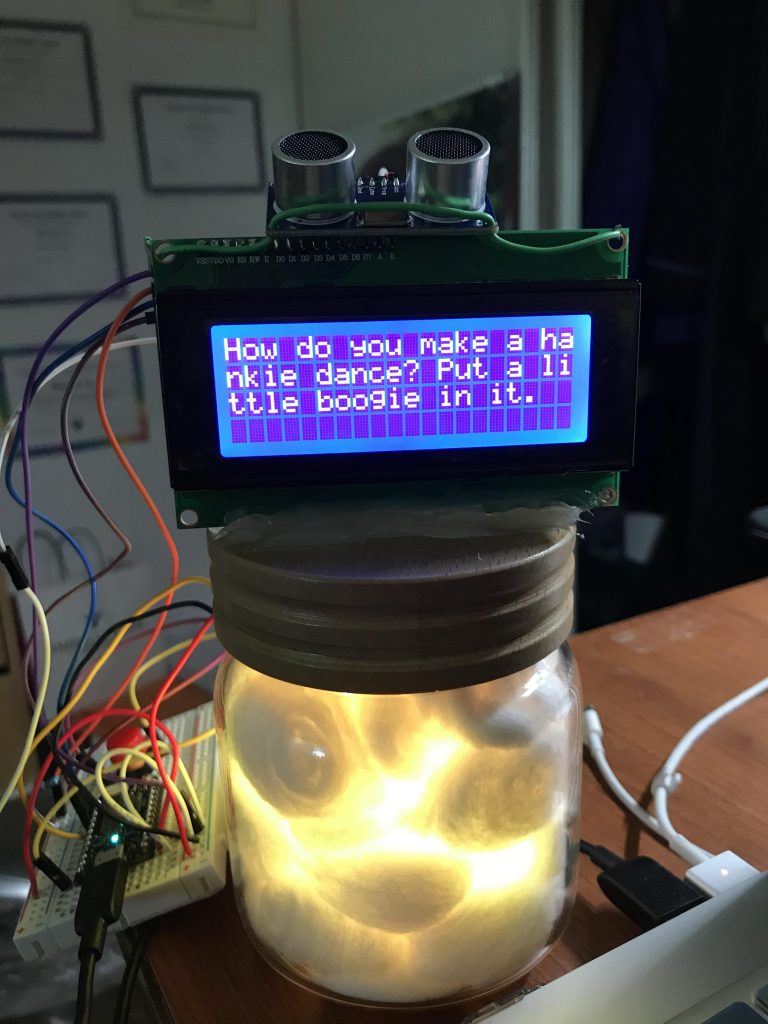
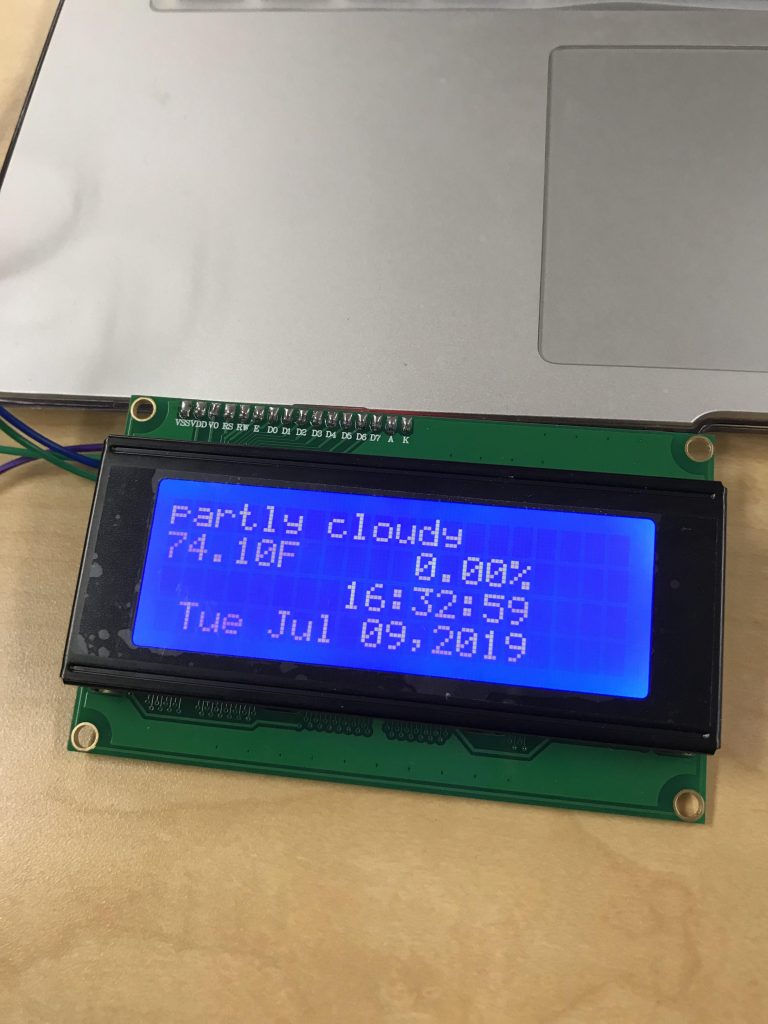
The IoT Weather Display is a cloud in a jar that retrieves weather information from the cloud to change colors according to the weather condition outside. In addition to displaying the current weather information, it shows the time and date, an inspirational quote of the day, and a random so-bad-it’s-funny dad joke. It’s a handy little device to keep on your desk for viewing pleasure, because who knows when you’ll need to know it’s 79.87ºF outside? Or to be inspired by Confucius? Or to put your dad in his place with your superior dad jokes?
Engineer
Karen L.
Area of Interest
Computer Engineering
School
Homestead High School
Grade
Rising Senior
Reflection
Overall, I had a really enjoyable experience building my project, as well as at BlueStamp in general. I was initially interested in the program because of the freedom and independence it offered for students to complete their own projects, and I definitely got that. I liked that I was able to work at my own pace and decide what I wanted to do based on what genuinely interested me. I was able to personalize my project with modifications and truly make it my own. I learned so much in just six weeks and met people who have endless knowledge of and passion for engineering. This program allowed me to explore engineering in earnest, and I feel confident in my decision to pursue engineering in the future.
Demo Night Presentation
Final Milestone
How It Works
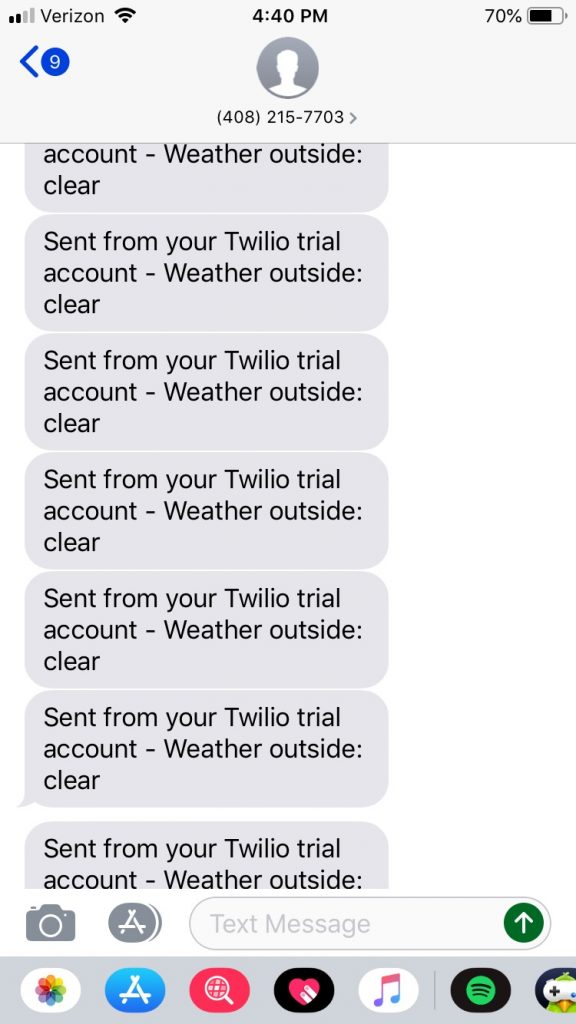
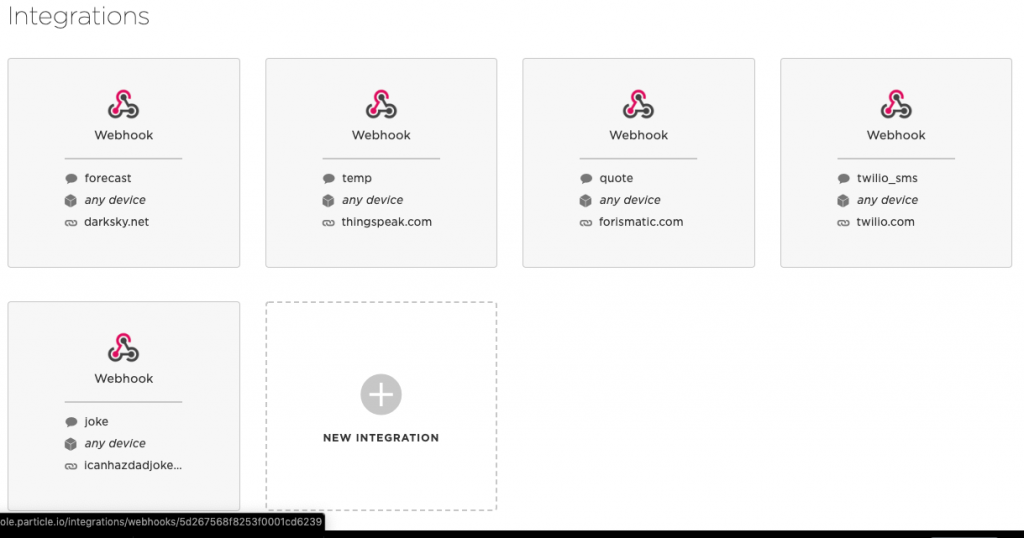
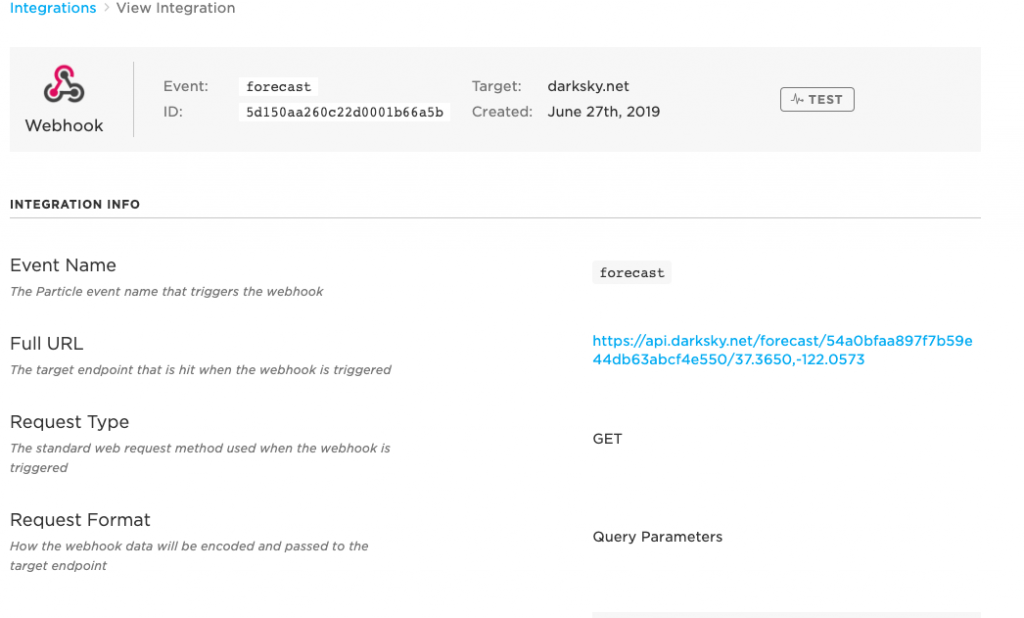
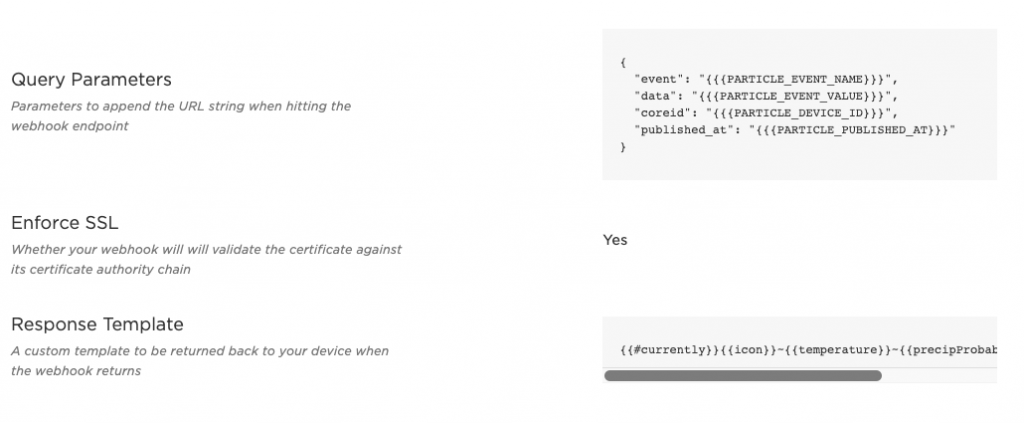
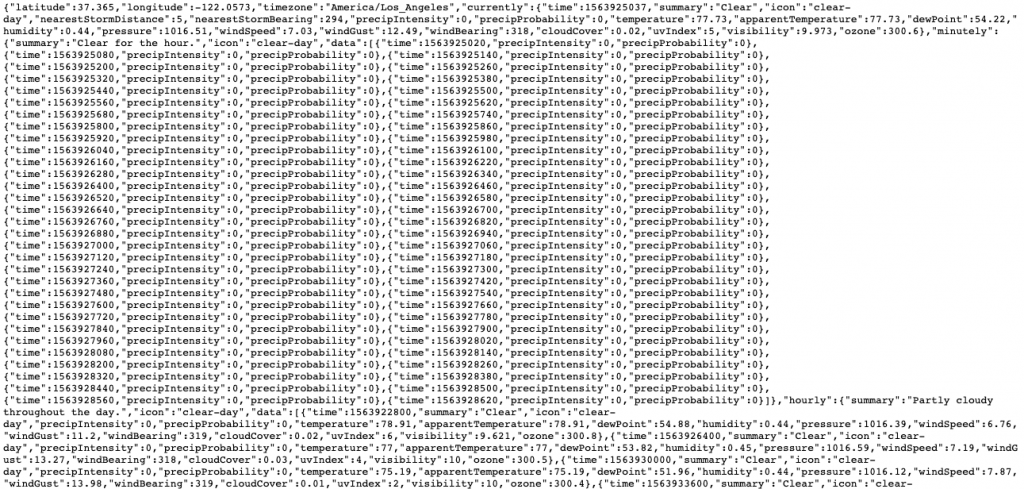
Webhooks are used to send info to and get info from services and apps on the Internet. I used a GET request type, since I want to get data from the weather API. The webhook listens for an event published by the Particle Photon, which then triggers a web request to the weather API URL. This tells the API to send the requested information back to the Particle Photon. I parsed the data to get the weather information I wanted and displayed the data on the LCD.
Building Process
Challenges
Surprisingly, I had the most difficulty with the display on the LCD. Getting the information from the webhooks was relatively simple, since I had already gone through all the trial and tribulation with getting the weather information. However, displaying it onto the LCD was more of a challenge than expected. The LCD prints from line 1 to 3 to 2 to 4, so the quote and joke appeared jumbled. I had to split up the text into lines and set the cursor to print line by line. Also, most of the time the quote or joke would be too long to fit on the screen, so I created an array to store the lines as Strings and used a for loop to scroll through the entire text.
What I Learned
I learned about the capabilities and limitations of an LCD screen, since I needed to work a lot with the display of the different modes. I learned how to use the C++ array equivalent, the vector. I didn’t know C++ before this project, so I’ve been teaching it to myself along the way. I also worked with an ultrasonic sensor for the first time. It sends a pulse and then receives an echo if it bounces off an object. The echo pin on the sensor receives this, and then calculates the distance using the time between sending and receiving the pulse.
Possible Further Modifications
Third Milestone
How It Works
Webhooks are used to send info to and get info from services and apps on the Internet. I used a GET request type, since I want to get data from the weather API. The webhook listens for an event published by the Particle Photon, which then triggers a web request to the weather API URL. This tells the API to send the requested information back to the Particle Photon. I parsed the data to get the weather information I wanted and displayed the data on the LCD.
Building Process
Challenges
One challenge that I faced was figuring out how to get the information from the API. When making the webhook on Particle, I had to make sure to input the correct query parameters to get the correct information as well as to code in Particle to trigger the webhook and receive/handle the data correctly.
What I Learned
Through this process, I learned how to use webhooks, which was really interesting because they gave me access to a lot more information than IFTTT did, which I could use for more advanced modifications. I also learned how to use an LCD and display text on it.
Second Milestone
How It Works
Building Process
Challenges
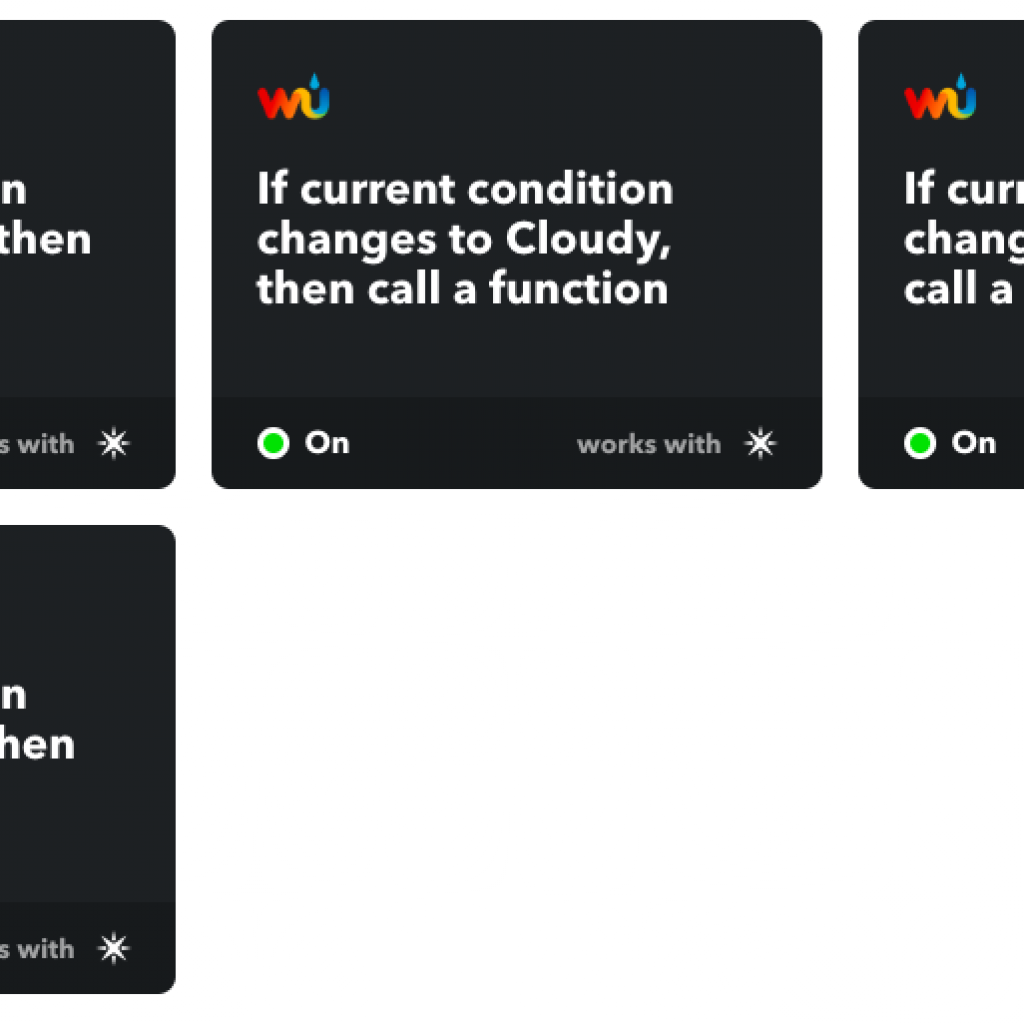
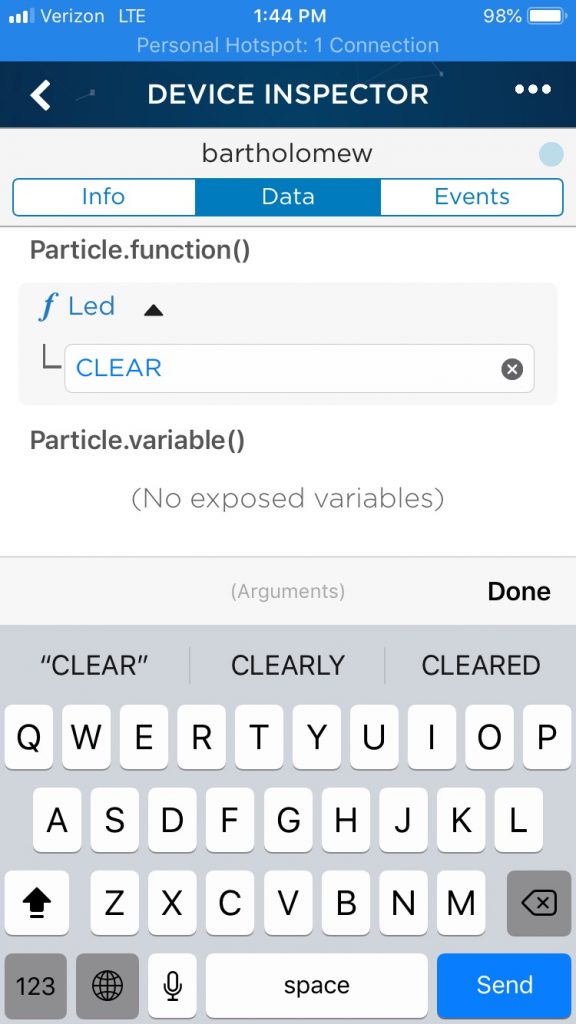
One challenge I faced was figuring out how to test the NeoPixel ring once I set up the IFTTT applets and made the connections between the NeoPixel and Particle Photon, since I am unfortunately unable to change the weather at my will. However, I figured out that I could directly input the argument into the function to make sure the NeoPixel changes colors when the weather condition changes. For example, if I type “RAIN” into the “Led” function on the Photon, the NeoPixel ring lights up indigo, which is the color corresponding with rain.
What I Learned
Through this process, I learned how exactly the Photon transfers data through a single pin to a single hole in the NeoPixel ring to light it up. It uses PWM, or pulse width modulation, to communicate the color dictated by the code. In the Particle code, I defined colors by their RGB values, and then the Photon sends either a 0 or 1 through the D4 pin over different intervals of time to convey the color. The differing time distinguishes between the RGB number values. The LEDs on the NeoPixel ring are connected in a line in a certain order, so the data is sent to the first LED and so on until the entire ring is lit up.
First Milestone
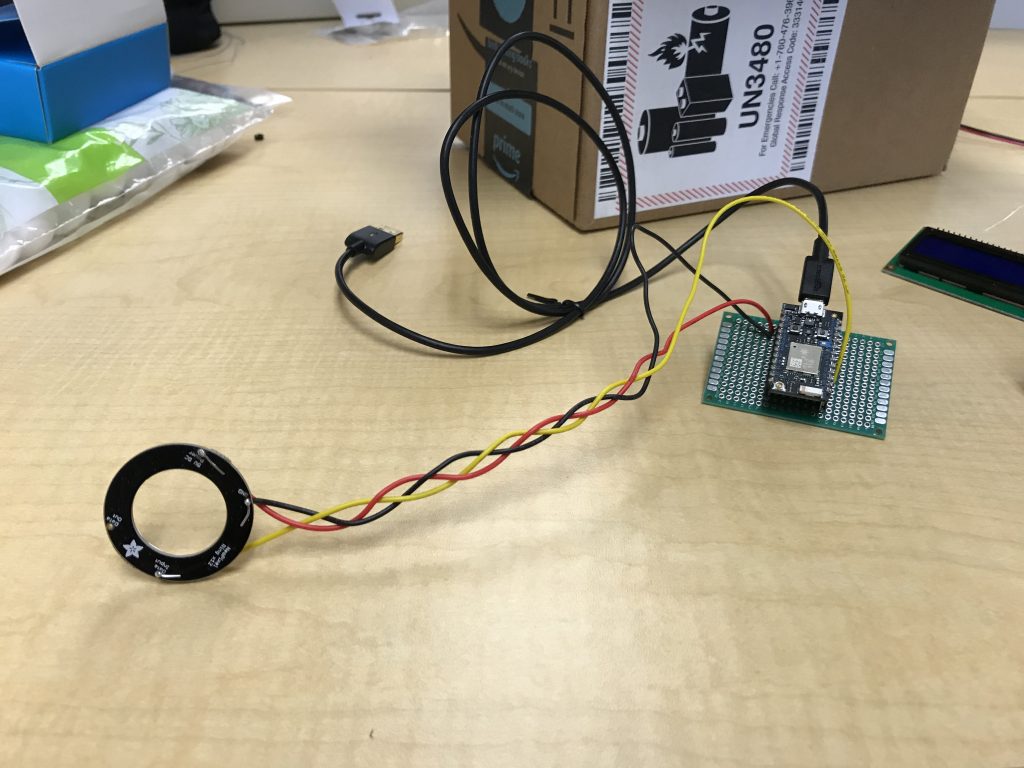
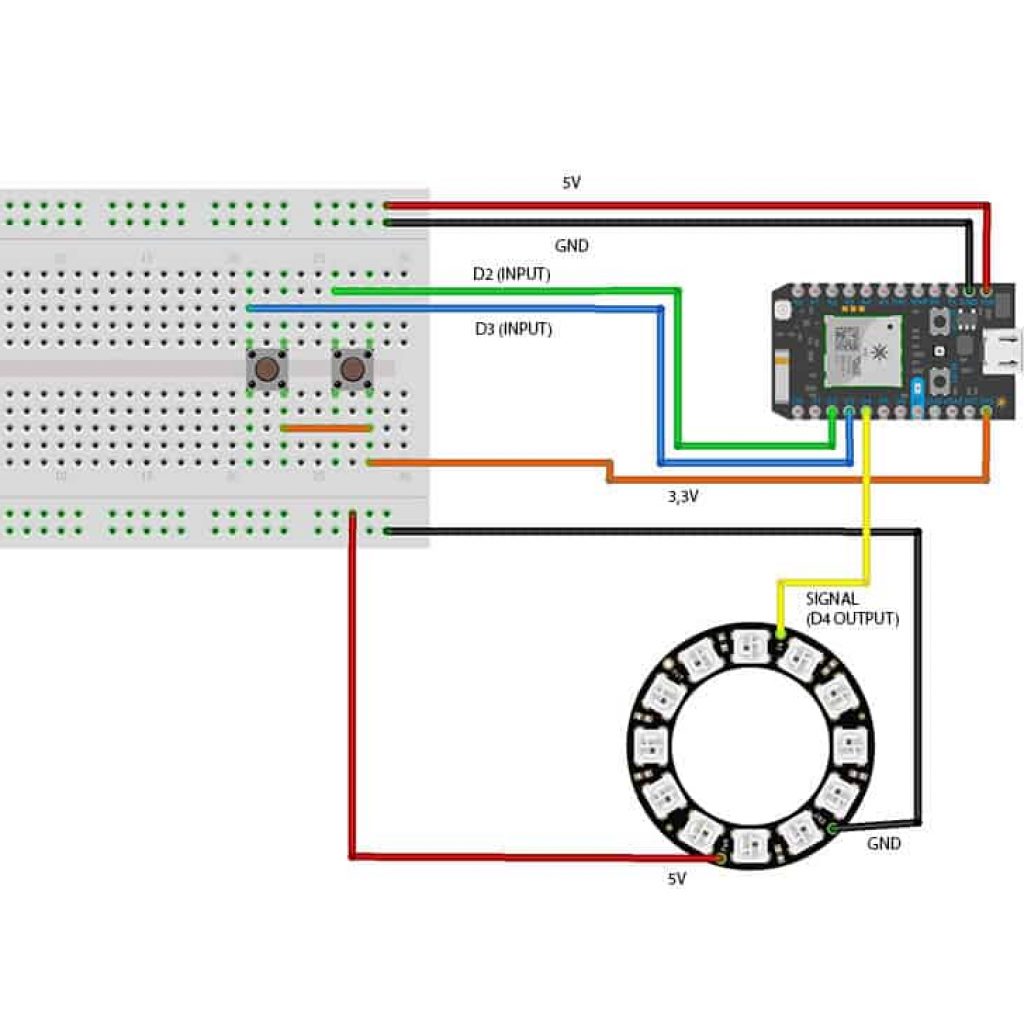
Circuit Connections
How It Works
Building Process
Challenges
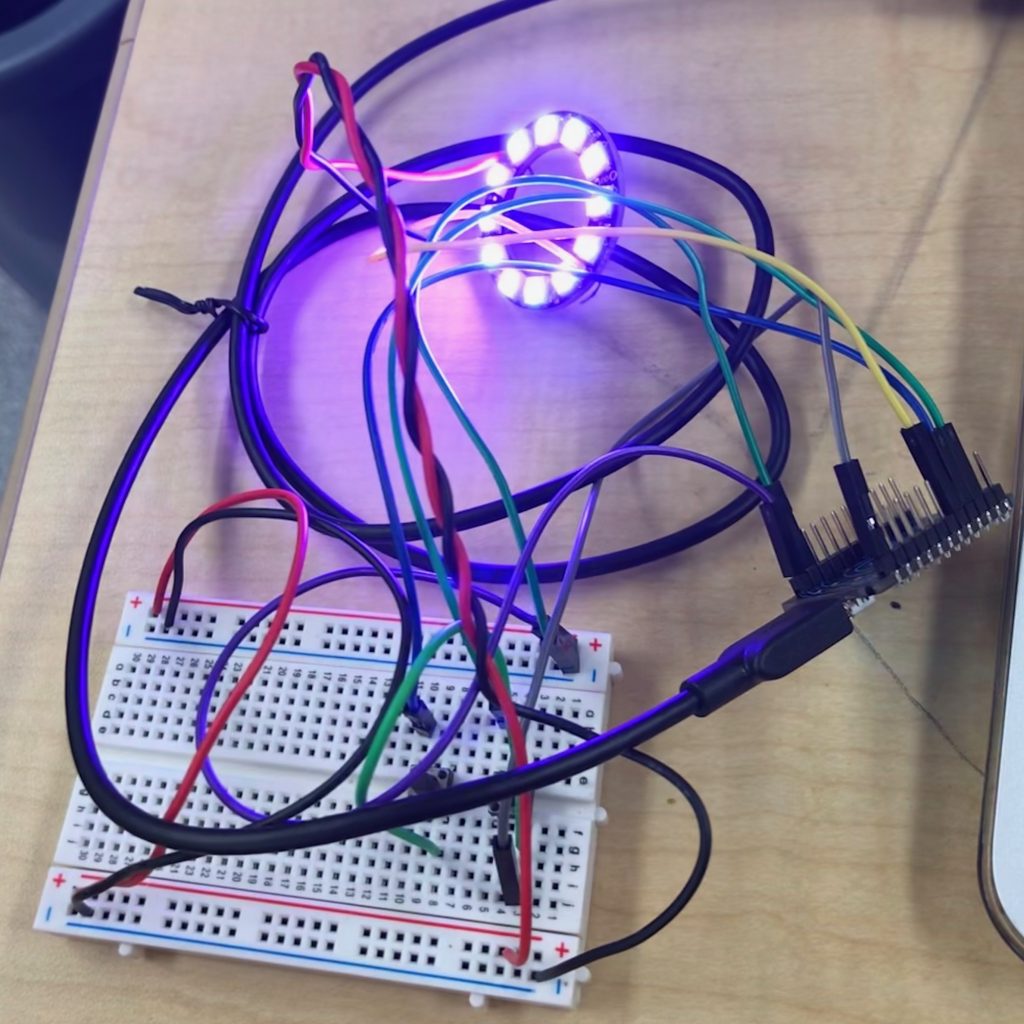
The main challenge I faced reaching my first milestone was connecting the Photon to the WiFi, and without that connection, the NeoPixel ring couldn’t light up. It was also difficult getting the ring to light up, but I realized it was due to the wiring, and once I switched it out, it was fine.
What I Learned
I learned how to connect circuits through a breadboard and the reason for different connections between the Photon and NeoPixel ring. For example, the VIN pin is connected to the PWR hole because it supplies the power needed to light up the ring and the D pins send data to the NeoPixel.
Starter Project: MintyBoost
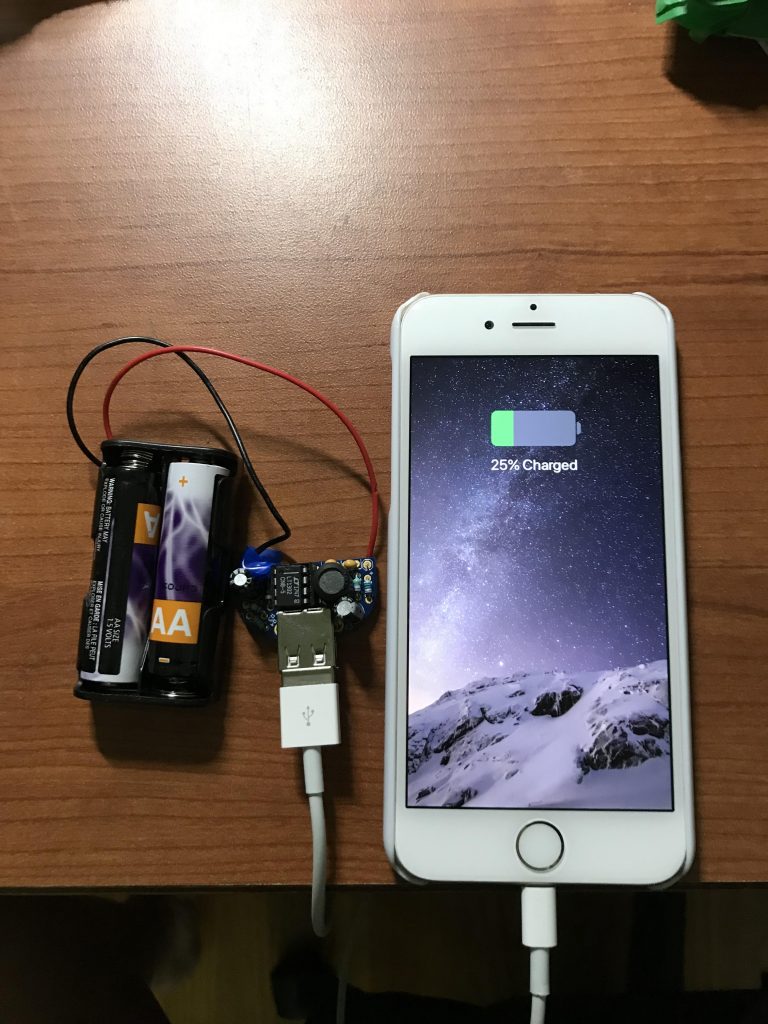
How It Works
Building Process
STEM, engineering, coding, computer, summer program, high school, science, project, IoT, Internet, Particle Photon, API