Introduction:
Hi! My name is Jake and I live in New York. I attend Staten Island Technical High school and am very interested in engineering. That is why I applied to enter Blue Stamp Engineering — to build cool things and meet people with the same interests as me. My starter project I built is called the “Minty Boost” by Adafruit. This device is a backup phone charger that I may need in tough situations to recharge my phone. The main project I built is a miniature wind turbine, perfect for New York city life. The turbine generates volts of electricity that powers many LEDs for a cool light show. I am glad I picked the mini wind turbine as my project, it has been a lot of fun building it. I hope this helps future BSE students who want to build their own turbine.

__________________________________________________________________________________________________________________________________________________________________________________________________________________________________________________________________________
The Mini Wind Turbine
When I was first accepted to the Blue Stamp Engineering program, I had to pick a project that I was most comfortable with. I saw that there were not many people who made this project and I wanted a challenge. The mini wind turbine I have created puts out around two volts, in which I used to power LEDs. The generator of the turbine consists of 27 AWG enamel wire, the acrylic frame, a neodymium magnet, screws, ball bearings, and a propeller. The enamel wire is coiled around the acrylic frame, so that the neodymium magnet is close to the wire. The coils produce an alternating current when the magnet spins, which is sent out to my rectifier circuit. This device takes the absolute value of the sign wave current from the generator, and makes it available for use. The smoothing capacitor on my circuit turns the hill like current of the rectifier into a more direct current, so the LEDs are always glowing. At the end of my circuit is a 10k loading resistor that prevents the lights from burning out. I highly recommend building your own wind turbine!
Here is my Electrical Schematic:

Here is the link to the original design:
http://www.gotwind.org/diy/12-inch-mini-turbine.htm
Here is my Bill of Materials :
Here are my technical drawings of the turbine:


Tutorial
The first step of this project is creating a durable frame made out of acrylic. I used a design similar to the one found on Gotwind.com, but I modified it so that ball bearings could be added to the frame. Have an instructor laser cut your frame, my instructor was Kyle Doyle. After laser cutting the acrylic frame, use stainless steel screws and nuts to secure the two acrylic frames. Next, epoxy glue the neodymium magnet to a lengthy screw that has a diameter of 1/4″. Slide the magnet into the center of the acrylic frame and then epoxy glue the ball bearings into place. These are used to reduce friction and are good for spinning the magnet. Next, coil the 27 AWG wires around both sides of the acrylic frame four hundred times on each side. This is not the most exciting part of the build, but is essential to the project. Next, strip the ends of both coils so that the copper is showing. BE CAREFUL! These wires are fragile and will break easily. I had to recoil several times because of this problem. Use an alligator clip to get the enamel off the wires. After, solder both wires to their corresponding wires on the opposite coil. Then set up a rectifier circuit on a PCB and connect the ends of the coils to the circuit. Add in the capacitor and loading resistor. Now you have built a fully functioning mini wind turbine! Just lead jumper cables to whatever you want to power, like LEDs or to a USB if higher than five volts.
Final Blog Post
It has been a great six weeks of Blue Stamp Engineering and I am sad to go. At first, I was so overwhelmed with things I have never heard of before, like transistors and inductors. Soon enough, I became familiar with the terminology of electronics and tools used to create my project. Blue Stamp is not for your normal student, it takes real effort and perseverance to overcome a project in six weeks. Joining the program as a student with little engineering knowledge was difficult. But soon enough I learned how to solder and create mechanical drawings.
Looking back on the program, I have spent most of the time figuring out solutions to a lot of problems. These problems with my turbine, which was not working as I thought it would, were usually based around the electromagnetic coils. For a while I could not figure out what the issue was. Then I realized the similarity between the Blue Stamp Engineering program and the real world. My mini wind turbine was not supposed to be easy to build. It was meant to have various problems that challenged me, like a real job.
Now I have learned many things about magnetic fields and how an alternating current works. Not to mention, how a rectifier works and electronic circuits. My turbine works great after overcoming the challenges and problems presented to me in the first place. It has been an amazing six weeks of experiencing what engineering truly is!
Mini-Wind Turbine Post #3
The turbine is coming along perfectly. After creating my own rectifier circuit, I realized I would not be able to use a USB port to charge my phone because the output voltage is lower than five volts. I also discovered that charging batteries with the turbine is extremely dangerous, because it requires a strict direct current, while I have a hill-like current. The voltage regulator idea did not make sense because the LEDs are powered so quickly, the naked eye doesn’t realize the strobe of the lights. Instead, I used a smoothing capacitor to get the voltage output as close to a direct current for consistent flow of electricity
For my final video, I will show many LEDs powered, for a cool light show. The turbine will be epoxy glued to an acrylic frame that my instructor Kyle will laser cut. This includes a fin that spins the turbine towards the wind if pushed. There is also going to be an acrylic board to hold the generator in place. I can’t believe it is already the end of my fifth week of Blue Stamp Engineering; it’s been extremely fun so far!
Mini-Wind Turbine Post #2
It is already the end of my fourth week of Blue Stamp Engineering. The mini wind turbine is starting to produce a constant flow of millivolts because of the product of my second milestone. The device, known as a rectifier, has been attached to the outputs of my turbine to convert a sign wave current into a positive curve of electricity. This is because the rectifier takes the absolute value of the alternating current and makes it stay positive. I have created my own rectifier for fun, and to learn what materials a person would need to make one. My rectifier consists of four 4001 diodes that are soldered together on a PCB, so the electrons are pushed in one direction to a positive point on the board. The copper wires from the turbine are soldered to the board as inputs, while other copper wires become outputs. These become positive and negative charges for the voltage regulator.
After assembling the diodes, I used a loading resistor to transfer the volts to positive and negative outputs, while not harming the circuit. The most difficult problem I faced over the past four weeks was the main generator not producing enough volts. I still have to find the solution to this problem, which is mainly fixing the gauge of the coils and the amount of times spun around the acrylic. Building the rectifier not only for fun, but was to enhance my knowledge of electronics, improve my soldering skills, and to learn how a rectifier works. In the future I will use these volts to power LEDs for a light show and power batteries
Mini-Wind Turbine Post #1
At first, I thought the Blue Stamp Engineering program was going to be too difficult for me, since I have rarely built something out of scratch. However, after the first two weeks of meeting others with the same interests as me, I have learned various things from them and the instructors. My project is the miniature wind turbine that produces volts of energy by wind spinning a propeller, that I found on Gotwind.org. To accomplish building this, I had to create a Bill of Materials so all the parts would be at the program before I arrived there. It consisted of the parts, costs, and amount of items. Then I had to create a schematic, or a technical drawing of my turbine. This included the measurements of all the possible dimensions a person would need to replicate this design. After I created the 3D model of the turbine in a program called sketchup, my instructor Kyle Doyle laser cut the acrylic with the exact measurements on the schematic so I could start building. Every day I would create goals for myself in a notebook containing what I would get done or what I wanted to learn for that day, which motivated me.
I was officially able to start hands on building the mini wind turbine at the beginning of week two. At first, building was a struggle because I wasn’t sure where to start and how to assemble it. My first step for building it was to attach the three acrylic pieces together with screws, for support and structure. After that, I took 27 AWG wires and coiled them around both sides of the acrylic two hundred times each. Throughout the project I had to recoil both sides many times to get the right amount of voltage output. Next I secured the neodymium magnet in the center of the acrylic with epoxy glue to a screw, including washers, acetal bearings, and shaft collars. Finally, I attached the propeller to the end of the screw and hacksawed the head of the screw off to reduce weight.
Now I have to reduce friction within the magnet spinning, mainly because it takes a large amount of force to spin the propeller. Any wind would not spin the turbine efficiently, so in order to fix this problem, grease or oil would have to be applied to the magnet and bearings. This project has been fairly simple so far and a lot of fun to build. Soon enough I will apply a voltage regulator and rectifier to the device to charge things, by using a USB port. My next milestone will feature the circuits behind the generated volts from the mini wind turbine.
________________________________________________________________________________________________________________________________________________________________________________________________________________________________________________________________________________________________________________________________________________________________________
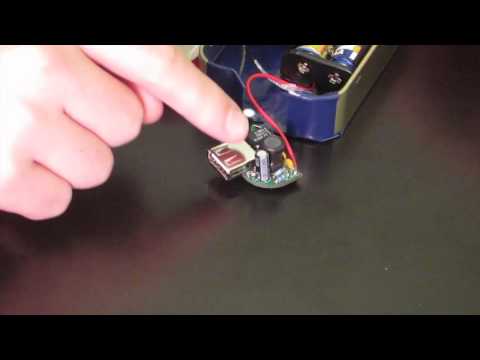
The Minty Boost
For my starter project, I have built the “minty boost” from Adafruit. This device is a backup phone charger that uses two double A batteries and sends 5 volts of electricity to your phone. The minty boost can fit into small spaces such as a gum packet or an altoids can. Attached to the minty boost is one USB charger that links to most phone chords, including the iphone.
The way the minty boost works is the double A batteries sends 3 volts of energy to a PCB circuit board containing diodes, capacitors, and inductors (a boost converter). The volts run through inductors and a transistor in the LT 1302 chip. When the voltage isn’t high enough, the chip creates current flow from the batteries and goes through the inductor. When the chip stops the current, the inductor sends its current through a diode and to the capacitor where volts are stored. The boost converter has now created 5 volts of electricity for your phone to use.
What I value from this project is the experiences and learning I acquire from it. BSE instructors trained me to solder the parts of the minty boost to the chip, so now I can solder by myself. It also helped me understand how engineers work, by researching the project and by carefully planning out the building procedure to achieve success.
If you would like to build your own minty boost, visit the Adafruit product site at
http://www.adafruit.com/products/14