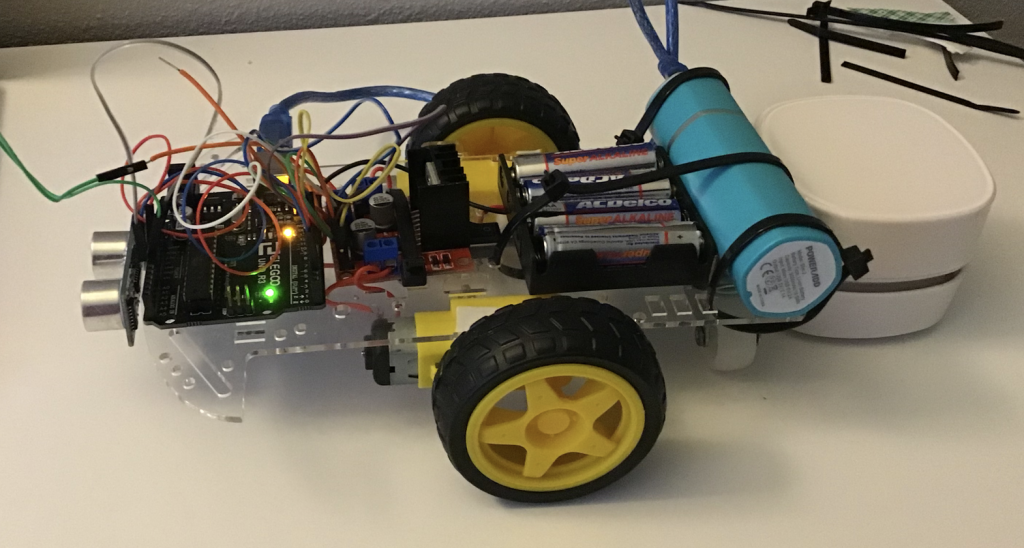
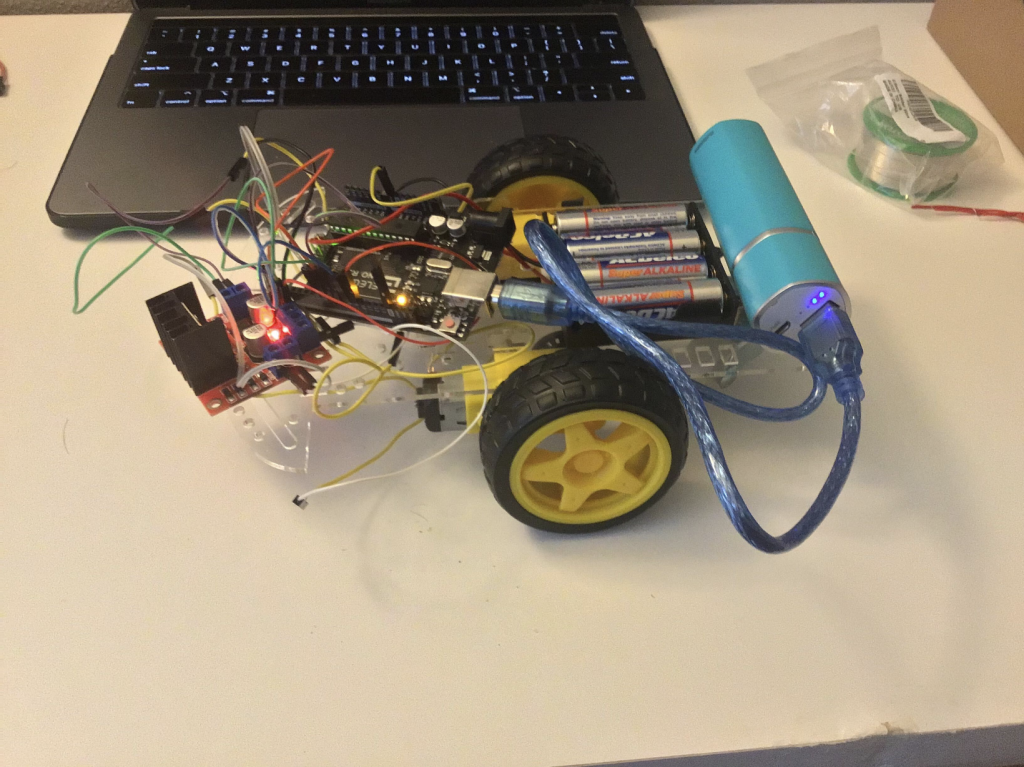
Floor-Cleaning Robot
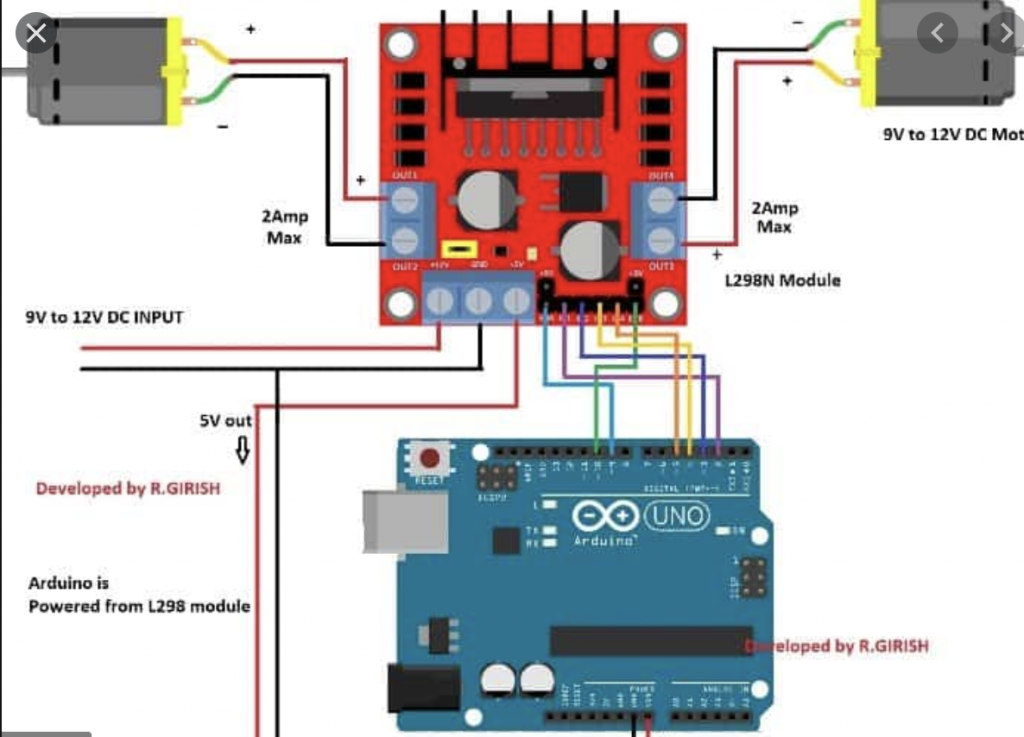
I created a floor cleaning robot using a car chassis as the base. Using a l298N motor controller and an Arduino it allows it to cleaning the floors thoroughly and accurately.
Engineer
Jacob G
Area of Interest
Mechanical Engineering
School
Monta Vista High School
Grade
Incoming Sophmore
Demo Night
Final Milestone
// Include the library
#include <L298N.h>
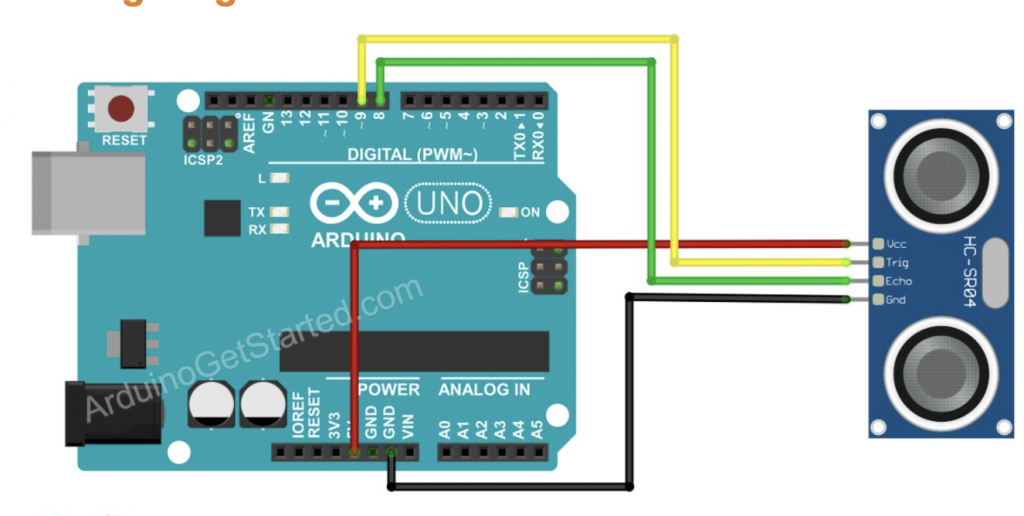
#include “SHCSR04.h”
SHCSR04 hcsr04;
// Pin definition
const unsigned int IN1 = 8;
const unsigned int IN2 = 7;
const unsigned int ENA = 9;
const unsigned int ENB = 6;
const unsigned int IN3 = 5;
const unsigned int IN4 = 4;
// Create one motor instance
L298N motor(ENA, IN1, IN2);
L298N motor2(ENB, IN3, IN4);
int turning=0;
void setup(){
motor.setSpeed(255);
motor2.setSpeed(255);
Serial.begin(115200);
}
void loop()
{
Serial.println(“——————-“);
Serial.print(“measure = “);
Serial.print(hcsr04.read(2, 3));
Serial.println(” cm”);
Serial.println();
if ((hcsr04.read(2,3))>10){
motor.forward();
motor2.forward();
delay(500);
motor.stop();
motor2.stop();
}
else if ((hcsr04.read(2,3))<10 and turning==0){
motor.backward();
motor2.forward();
delay(500);
motor.stop();
motor2.stop();
}
}
First Milestone
// Include the library
#include <L298N.h>
// Pin definition
const unsigned int IN1 = 7;
const unsigned int IN2 = 8;
const unsigned int EN = 9;
// Create one motor instance
L298N motor(EN, IN1, IN2);
void setup()
{
// Used to display information
Serial.begin(9600);
// Wait for Serial Monitor to be opened
while (!Serial)
{
//do nothing
}
// Set initial speed
motor.setSpeed(70);
}
void loop()
{
// Tell the motor to go forward (may depend by your wiring)
motor.forward();
// Alternative method:
// motor.run(L298N::FORWARD);
//print the motor satus in the serial monitor
printSomeInfo();
delay(3000);
// Stop
motor.stop();
// Alternative method:
// motor.run(L298N::STOP);
printSomeInfo();
// Change speed
motor.setSpeed(255);
delay(3000);
// Tell the motor to go back (may depend by your wiring)
motor.backward();
// Alternative method:
// motor.run(L298N::BACKWARD);
printSomeInfo();
motor.setSpeed(120);
delay(3000);
// Stop
motor.stop();
printSomeInfo();
delay(3000);
}
/*
Print some informations in Serial Monitor
*/
void printSomeInfo()
{
Serial.print(“Motor is moving = “);
Serial.print(motor.isMoving());
Serial.print(” at speed = “);
Serial.println(motor.getSpeed());
}