
Bio
Hi! My name is Elias and I’m a rising junior at Hunter College High School. For my starter project I did the Gram Piano and for my main project I did the Jasper project on Raspberry Pi. I like to play piano, draw and write code. Before BlueStamp, I had very little software experience and no hardware experience at all. I’m getting a lot out of the program, and taking advantage of the skills that I came into the program with to make the best projects that I can.
I really enjoyed BlueStamp, but I feel like my project choice slightly hindered the amount I learned here. I chose Jasper because I heard that it was Python-based, a language with which I was familiar, but while doing it I found that I was able to use my previous knowledge to solve most problems, as opposed to learning the many new tools and skills I might have had I chosen a hardware project. I did learn about one new piece of hardware: the Raspberry Pi. I’d heard about it, but hadn’t using such a basic system helped me learn how a computer works, and the files that we often take for granted in more polished operating systems than Raspbian. I also really liked how the program allowed me to learn on my own. At first it was tough, and I would default to asking the instructors for help, but as the program went on I began to automatically research for my answers, and ended up finishing the project with little to no help at all.
Table of Contents
Main Project
Installation Guide
Milestone Two
Milestone One
Starter Project
Build Plan
Bill of Materials
DOCUMENTATION
Main Project

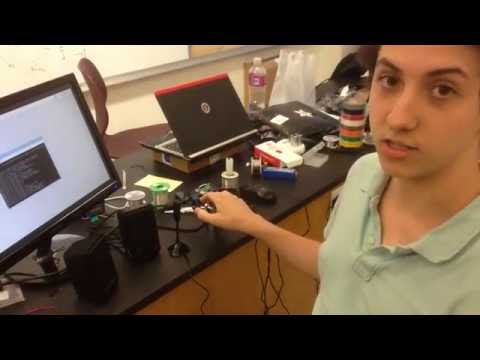
Here is the final product.
I chose the Jasper project because I knew some Python (which the Pi runs on), enjoyed working with it, and wanted to expand my ability and get into more of the source code of a computer. Also, I like the movie Iron Man. This is how it turned out:
My final modifications include (but are not limited to):
- A module that allows Jasper to remember lines and repeat them back
- A module that allows Jasper to shutdown, reboot, or log off
- A module that reads the Meaning of Life, from Hitchhiker’s Guide to the Galaxy
- Spotify integration that allows Jasper to play music from my Spotify account
- A module that allows Jasper to define words and phrases
- Changing the name from Jasper to Jarvis, because I like the movie Iron Man a lot
When I first tried to install Jasper, I had some trouble. I hope to save the next person the trouble, and have included a guide just below. Below that are the other steps I took in finishing my Jasper module.
My Jasper Installation Guide
The Jasper website is very well-organized and easy to follow, but it is outdated and many steps do not apply to the new Raspbian Jessie. This guide contains the method I found to install Jasper, which worked at the time that this was written.
- Install Raspbian from the disk-image. Immediately try the commands:
aplay -l
arecord -l
These should list the output and input audio devices, respectively. Next, install some dependencies that may or may not have come with the install with:
sudo apt-get update
sudo apt-get upgrade – yes
sudo apt-get install vim git-core python-dev python-pip bison – yes
sudo apt-get install libasound2-dev libportaudio-dev python-pyaudio – yes
2. Once those are installed, test the sound with:
speaker-test3. If a static can be heard out of the speakers, everything is a-ok. If not, the speakers will need some work. Next, try:
arecord -f S16_LE temp.wavIf this immediately returns an error and crashes, then the mic isn’t being picked up, but as long as the recording proceeds without immediately returning you to the command line, the mic is ok. Press ctrl-C to stop the recording.
4. If the speakers are not working: (Skip this step if your speakers work fine)
If the aplay -l command listed multiple devices, visit the Pi configuration with
sudo raspi-config5. With the arrow keys, navigate to Advanced Options, then to audio. Select the 3.5mm audio output option, then exit. Test the speakers again. This was the fix I found to this problem.
If the aplay -l command did not return a list of sound devices, I’m afraid you’re in for a tougher time. Make sure that the speakers are connected properly, then go to step after the next one.
6. If the mic is not working: (Skip this step if your mic works fine)
If the arecord -l command listed your mic, exit the command line, and using the menu in the upper left corner, navigate to preferences, and audio preferences.
Click “select controls” and see if your mic shows up. If it does, click the box next to its name to get it working. This was the fix I found to this problem.
If the arecord -l command did not return a list of sound devices, it seems that you are also in for a tougher time here. Make sure the mic is connected, then go to the next step.
7. If the mic and/or speakers do not show up in the list at all, use:
sudo nano /boot/config.txtAnd at the bottom of the page, where it says:
dtparam=audio=on8. Change on to off, and then add the original line immediately beneath. The last two lines should read:
dtparam=audio=off
dtparam=audio=on
I’m not really sure why this works. I actually discovered this after I messed up my sound card so badly I had to reinstall it completely. The “dtparam=audio=on” line allows the Pi to use the audio card, but I’ve also found that turning it off allows the mic to be read, but not the speakers, and turning it on allows the speakers to be read, but not the mic. In a moment of desperation, I thought “What if I tried to turn it off and on…at the SAME TIME???” And it worked.
However, sometimes on boot either the speakers or the mic will not appear. In this case, delete the line that corresponds to whatever device is missing (delete “dtparam=audio=off” for mic, “dtparam=audio=on” for speakers,) and reboot. List the devices to ensure that the one you didn’t delete is still showing up, then add back the other line and reboot again.
9. Hopefully, your audio devices work now. If they don’t, I’ll put a list of extra options at the bottom of this guide. Anyway, now you should be ready to install Jasper. Do this with:
git clone https://github.com/jasperproject/jasper-client.git jasper10. Next, install the dependencies for Jasper with:
sudo pip install – upgrade setuptools
sudo pip install -r jasper/client/requirements.txt
I’ve heard that sometimes these links don’t work. If they don’t for you, consult the Jasper google group, which has a very active community and responsive admins, and will hopefully have the solution you need.
11. Finally, make Jasper executable with:
chmod +x jasper/jasper.pyNow that Jasper is installed, the hardest part is behind you (hopefully), and now you get to start customizing Jasper. An important command is going to be:
cd ~/jasper/client12. This folder contains a lot of the important files for executing jasper correctly. For now, use:
python populate.py13. Follow the steps, and fill in all your information. Once you’re done, pick an STT engine and TTS engine from the list that can be found here. These choices can be changed at any time. Install the dependencies as described on that website.
14. Next, access your profile with:
sudo nano ~/.jasper/profile.yml15. Make any changes that are described in the instructions for your STT and TTS. Often this will include adding a line about the TTS, or putting in an API key.
You are getting very close now! Just a few steps more!
16.Do some final configuration with your mic by using:
arecord -f S16_LE -r 60000 temp.wav17. This should start recording, while also displaying an error, saying that the rate of 60000 is incorrect, and the mic takes a different number. Copy this number, then use:
sudo nano ~/jasper/client/mic.py18. Use ctrl-W and search for 16000. Everywhere this appears, replace it with the number that you just copied. Then divide your number by 15.625. Then use ctrl-W to search for 1024. Put the quotient that you just found in the place of every 1024.
19. Finally, make sure your pyaudio is up-to-date with:
sudo apt-get install python-pyaudio – yes20. And now you should be good! Boot up Jasper and have fun! Use the following command to boot it up:
~/jasper/jasper.pyI also promised some other possibly helpful commands. Here are some:
The Jasper website recommends changing a setting in a certain file. I didn’t need to change it, but the file they recommend does not exist on the newest version of Raspbian. Use this command to access it:
sudo nano ~/lib/modprobe.d/aliases.confIf you need to, change:
options snd-usb-audio index=-2Into:
options snd-usb-audio index=0In general, don’t trust any of the alsa commands on the Jasper site, since alsa has been heavily updated since those commands were posted.
If your speakers aren’t working, your sound card might not be set correctly. Look at aplay -l, and find the item that seems to correspond to your speakers. Sometimes this can be tough to figure out, so if all else fails, try them all. The list should look something like:
    **** List of PLAYBACK Hardware Devices ****
  card 0: ALSA [bcm2835 ALSA], device 0: bcm2835 ALSA [bcm2835 ALSA]
  Subdevices: 8/8
  Subdevice #0: subdevice #0
  Subdevice #1: subdevice #1
  Subdevice #2: subdevice #2
  Subdevice #3: subdevice #3
  Subdevice #4: subdevice #4
  Subdevice #5: subdevice #5
  Subdevice #6: subdevice #6
  Subdevice #7: subdevice #7
  card 1: Device [USB PnP Sound Device], device 0: USB Audio [USB Audio]
  Subdevices: 1/1
  Subdevice #0: subdevice #0
Next, use:
sudo nano /usr/share/alsa/alsa.confUse ctrl-W and search for defaults, then find where the list of default settings start. Change the default ctl card and device to the speaker on the list.
Finally, one command to make sure your USB devices are connected. Run:
lsusbThis should display a list of USB devices. This helped me check if my mic was connected, as well as my mouse and keyboard.
Finally, if the fix with dtparam didn’t work, you may need to get a USB sound card. There are a lot of good options, and the Jasper website has a list of all compatible sound cards and other devices here. There is also a lot of documentation on how to get these working, and they are much more reliable than that garbage card on board. I used the Adafruit guide to get mine working. (after I decided that I couldn’t take anymore trashy audio and just got a new card)
But, haHA! You’re not done yet! That would be too easy.
The sound card will only work at all with dtparam=audio=off, but once that’s disabled, the sound card should work well, allowing you to record yourself, play it back through the speakers, play music, whatever. EXCEPT for Jasper (haha.) Jasper will run correctly, but you won’t hear any sound. There will be a lot of Alsa errors at the top of the feed, but these don’t matter and don’t affect anything. The fix I found is very obscure.
Boot the Pi with the speakers plugged into the sound card, and not the mic. Then, once it has booted, boot Jasper once. You will get an error regarding no mic. Then plug in the USB mic and try again. You may need to reboot a few times, Good luck to you.
Milestone Two
I didn’t expect my second milestone to be so soon. But, amazingly, my first milestone was only around twenty minutes before this one. I figured the “dtparam” fix for the audio (which I have added to my Jasper guide) and was able to run the mic and speakers at the same time. With this miraculous discovery, I was able to glitch my way into running Jasper correctly. It works as it’s supposed to, and takes in voice commands, but the amount of background noise makes it very difficult to get it to hear my commands. It works pretty basically: I say “Jasper,” then it goes “beep,” then I say my command, then it goes “beep,” then it says its response. However, there is a large delay in the speech-to-text translation that makes Jasper’s response come around 30 or 45 seconds after I say my command. I hope to improve this through modification, and also help it differentiate commands from background noise. I also think I might change its name to Jarvis, because I like Iron Man.
Milestone One
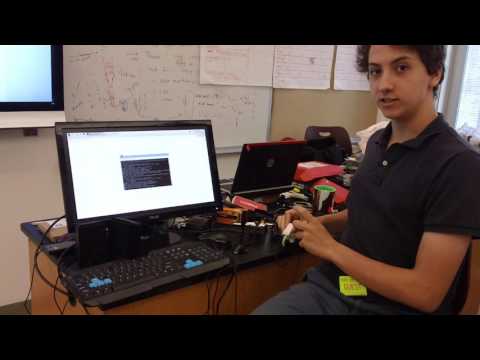
I got to my first milestone today, and I have to write about it now because I seriously doubt it will be working the next time I boot up. My main project is Jasper, which is a computer assistant running on a Raspberry Pi 3 Model B. A Raspberry Pi is a tiny, self-contained circuit board, capable of running basic operating systems and functioning as a normal computer. The computer is built on Python, which I knew coming into BlueStamp, making this project much easier for me than it would have been had I not had any experience. When I began working, I found myself able to snap every piece of hardware into place in a number of minutes, and thought that I would be dealing solely in software after that. I got the operating system working easily, and was able to start installing Jasper immediately.
The installation started off fine, and I found that most of the programming I would be doing would be with the command line more than Python. As I continued, I realized that documentation for the Jasper project was for an older operating system that ran on a totally different version of Alsa, the sound software used on the Raspberry Pi. This made everything take twice as long as it would’ve, since I had to track down every file I had to edit, and none were where they were supposed to be. I managed to get it done, however, and booted up Jasper for the first time. I was immediately hit with an error, which read “ImportError: cannot import name IncompleteRead.” This meant that the version of pip, an installation software, that came with the OS did not have the module that I needed, IncompleteRead. The command to fix it was “sudo easy_install – upgrade pip”, which just upgraded pip with all the new tools it needed. I ran it again, this time seeing “ImportError: No module name pyaudio”. This is another issue with outdated software coming with the OS. I used “sudo apt-get install python-pyaudio – yes”, which gave me the newest version of pyaudio and all the functions I needed. The next bug took me a while. After I restarted the program, I saw “IOError: [Errno Invalid sample rate] -9997”. I didn’t know what sampling rate was, and the file that controlled it was confusing. I did extensive research and found out that sampling rate, which is the rate that a computer translates frequency, was controlled by the RATE variable in the file mic.py, which can be found in ~/jasper/client/. My mic took a sampling rate of 44.1 khz, so I set the rate to 44100. What I didn’t realize was that RATE is defined 3 different times in the file, and I was only changing one. This took my longer than it should have, but I ended up sorting it out. After that, I got the bug “IOError: [Errno Input overflowed] -9981”. As far as I understand, this means that Jasper itself is receiving too much input, so this isn’t caused by one source alone. To fix this I first changed the CHUNK variable in mic.py, which controls how much data the program takes in at once, with a smaller size taking in more data more quickly. I set the size to 10000, which delayed the error but didn’t stop it.
This was when I first got Jasper actually running. He began transcribing everything I said, but didn’t make any sound. I realized that my speakers weren’t working at all. Using the command “aplay -l”, which normally lists all output sound devices, I got an empty list. My microphone seemed to work fine, but I couldn’t get the speakers to work no matter what I did. I did extensive research on this, finding no definite solutions, and eventually decided to reinstall Raspbian. When I booted it back up, I found something unsettling: now the speakers were showing up, but the mic wasn’t. This meant that the error had nothing to do with Jasper, which I hadn’t yet reinstalled, or the speakers, which worked fine on my laptop. The issue was the sound card, and how it interacted with the mic and speakers at the same time. I did a lot more research, again totally useless. I decided that I would reinstall Raspbian one more time, then get an USB sound card if it didn’t work. On this boot of Raspbian, they both showed up, and I was thrilled. I was able to record myself and play back my recording. I reinstalled Jasper and replicated everything I did before, finally booting him up. I heard him say “How may I be of service, Elias?” or something like that, and began transcribing everything he heard. It didn’t last long, and the “Input overflowed” error crashed it again. I rebooted the Pi the next day, and found that the mic was no longer showing up. I was really worried, because it took a crazy long time to get those both to work. I rebooted again, to find that the mic showed up, and the speakers did not. Through this process of error and despair I found that on every boot, the sound card works differently. After around 6 boots, I finally got both of the audio pieces to work. I didn’t turn off the Pi for the rest of the day, and went back to Jasper. I still don’t know if this is a problem with Raspbian, or the Pi itself. To fix the “Input overflowed” error, I reduced another source of input by setting all of my e-mails to “read”, so that Jasper didn’t have to load 3,582 emails every few seconds. This stopped the error entirely, and Jasper now runs well. Note: Throughout the process I would randomly get the error “IOError: [Errno Invalid input device (no default output device)] -9996”, usually during one of the later bugs. It didn’t seem to be connected to anything else, and it went away as randomly as it appeared. I have no idea what it meant, since it appeared even when all my audio was working.
Update: If I delete the sound card file, which is “dtparam=audio=on”, located in boot/config.txt, only the mic shows up. If I put it back, only the speakers show up. I have to suppress the urge to throw my entire project out the window.
Starter Project

For my starter project I did the Mini Piano Keyboard. It ran off of a microcontroller, and the board had three sources of input: a button, a potentiometer and the “keys”. The keys used capacitive sensors that detected the user’s fingers and registered with the microcontroller. Each part had to be soldered onto the board. I had never soldered before, but these joints were not too difficult to make, and making so many of them helped me learn the technique. The first two parts I added were the capacitors and the resistors. The capacitors are all near the microcontroller, which I added later, and the resistors are near the sources of input or LEDs. Next I added the switch, button, LEDs, potentiometer and header. The LEDs were the first polarized parts I had to put in, but I was able to orient them correctly in three ways. First, I could line up the flat edge of the bulb with the flat edge on the PCB. I could also measure the legs, with the shorter one being negative, and the longer being positive, or I could look inside the bulb at the two pieces of metal, with the larger piece being associated with the negative charge and the smaller with the positive. There was one LED that lit up when the system was on, and one that lit up when input was detected from the button or the keys. The header is used to add code or other data to the microcontroller or transmit the data on the chip to another computer, and was put at the very top of the board. The potentiometer was also polarized, but like the LEDs, I was able to line up the shape of the part with the shape on the board. This part was used to control the octave that the keys played at. It acts as an adjustable resistor, and the pitch of the speaker changed depending on how much voltage the potentiometer sent to the microcontroller.The button and switch were both straightforward to attach, similar to the small parts. The part I had the most trouble with was the microcontroller. I put it in at a bad angle, so that one side was higher than the other. I had done two solders on each side when I realized this. First I tried to heat the solders I had made and push the part through, but I couldn’t heat them all at the same time. Then I tried to desolder the joints, but a some solder went through the hole to the other side of the board, and I couldn’t reach it. By the time I finished this, I had burned one of the holes badly. I asked an instructor if they had any advice for me, and they decided that they should just remove the part in order to avoid damaging the chip. They did this quickly and safely, and only one leg broke off in the end. I was able to attach the chip again, this time at the correct angle, and I was able to solder the broken legs to the holes and make a conductive joint. I attached the speaker and battery holders last.
Next, I put the legs on and powered it up. I began to notice problems almost immediately. The power light flickered the first time I turned the machine on, so I reinforced the solders on the bottoms of the battery holders, and the power was more stable. After that, I quickly figured out that pressing the button was supposed to play the guitar intro to “Sweet Child of Mine” by Guns n’ Roses, but it sounded distorted and slow. I found that pressing down on the speaker made it sound clearer, which meant that the speaker was loose. I reinforced those solders and the tune sounded much better. There were more problems with the keys. At first, they only played once out of three presses. When I rebooted the circuit, they played fine, but whenever I didn’t have my finger on a key, the speaker would play a low C. The outcome was different every time I turned the machine on. To address as many of these as I could, I reinforced the solders on all of the resistors, which connected the keys to the microcontroller. This made the keys play much more reliably, and targeting a few more weak joints fixed the problem altogether. Now my keyboard works well, and I can play reliably.