Hi! My name is Derrick and I am going to be a junior at Lowell High School in the Fall. My Starter Project is the MiniPov and my main project is Home Automation with the Amazon Alexa.
I came to Bluestamp looking for a challenge and that is exactly what I got. I gained confidence and problem solving abilities and ways to workaround some software limitations. Guest speakers were interesting and provided a different point of view and perspective of what is to come. I really like Bluestamp because it showed me how to work around problems and to keep pushing to find solutions.
Presentation Video
Final
This is my final project and final log with Alexa Home Automation. Alexa can get data, make requests, and give post notifications with a bit of a (very unnecessary) workaround. Apparently I am one of the first to attempt this project at Bluestamp, and I really am glad that I was. I chose this project because I wanted to try a more software based project as I was pretty experienced with hardware. The documentation was very limited with the project and I take pride in completing it with such little prior information. With everything completed, Alexa can now open and close blinds, get data from sensors, notify me when certain events occur, and turn on appliances, all with a command and the Particle Photon.
var APP_ID = //replace with "amzn1.echo-sdk-ams.app.[your-unique-value-here]";

/**
 * The AlexaSkill prototype and helper functions
 */

var http = require('https');
var AlexaSkill = require('./AlexaSkill');

/*
 *
 * Particle is a child of AlexaSkill.
 *
 */
var Particle = function () {
    AlexaSkill.call(this, APP_ID);
};

// extend
Particle.prototype = Object.create(AlexaSkill.prototype);
Particle.prototype.constructor = Particle;

Particle.prototype.eventHandlers.onSessionStarted = function (sessionStartedRequest, session) {
    console.log("Particle onSessionStarted requestId: " + sessionStartedRequest.requestId + ", sessionId: " + session.sessionId);
};

Particle.prototype.eventHandlers.onLaunch = function (launchRequest, session, response) {
    console.log("Particle onLaunch requestId: " + launchRequest.requestId + ", sessionId: " + session.sessionId);
    var speechOutput = "....skynet active..";

    response.ask(speechOutput);
};

Particle.prototype.eventHandlers.onSessionEnded = function (sessionEndedRequest, session) {
    console.log("Particle onSessionEnded requestId: " + sessionEndedRequest.requestId + ", sessionId: " + session.sessionId);
};

Particle.prototype.intentHandlers = {
    // register custom intent handlers
    ParticleIntent: function (intent, session, response)
    {
		var sensorSlot = intent.slots.sensor;
		var deviceSlot = intent.slots.device;
		var onoffSlot = intent.slots.onoff;

		var sensor = sensorSlot ? intent.slots.sensor.value : "";
		var device = deviceSlot ? intent.slots.device.value : "";
		var onoff = onoffSlot ? intent.slots.onoff.value : "off";
		var speakText = "";

		console.log("Sensor = " + sensor);
		console.log("Device = " + device);
		console.log("OnOff = " + onoff);

		var op = "";
		var pin = "";
		var pinvalue = "";

		// Replace these with action device id and access token
		var deviceid = "deviceid";
		var accessToken = "accessToken";

		var sparkHst = "api.particle.io";

		console.log("Host = " + sparkHst);

		// Check slots and call appropriate Particle Functions
		if(sensor == "moisture"){
			speakText = "moisture is 2800";
			op = "getWater";
		}
		else if(sensor == "door"){
			speakText = "door is open";
			op = "getDoor";
		}
		else if(device == "blinds")
		{
			pin = "D2";
		}

		// User is asking for temperature/pressure
		if(op.length > 0)
		{
			var sparkPath = "/v1/devices/" + deviceid + "/" + op;
			console.log("Path = " + sparkPath);

			makeParticleRequest(sparkHst, sparkPath, "", accessToken, function(resp)
			{
				var json = JSON.parse(resp);

				console.log(sensor + ": " + json.return_value);

				response.tellWithCard("soil sensor " + sensor + " has a moisture of " + json.return_value , "Particle", "Particle!");
			});
		}
		// User is asking to turn on/off lights
		else if(pin.length > 0){
			if(onoff == "open")
			{
				pinvalue = "";
			}
			else
			{
				pinvalue = "c";
			}

			var sparkPath = "/v1/devices/" + deviceid + "/servoHandle"+ pinvalue ;
			console.log("Path = " + sparkPath);
			var args =pinvalue;

			makeParticleRequest(sparkHst, sparkPath, args, accessToken, function(resp){
				var json = JSON.parse(resp);

				console.log("Temperature: " + json.return_value);
				response.tellWithCard("OK, " + blinds +" are "+ onoff, "Particle", "Particle!");
				response.ask("Continue?");
			});
		}
		else{
			response.tell("Sorry, I could not understand what you said");
		}
    },
    HelpIntent: function (intent, session, response)
    {
    	var rand = Math.floor((Math.random()*4)+1);
    	//if(rand == 1)
    	response.ask("k");

    }
};

// Create the handler that responds to the Alexa Request.
exports.handler = function (event, context) {
    // Create an instance of the Particle skill.
    var particleSkill = new Particle();
    particleSkill.execute(event, context);
};

function makeParticleRequest(hname, urlPath, args, accessToken, callback){
	// Particle API parameters
	var options = {
		hostname: hname,
		port: 443,
		path: urlPath,
		method: 'POST',
		headers: {
			'Content-Type': 'application/x-www-form-urlencoded',
			'Accept': '*.*'
		}
	}

	var postData = "access_token=" + accessToken + "&" + "args=" + args;

	console.log("Post Data: " + postData);

	// Call Particle API
	var req = http.request(options, function(res) {
		console.log('STATUS: ' + res.statusCode);
		console.log('HEADERS: ' + JSON.stringify(res.headers));

		var body = "";

		res.setEncoding('utf8');
		res.on('data', function (chunk) {
			console.log('BODY: ' + chunk);

			body += chunk;
		});

		res.on('end', function () {
            callback(body);
        });
	});

	req.on('error', function(e) {
		console.log('problem with request: ' + e.message);
	});

	// write data to request body
	req.write(postData);
	req.end();
}
ParticleIntent what is the soil's {moisture|sensor}
ParticleIntent return {moisture|sensor}
ParticleIntent get soil {moisture|sensor}
ParticleIntent is my {door|sensor} open
ParticleIntent is there something between the {beam|sensor}
ParticleIntent check {door|sensor}
ParticleIntent check {moisture|sensor}
ParticleIntent check {beam|sensor}
ParticleIntent {open|onoff} my {blinds|device}
ParticleIntent {close|onoff} my {blinds|device}
ParticleIntent {open|onoff} the {blinds|device}
ParticleIntent {close|onoff} the {blinds|device}

HelpIntent help
HelpIntent help me
HelpIntent list commands
HelpIntent list me the commands
HelpIntent what are the commands
HelpIntent tell me the commands
HelpIntent what can I say
HelpIntent how can I turn on a light
HelpIntent show me the commands
int pirState = LOW;
int detected = 0;
int pirVal = 0;

int previousDoor=0;
int doorStatus = 0;

int sensorState = 0;
int lastState = 0;
int broken =0;

Servo servoFS;

void setup()
{
  pinMode(0, INPUT);
  pinMode(2, INPUT);
  digitalWrite(2,HIGH);
  Particle.variable("pir", detected);

  Particle.variable("doorStatus", doorStatus);
  Particle.variable("preDoor", previousDoor);

  Particle.function("getWater", getWaterHandler);

  Particle.function("servoHandle", servoHandler);
  Particle.function("servoHandlec", servoCloseHandler);

  Particle.variable("lb", broken);

  Particle.function("getDoor", getDoor);

  servoFS.attach(0);

}

//servos
int servoHandler(String args)
{
    servoFS.write(0);
    delay(7000);
    servoFS.write(90);
    return 1;
}

int servoCloseHandler(String args)
{
    servoFS.write(180);
    delay(7000);
    servoFS.write(90);
    return 1;
}

//soil moisture
int getWaterHandler(String args)
{
    int soilM = analogRead(3);
    String callback = args;
    if(callback == "error" || strlen(callback)>10)
    {
        return -1;
    }
    else
    return soilM;
}


//beam break

void lb()
{
   int rawRead = analogRead(0);
   if(rawRead>1)
   {
       broken = 0;
       delay(5000);
   }
   else
   {
       broken = 1;
       Particle.publish("lb", "broken");
   }
}

void loop()
{
  pir();
  door();
  lb();
}


/*pir motion sensor
string hold is there to keep the console log limited to one change in motion, as it only polls/logs 1 once.
dectected is raw detection from the sensor, at max refresh rate the sensor puts out 10 polls/ detection.
pirVal is the raw input and pulse from the sensor
*/
void pir()
{
  String hold;
  pirVal = digitalRead(0);
  if (pirVal == HIGH)
  {
    if (pirState == LOW)
    {
      detected = 1;
      pirState = HIGH;
      hold = hold+"i";
      Particle.publish("detected", PRIVATE);

    }
  }
  else
  {
    if (pirState == HIGH)
    {
        detected = 0;
        pirState = LOW;
        hold = "";
    }
  }
}

// door
  //doorStatus = analogRead(1);
  // when the door is closed, sensor returns low value, open returns insanely high values
  // stop overload of 1's
  //status = 1 open
  //status = 0 closed
  //status = 2 open but no return to ifttt

void door()
{
  if(analogRead(1) > 5)
  {
      if(previousDoor>0)
      {
          delay(6000);
          doorStatus = 2;
      }
      else
      {
        doorStatus = 1;
        previousDoor = 1;
        Particle.publish("doorStatus","open");

      }
  }
  else
  {
    doorStatus = 0;
    previousDoor = 0;
  }
}

int getDoor(String args)
{
    return doorStatus;
}
#include "RelayShield/RelayShield.h"

RelayShield myRelays;
Servo servoFS;

void setup()
{
    myRelays.begin();
    Particle.function("getWater", getWaterHandler);
    Particle.function("getWater2", getWaterTwoHandler);
    //IFTTT relay control
    Particle.function("relayOne", relayOneHandler);
    Particle.function("relayTwo", relayTwoHandler);
    Particle.function("relayThree", relayThreeHandler);
    Particle.function("relayFour", relayFourHandler);
    Particle.function("allRelays", allRelaysHandler);
    //servo
    Particle.function("servoPull",servoHandler);
    servoFS.attach(0);
}

void loop()
{
    delay(250);
}


int relayOneHandler(String args)
{
    if(myRelays.isOn(1))
    {
        myRelays.off(1);
        delay(100);
        return 0;
    }
    else
    {
        myRelays.on(1);
        delay(100);
        return 1;
    }
}

int relayTwoHandler(String args){

    if(myRelays.isOn(2))
    {
        myRelays.off(2);
        delay(100);
        return 0;
    }
    else
    {
        myRelays.on(2);
        delay(100);
        return 1;
    }
}

int relayThreeHandler(String args){
    if(myRelays.isOn(3))
    {
        myRelays.off(3);
        delay(100);
        return 0;
    }
    else
    {
        myRelays.on(3);
        delay(100);
        return 1;
    }
}

int relayFourHandler(String args){
    if(myRelays.isOn(4))
    {
        myRelays.off(4);
        delay(100);
        return 0;
    }
    else
    {
        myRelays.on(4);
        delay(100);
        return 1;
    }
}

int allRelaysHandler(String args){
    for(int i=1; i<5; i++)
    {
        if(myRelays.isOn(i))
        {
            myRelays.off(i);
            delay(100);
        }
        else
        {
            myRelays.on(i);
            delay(50);
        }
    }
    return -1;

}

int servoHandler(String args)
{
    servoFS.write(180);
    delay(10000);
    servoFS.write(90);
    return 1;
}
int getWaterHandler(String args)
{
    int soilM = analogRead(0);
    String callback = args;
    if(callback == "error")
    {
        return -1;
    }
    else
        return soilM;
}

int getWaterTwoHandler(String args)
{
    String callback = args;
    int soilSensorTwo = analogRead(1);
    if(callback == "error")
    {
        return -1;
    }
    else
        return soilSensorTwo;
}
Milestone #3
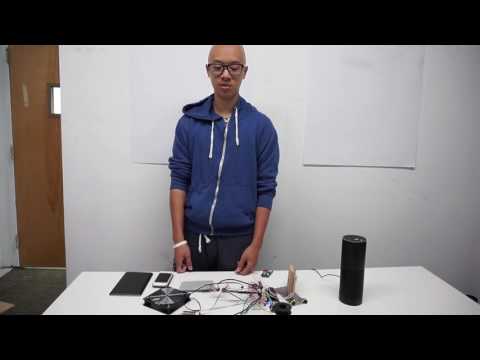
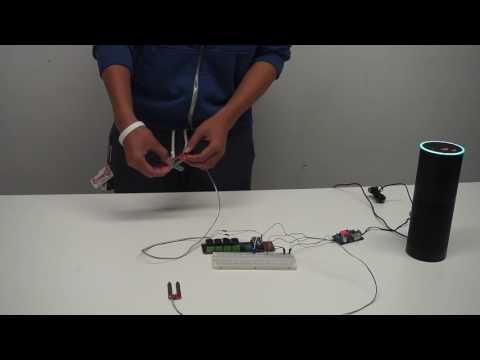
The milestone this time around is being able to post notifications. Alexa is connected to my Nexus 7 through bluetooth, and plays a pre-recorded message of Alexa saying that there are notifications to be checked. The photon is hooked up to a door sensor, which is effectively a hall effect sensor, and also connected to an IR Break Beam Sensor. A Hall effect sensor is a transducer that varies its output voltage in response to a magnetic field. If the analog read from the door sensor is greater than five it means the door is open. Similarly if the analog read of the break beam is equal to zero, the beam is broken. When either of these conditions are met, particle.publish pushes a unique label for each sensor. IFTTT picks up these posts and recognizes them, sending them to different channels such as SMS, Gmail, and IF Notifications. These channels can send a text, gmail, or phone notification when the sensor’s conditions are met.
This modification is very interesting because it is a serious workaround for Amazon Echo users and developers. It enables the echo to notify you when something happens, which is not natively supported by Amazon(although they really should). This workaround however only allows one audio file to be played and I recommend using an cheap android device as when it plays through an audio file it doesn’t know when to pause. This means that you can only have one song downloaded, which kinda sucks.
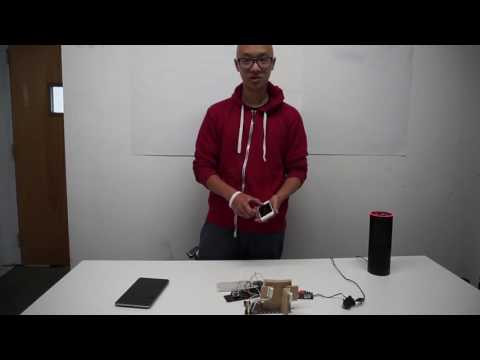
Milestone #2
My second milestone for Alexa Home Automation is being able to return values from the Particle Photon and send them to Alexa. I am using two soil sensors since I already have them as data for the Photon to post. Most of the electronics are the same as last time, with the same 12V source down volted to 5V this time, and an addition of two soil sensors. The real change is in the code. I have developed an AWS Alexa Skill to grab data. On my photon, I read the analog signal from the two soil sensors. The soil sensors input a 5V voltage across the stakes, however it is an open circuit and only returns a value if the circuit is closed with an external conductor such as water, metals, or human contact between the stakes. The analog signal is uploaded into the Particle API with the particle.function(String card, function) call and I have two handlers for requests , one for each sensor. Soon I will make the code more efficient with a single handler with a String argument to designate the correct sensor to return data from. From AWS, using my photon’s device ID and access token, I make a request to Particle’s REST API (api.particle.io/v1/devices/{DEVICE_ID}) for either the functions getWaterHandler or getWaterTwoHandler which returns either analogRead(0) or analogRead(1) respectively. From Alexa’s end I have intents and utterances to provide variations of what the user might want to say. The intent “sensor” is set to either give “one” or “two” which differentiates between the sensors. Then Alexa just says the value of the selected moisture value and says it with a string through “literal” and tellwithCard.
The Photon was easy to deal with as I already knew C, however, on the backend with AWS, I had no idea what I was doing initially. My Node and javascript skill was very subpar and made this very challenging for me; however, I eventually got the flow of it by going line by line through the code. I learned so much about node which is very important for IoT. I usually struggle with javascript when I do my projects and look at some sort of documentation. However, this time around there wasn’t any documentation or recent projects similar to mine. This was a very good experience because node.js is completely out of my comfort zone, and I really hate doing backend and web development. However, in the end, I am really glad that I went into this without too much external assistance as it really does give me confidence and pride in what I have done.
Milestone #1
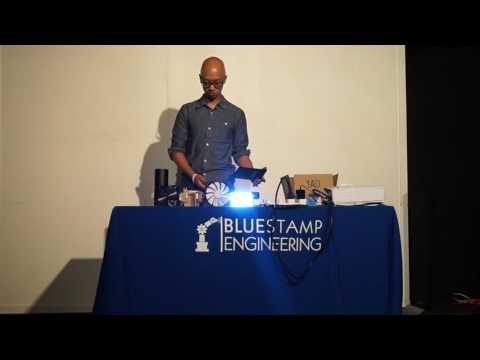
My first milestone for Alexa Home Automation is simply giving the Alexa a command and having it execute an event handler on my photon. More specifically I am able to tell Alexa to turn on a specific relay and it will switch it on.
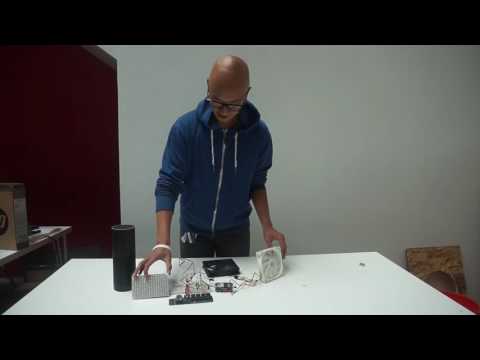
I wrote few event handlers on the Particle Photon to handle particle “subscriptions” which are like requests. To handle requests I just used IFTTT (If this then that) to relay commands from the Alexa to handlers on the Particle. The Photon is hooked up to a relay shield with 3 loads to show current flow and draw. The relays and the photon are powered by 5VDC stepped down from 8.8VDC from a buck converter. The AC source is converted by a rectifier and converted from 120VAC to 12VDC 1A. The buck converter steps down voltage to increase current, in this case 12V(1A) = 8.8V(1.364A). The extra current is needed to power more devices in parallel, as voltage is constant but current drops occur. I used an LED panel and two fans as loads for the relay, more for a visual display that the relay is switched on. A relay uses an electromagnetic switch to physically switch loads on and off, with the option of having it normally open (NO) or normally closed (NC). The relay shield has 4 channels and takes a DC input of 7-20V which it converts to 5V across all the relays and the photon. I have an 8.8V 1.364A rail for all the loads and the shield. All the loads are connected to a normally open channel. The full process is from the command from Alexa to the IFTTT servers then to the Particle Photon and to the relays.
A few challenges I ran into included problems with the solid state relay and issues with AWS Lambda. I had issues with the solid state relay because solid state relays use the AC wave to switch the relay, requiring an alternating sine wave. And since most appliances use 120VAC, and I can only work with up to ~48VAC, it was kind of useless so I decided to just ditch it and use a standard relay. For AWS Lambda, the process of creating skills is not as straightforward for beginners and I decided to use IFTTT because it was much more simple to implement for a simple task requiring only communication from Alexa to the photon and not from the photon to Alexa.
I learned a lot about solid state relays, relays, and the most from AWS and alexa.dev about web developmemt and backend coding. It is still confusing how Alexa’s handlers work, but hopefully I get more fluent in Node.js and backend dev.
MiniPov
The MiniPov uses x3 AAA batteries in series as a 4.5V source. The source flows into a 100 uF capacitor which provides a stable voltage, compensating for voltage drops with the stored charge within the parallel plates held by an electric field. This stabilized voltage flows into a 2.2k ohm resistor and a 47 ohm resistor and then into the arduino based IC. The IC, a microcontroller, controls the LEDs timings and takes the timing from a potentiometer (10k ohm) which determines the speed at which the LEDs displays text. The IC uses a ceramic resonator (12Mhz) as a clock for LED timings. Information from the IC to determine color and timings are then moved to the NPN transistors after reducing voltage with a 2.2k ohm resistor. The NPN transistor regulates voltage of the red, green and blue channels. Each LED has 4 pins due to red, green, and blue inputs and then a ground. The LEDs receive a lower voltage after passing through a 47 ohm resistor. The IC can be programmed to display different text/images through a Processing generated sketch where you can import the files. The USB B input on the board is filtered by two diodes (3.7v) to ensure there is no backflow of current in an event of ESD. I also found out that diodes are used on data lines to protect against ESD (electrostatic discharge), whether from a failed component or from human error, e.g. contact with PCB.
I could not get the firmware of the MiniPov to work on Windows 10, as drivers were designed for Windows 8. I used an instructor’s PC which had Windows 7 to download drivers and load the firmware. Before that however I retried installing the drivers many times and just to check I re-soldered the USB B port and tried my peer’s Windows 10 computer and it did not work.
I discovered a new component which I previously did not know of which is the ceramic resonator. I learned that it is a piezoelectric ceramic with pins and when powered it generates an alternating/oscillating signal of a specific frequency, in this case 12Mhz. The thickness of the ceramic determines the output resonant frequency.

MiniPov v4 Schematic Img Src: https://github.com/adafruit/Adafruit-MiniPOV4-Kit/tree/master/Hardware
Software: https://github.com/pepe-roni/MiniPov-V4