
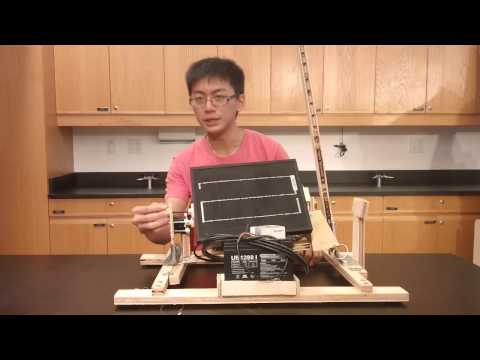
e is Dave and I’m a rising senior at Staten Island Tech. I decided to apply for BlueStamp Engineering when representatives came to talk in my school. I wanted to major in engineering, but had no prior experience. I felt BlueStamp would be a great opportunity to experience engineering. For the program, I picked an ultrasonic parking sensor as the starter project since I thought it was a cool thing to build. After that, I went on to build my intensive project: the sun-tracking solar panel. I found this project from http://www.instructables.com/id/Portable-Sun-Tracking-Solar-Panel-With-A-Windup-Cl/?ALLSTEPS. this structure helps adjust the solar panel to have it face the sun in any angle. With the Intermatic clock motor, the solar panel would rotate at the same rate as the sun, making the solar panel always face the sun. I had a great time building and talking with the helpers at this program. Below are my posts building the sun-tracking solar panel and the ultrasonic parking sensor.
![CAM00107[1]](http://bluestampengineering.com/wp-content/uploads/2014/06/CAM0010711.jpg)
![CAM00108[1]](http://bluestampengineering.com/wp-content/uploads/2014/06/CAM001081.jpg)
I got a little help building the project from a previous BlueStamp student, Kelly, who accomplished the similar project , so the building materials are similar to hers. Also, I included the basic dimensions for the base, arm, and extension, the long piece of wood that holds the arm and has angle dimensions.
Building Materials: BOM Template Solar Tracker
Sun Tracking Solar Panel Dimensions: Sun Tracking Solar Panel Dimensions
Schematics:
![CAM00112[1]](http://bluestampengineering.com/wp-content/uploads/2014/06/CAM001121.jpg)
Third Milestone
Hey guys,
The last milestone was my proudest milestone because the milestone was the hardest to accomplish. After getting the solar panel’s arm onto the base, the torque for the motor was too weak for the solar panel to rotate. I went to try many different ideas to get the solar panel to rotate. I first requested the purchasing of roller bearings, which was able to decrease the friction of the threaded rod’s motion. In order to place the roller bearings, I need to have the threaded rod straight, which took me some time for me to create a new part of the arm in order to get the threaded rod straight. I super glued the roller bearings on the wood extension so that it would be able to stay in place. After securing the roller bearings properly, I went to put the threaded rod with the solar panel through the bearings. Sadly, the bearings didn’t decrease the torque enough for the solar panel to turn. Then, I created a new base for my motor because I realized my gear mesh wasn’t locked properly with the threaded rod’s gear and it prevented the solar panel from moving. I placed the motor underneath the threaded rod’s gear so that if the solar panel’s weight was bringing the gear down, it would still mesh. I then placed dumbbells on the other end of the solar panel’s mount to decrease torque needed to rotate the solar panel. I got another block of wood to bring the motor up. With that, the solar panel worked!
Second Milestone
Hey guys,
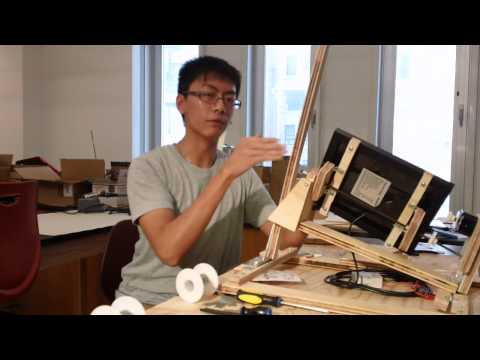
I accomplished my second milestone for my intensive project: constructing my solar panel arm. Constructing the arm was very easy at first. I started constructing the wooden part of the base without any trouble. When I got to creating the mount to hold the solar panel, I experienced several problems. First, I found out my original plan of drilling through the frame and inserting the threaded rod through wouldn’t work because the back of the solar panel isn’t entirely empty. The threaded rod is a long fastener made of metal that can tighten Instead, the back had a box connecting to the solar panel, which would block the threaded rod from going through the solar panel. This made me have to create a wooden structure for the solar panel in order to create a way for the threaded rod to go through. After getting the threaded rod and hex nuts for the solar panel, I tried to mount the solar panel on the arm but encountered another problem. I found out that the motor doesn’t provide enough torque for it to move the solar panel when the weight coming down increases. This made me have to use an adhesive: Loctite. It was able to lock two metals together very tightly, but would be irreversible. I used the Loctite for the threaded rod with the hex nuts and the gear, which made the solar panel to have enough torque to move everything around! Finally, I was able to accomplish the numerous parts of the second milestone.
First Milestone
Hey guys,
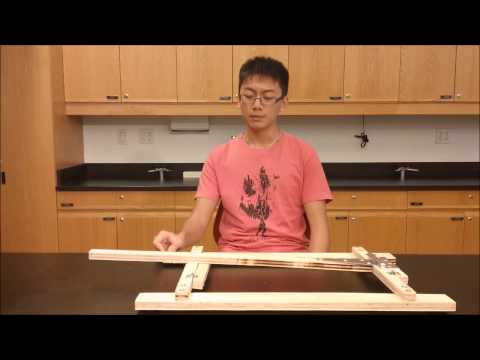
I have finally accomplished my first milestone after 2 weeks working on my intensive project: the sun tracking solar panel. For my first milestone, I constructed the base. The base seemed to be quite simple, but I experienced several problems working on it. I first tried to use a drill to get my screws in the wood, but the drill’s powerful force caused the screw to be stripped. This made me to manually screw using a simple screwdriver. Another issue was messing up the wood pieces. A couple of times, I had to cut another piece of wood using a saw because either I miscalculated the dimensions, I got half of a screw stuck in the wood, or I cracked the wood. These problems were all easily fixable, but it became a very time-consuming and a physically tedious task to finish the first milestone. Happily, I’ll be moving onto my next milestone: constructing the arm and placing the solar panel on the arm.


![CAM00111[1]](http://bluestampengineering.com/wp-content/uploads/2014/06/CAM001111.jpg)
Starter Project
Hey guys,
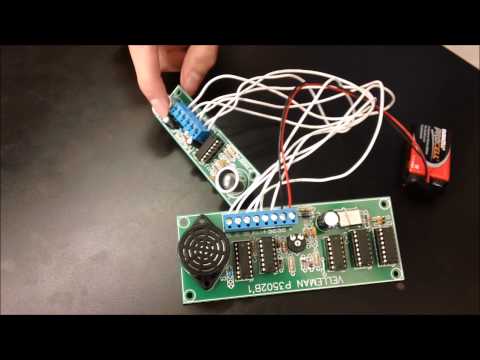
After my first few days at BlueStamp Engineering, I have completed my starter project. I’ve decided to build the car sensor. I chose this project because the sensors were pretty interesting and the idea itself sounds fun to build. I was first challenged by this starter kit because I wasn’t accustomed to its manual guide. After several minutes I was able to figure out how each part was labelled and how the outline looks. After assembling all the parts shown by the diagram, the sensor didn’t respond at all. I was at first a bit overwhelmed because finding out my error would be difficult to detect. After seeking guidance, I found out my mistake wasn’t anything major, I didn’t place all my parts correctly. The official part labels were so tiny that I wasn’t aware the part names were on the part. I switched a few back correctly and the sensors worked perfectly! Besides its inability to detect objects very closely, the project worked. Although it listed a 12 V source requirement for the project, the 9 V battery worked just fine. After the completion of this mini-project, I learned how instructions and planning are crucial for constructing the final product correctly. My next step now is to construct the intensive project: the sun tracking sun panel.