My name is Christian. I will be a 10th grader at Bellaire High School next year. For my starter project, I made an electroluminescent wire, also called an EL wire. For my more intensive project, I did a mini wind turbine which produced energy by rotating a neodymium magnet between coils of copper wire.
Final Project
Steps for Building a Wind Turbine

Main Project
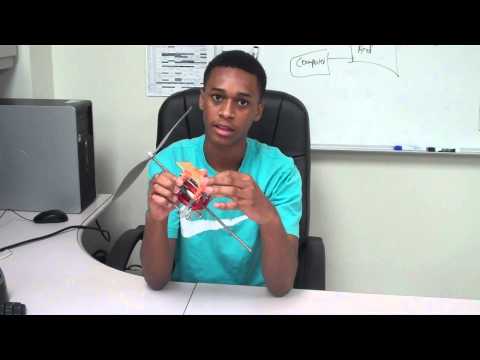
For my main project I decided to do a mini wind turbine. The wind turbine is an air core alternator, which means there is a neodymium magnet in the center that rotates in between copper coils to create electricity. I followed a design that was similar to one on gotwind.org’s page on a mini DIY wind turbine. The description wasn’t good instructions, but I was able to somewhat base my design off of it. I had to change the plate design and the circuit wasn’t explained, but I changed that and did my own with added diodes, a capacitor, and a resistor.
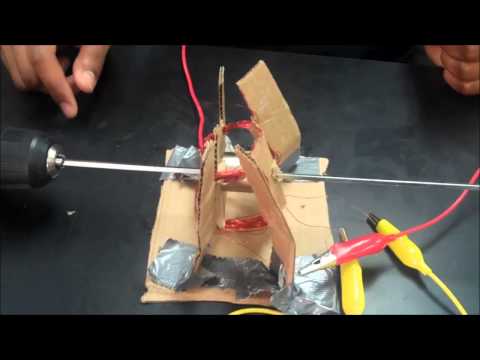
My second milestone was building the actual wind turbine, which I built out of a material called lexan. I fixed the magnet onto the shaft with a nut on each side and I secured the plates together with 4 bolts. I wrapped the wires on both sides of the magnet 320 times. I also made the circuit to change the AC current to DC current. The AC current from my wind turbine caused the LED to blink as current passed through it from the copper wires. The current would look like a big wave on the voltage reader and it would go positive and negative. As the voltage reached 0 and was going negative or positive, the light will turn off. I thought that it would look better if the LED lighting was constant. I arranged diodes in the circuit to make a full wave rectifier, which restricts the flow of electrons and keeps them from going negative. I also added a capacitor to hold the energy as the voltage from the wind turbine.

My first milestone was building a prototype for my wind turbine. I built the prototype to test to see if my design would work and how it needed to be made. The first one I made did not work because I wrapped my wire coils the wrong way, causing no current to be made. Another problem with the first design was that the wire coils weren’t connected. I made the next design with the 35 copper wires wrapped parallel with the magnet.I connected the separate coils of wire together with a gator clip. I spun the rod with a drill and was able to create a current.
EL Wire
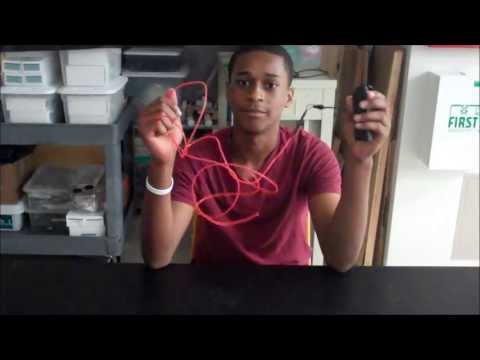
For my starting project, I did an electroluminescent wire, also called an EL wire. An EL wire is a long thin wire that glows when an alternating current passes through it. For my project I created a connection from the transistor, the power source, to the actual wire itself. I soldered the wires together and tightened the whole connection with a heat shrink. It was a good but difficult experience, this being the first time I’ve ever soldered. It was also difficult to shrink the heat shrink, especially since I was doing it wrong at first. In the end, I finished my project without any critical errors the first time.