
INTRODUCTION:
My name is Charmie JB and I am a sophomore at Promise Academy. Also I am a student at Blue Stamp Engineering. I first found out about BlueStamp when Robin came to my school to give us a demo and I was just amazed by the projects he showed us. I never considered engineering to be interesting but Robin proved me wrong, from that day on I knew I had to be in this program. BlueStamp gave me the option of what projects I wanted to work on as my starters and as my main. My starter project was originally to put together an EL (electroluminescent) Wire but I was finished in 10 minutes, so my instructor gave me another project to work on. He asked me to put together an alarm system. He gave me the kit and I got to work. My main project was pretty cool. I chose to build a system for when I walk through the door music starts playing. Its tough work but the challenges are what makes it so special.
CODE:
https://docs.google.com/document/d/1PLNUS8w9mZy_RCRgkBNTQqzbrkUjlQ2NVQFJM64rli4/edit?usp=sharing
 Final Blog Post
My final project is finally done but there are some technical difficulties. However, it still works! It was hard work building the hardware and fixing the software. The song I choose for my final project was “Wobble Wobble” by VIC. The way my project works is there is a magnet taped to a door and the arduino and player shield are connected to the speakers and computer. There is a reed switch that is connected to the player shield, which detects when the magnet is near or far. When the magnet is near, music doesn’t play but when the magnet is far, music starts playing. Click on the video below and it will show you how it works.
FINAL VIDEO PROJECT
HALL EFFECT SENSORS:
There were a lot of things I used for my main project to work; one of the main items I used was a Hall effect sensor. A Hall effect sensor is a basically a transducer that detects when a magnet is near. In my project the Hall effect sensor is supposed to detect when the magnet is moved away. When the magnet is moved away music is supposed to start playing. The theory of the Hall effect sensor is when a magnet is present the magnet pushes on the charge carriers. When pushed on the charge carriers try to move away. When the charge carriers are pushed there is a difference in voltage, that’s when the Hall effect sensor comes in and measures the change in voltage. I’ve installed an LED that will start blinking when the Hall effect sensor detects a magnet is near. I had wired the Hall effect sensor to a proto shield that is also connected to an arduino and a player shield. I had to write a certain code so the arduino can work with the hall sensor:
//int value_of_hall_sensor = analogRead(hall_sensor); //variable that stores the value on A2
while(value_of_hall_sensor<1000)
{
digitalWrite(led, HIGH);
Serial.println(value_of_hall_sensor);
delay(100);
digitalWrite(led, LOW);
}
When I was wiring it I had to make sure I was placing the pins on the Hall effect sensor the right way because not every line on the proto shield is connected to each other. I used the data sheet to figure out where each pin needs to be placed. Since the Hall effect sensor was too sensitive I decided to use a reed switch instead.


MUSIC THROUGH ARDUINO:
Today I have reached my second milestone for my project and I’m very excited. I was able to make music play through an arduino and player shield. Basically I have a micro SD card where I uploaded music, which is inserted into the player shield, and I have an Arduino with a certain code uploaded to it to make the song play. During this process I needed an arduino, player shield, arduino cord, speaker, and computer with arduino software. First I needed to find an mp3 file that was encoded at 192kbps and download it on the micro SD card, but the file that I chose was not encoded at 192kbps. Make sure the music file is named ‘track001.mp3’. That was my first problem trying to figure out how to convert the bit rate, I went on the internet to download a software that would convert the bit rate for me but they didn’t work. It turned out that iTunes was able to convert it for me with no problem. When I had completed that process, I needed to download the libary ‘SdFatLib.h’ and ‘mp3 player example sketch code.’ I was able to find both files on this website https://www.sparkfun.com/tutorials/295. When I had downloaded SdFatLib , the tutorial said I needed to change this specific code:
Unzip sdfatlib, and place the folder in Arduino->libraries. Place the MP3 Player Example Sketch in your sketchbook.
Before the MP3 Player Example sketch can work with the shield, we need to tweak sdfatlib a bit. The existing library will use the default ATMega328 CS pin, which is incorrect in this case. To fix this, open the file
…/arduino-0022/libraries/SdFat/Sd2PinMap.h
and change the line
uint8_t const SS_PIN = 10;
to
uint8_t const SS_PIN = 9;
It turned out that you didn’t need to change the code because a very kind person already updated it for us. Here’s where you can find her library http://www.billporter.info/2012/01/28/sparkfun-mp3-shield-arduino-library/ . Now that I had that all done I uploaded the code to the arduino, connected the player shield to arduino and connected the speakers to the computer and I was ready to go. Earlier I had soldered the pins to the player shield and I connected the headers pins into the socket on the arduino.
LIGHTING UP AN LED W/ AN ARDUINO AND BREADBOARD:
My instructor gave me a mini project to help me understand how Arduino’s and Breadboards work. He asked me to light up an LED using an arduino and a breadboard. So basically what I have learned is that arduino’s are little computers that can work with any type of circuits. The hardware consists of a simple open source board and the software is a standard programming language complier and a boot loader. When using an Arduino you can make your own code. Each code has a significant meaning to it for the Arduino to work properly. The codes are divided into 3 different parts structure, values, and functions. You can use arduino’s for many things for example lighting up a LED. A breadboard is a base for prototyping, basically when using a breadboard no soldering is required. They allow you to make quick circuits, test out ideas before making a more permanent Printed Circuit Board *. To make my LED light up I used a 330 Ω resistor, LED, arduino cable cord, computer with arduino software installed, breadboard, and jumper wires. So I have this code for the arduino to where it is program for it to light up the LED for half seconds and turn off for half seconds. (As shown below).
digitalWrite(led, HIGH); // turn the LED on (HIGH is the voltage level)
delay(500); // wait for a second
digitalWrite(led, LOW); // turn the LED off by making the voltage LOW
delay(500); // wait for a second
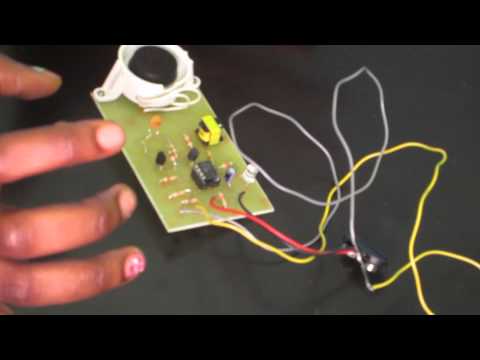
MY ALARM KIT STARTER PROJECT:
Well my starter project that I chose to do is a C6703 Window/Door Burglar Alarm Kit. It used a 2 transistor oscillator modulated by an IC circuit to provide a loud irritating sound when triggered by an SCR latching circuit. SCR triggers on as soon as the contacts of a small magnetic sensitive reed switch opens.* The LED lights up when the trigger is set off. My project contains an electrolytic capacitor, disc capacitor, large piezo, transistors, resistors, reed switch, transformers, socket, battery snap, PC board, and wire. An electrolytic capacitor has to go in the right direction or else it will cause the circuit to short. Disc capacitors that are used for isolators can be inserted in any direction. The large piezo is a vibration sensor used for flex, touch, vibration, and shock measurments. Transistors are used to amplify and switch electronic signals and electrical signals. Resistors resist current. A reed switch is an electrical switch operated by a magnetic field (used as a proximity switch in my project). A transformer is an electrical device that transfers energy between winding circuits. The capacitor, resistors, and transistor make an oscillating wave sound which the IC chip reads and sends to the speakers. A challenge I faced was that the sound did not go off because the transistors were not placed in the circuit the right way. Just a little reminder, make sure your parts are put in the right way and the right place.
REFLECTION:
My time at Blue Stamp Engineering was pretty interesting; I learned so many new things. I learned about things that my friends wouldn’t even know exist. What I like about BlueStamp is that it gives you the opportunity to try something new. I never considered I would be perusing an engineering career but after being a student at BlueStamp I just might consider it. I got a chance to meet new people and face new challenges. On a regular day a challenge that I thought was world ending would be my hair looking crazy or my make up not on right but BlueStamp made me realize there are bigger challenges in life then realizing your hair not looking nice. Also at BlueStamp the instructors helped me overcome these challenges. They helped me understand that without giving up you can really accomplish something great. The only thing I didn’t like was the timing but sometimes life is about making sacrifices.