Final Review
I first heard about BlueStamp while checking my grades online in boredom. I went to my Schoolloop(online grade-posting website) email and saw that the computer programming teacher had posted a flier indicating that two engineers from an engineering program were going to be visiting the computer programming class during second period. I had second period free, so I decided to make my way to the classroom that day and sit in on the presentation. I met my friend Kegan there and was quite impressed by the projects Dave and Robin (the two engineers) showed off. I signed up with my name and email on the iPad mini Robin passed around. I applied to the program and got in, but had no real idea what I was going to do or what engineering really is. During the first week of the program, I learned a lot and felt like I was really getting stuff done. In later weeks, though, I kind of lost direction and wasn’t really sure what I wanted to do with my main project. Eventually, toward the end of the program, I got my act together and started real work. I got a lot accomplished in a relatively short space of time and was eventually able to finish the project at the very end. The staff was extremely helpful, and I probably wouldn’t have gotten anywhere without them. One was kind enough to lend me his computer when mine crashed, and, without his help, my project would have been impossible. Though you do have to pay to be in the program, I truly believe that it is a great place to learn and grow creatively.

Code:Averal’s MapBag
GitHub Repository: https://github.com/avekan33/AveralMapBag
Schematic: http://www.digikey.com/schemeit/#fg4
Bill of Materials: https://docs.google.com/spreadsheets/d/11cn314X-pU-3_yelXkl0XLrMNT9gZwZRZKK5u-NZ9ZI/edit#gid=0
Averal’s Main Project- MapBag
Overview- The MapBag is a proprioceptive augmentation device first created by Chicago blogger Josh Billions. Tired of the monotony of traveling to work and back by only one route, Josh wanted a method to explore along the way without getting lost. So, using a LilyPad Arduino, his Chrome messenger bag, and some other components, Josh assembled the first MapBag. I am attempting to assemble my own MapBag using Josh’s blog and my own coding experience. There are seven (eight in the original version) vibration motors that circle the back of the bag, corresponding with forward, backward, left, and right directions. I am using a LilyPad Arduino, and Adafruit Ultimate GPS Breakout, and an HMC6352 digital compass to take in location and heading data and convert that into motor pulses. Coding is done in Arduino, with Adafruit_GPS, SoftwareSerial, and Wire libraries. Status update: The project has been finished!

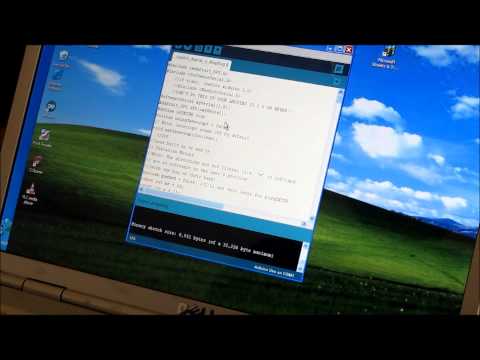
2nd Milestone- In this milestone, I have completed my MapBag code and explain the mathematics behind the key GPS-to-motor section of the code. I used cosine and arctangent functions as well as conversions from radians to degrees to find the “angle to destination” from the current location. I used a built in GPS.angle function to find my heading in relation to north(at 0 degrees). My location was also found by built in GPS.latitude and GPS.longitude functions, with my own destlat() and destlong() functions retrieving stored coordinates depending on the selected location out of ten (0-9).
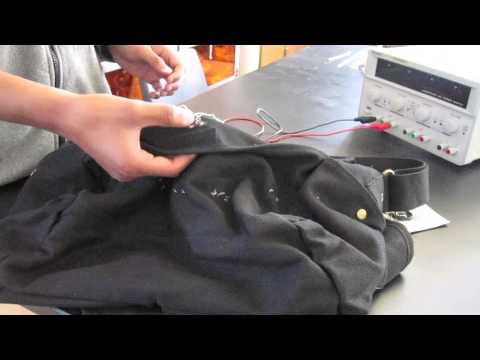
1st Milestone- After sewing on all of the eight vibration motors to the bag, I connected a white ground wire to each and every motor, soldering on new segments with each motor, with a central ground wire routed from the “north” motor to connect to the Lilypad Arduino’s ground pin. Green pin wires were soldered onto each motor’s pin hole and pointed out for later connection to longer wires. For my video demonstration, I put a generator’s power and ground to the pin and ground wires of a couple motors to show that each motors vibrates and does so independently of the other motors.(Note: It’s hard to see the motors vibrating in the video, but I assure you that they were vibrating.)
Averal’s Laser Target
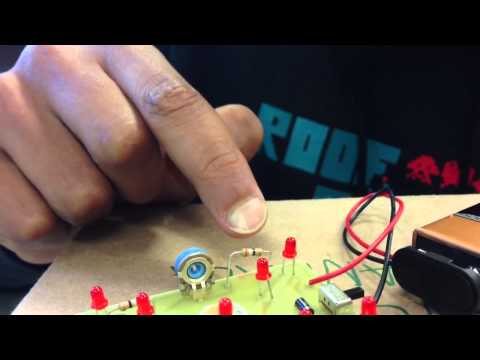
For my starter project, I built a laser target. The laser target is composed of many different parts all connected by a copper-channeled PC board. A Battery Snap conducts electricity into the board from a battery through positive(red) and negative(black) wires. Upon receiving electricity, 9 bright red LEDs(light-emitting diodes) light up. However there are many obstacles in the electricity’s way that make this circuit dependent on outside light (from a laser or otherwise). The CDS cell, a photo-resistor, allows electricity to flow if light is hitting it or blocks the flow if light is not hitting it. Two transistors amplify and/or switch the current, while a trimmer resistor keeps the current constant and unvarying. A diode pushes the electricity to flow in one direction, and an on/off switch puts the board on day, night, or off mode. Finally, three resistors keep the current manageable for the board and prevent electric discharge. There are two 39 ohm resistors (tolerance percentage of 5%) that are characterized by orange-white-black-gold color bands, as well as one 1 kilo-ohm resistor (tolerance percentage of 5%) that has brown-black-red-gold color bands. This project was pretty straightforward. As long as one knows how to solder and is willing to learn about the project’s components, it is easy to complete with success. The only obstacles in completing this project are the fact that the components sometimes fall out when one is soldering them (causing them to be higher up than one would want) and the on/off switch makes it kind of difficult to turn it off- as the off “switch” is located in a small area in between the day and night mode areas.