
Hi my name is Ab, I attend City College Academy and I am a rising Senior. This summer at Blue Stamp I worked on two projects: the voice modulating apparatus and the omnidirectional robot. I chose the projects that seemed like they would challenge me the most. I also choose projects that would expose me to the most topics. For example, the omnidirectional robot had electrical, mechanical and software engineering! I learned so much from these projects and here’s my story!


Bill of materials- Bill of materials Ab
Arduino code (word document)- omni_CODE
schematic: Good schematic-Omni (PDF file)
omni neat sketch (FZZ file, click on schematic view)
Sketchup File-ab sketchup
Modifications- (Omnidirectional Robot)
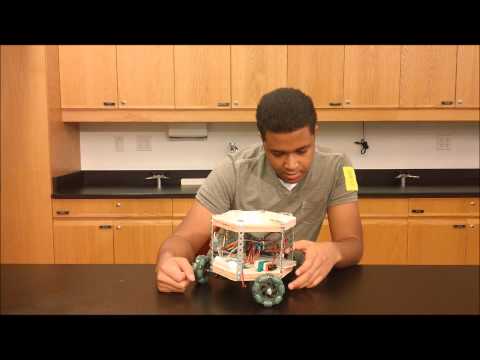
As with any project, modifications and tweaks are important. Everyday I am trying to make my robot easier to use and better than the day before. I added a slot that holds the wires of the 7.2 V battery connected to the battery, that way people can easily store the wires there and not be worried about the wires tangling with the wheels.
I also added a ultrasonic sensor. The way the ultrasonic sensor works is actually really cool and surprisingly accurate! The sensor sends out waves and waits for the waves to ricochet off an object and come back. The sensor records the time it takes for the waves to come back and provides an accurate distance as to how far the object is from the sensor. This seems like it would cause a delay, but the ultrasonic waves move at the speed of sound, which is pretty fast. With the ultrasonic sensor, I added code to my robot which causes it to move back when it spots an object within 20 cm or less of it. The robot keeps moving back until it is not within that range.
Robin (Blue Stamp founder) said that true mastery of a project is when a project functions better than originally intended; I can gladly say I’ve mastered this project :).
Final milestone-(Omnidirectional Robot)
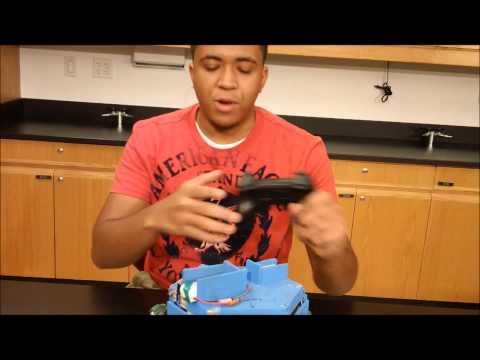
This is my last milestone and my product works as expected. I fixed the delay between the controller and the receiver. I did this by changing the commands to the analog stick. Now the analog stick controls the robot and works well with the receiver. I also added a switch to my robot, which turns the arduino and the receiver on and off. With this switch it makes it a lot easier to turn it on and off. I used to just plug in the battery to the Vin pin and the ground pin. This really didn’t look well, and now anyone can just flick a switch and use!
I also added battery slots to the roof of my project; this way the batteries don’t fall off when the project is moving and it is easier to remove dead batteries. I also painted my project blue, because, well, its BLUE stamp engineering! 🙂
This project was extremely challenging and humbling. It has been one of the hardest things I had to do, but when my code finally worked and my project worked as predicted, it was the most fulfilling feeling ever! Perseverance and persistence is key!
2nd milestone-(omnidirectional Robot)
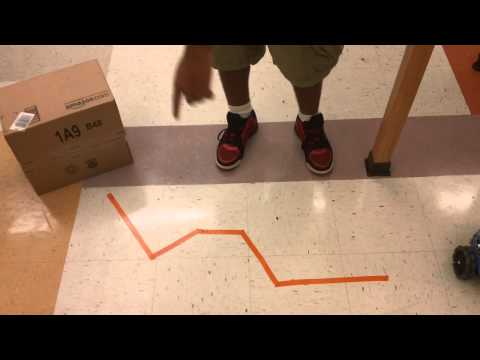
I got it all to work! The car can move forwards, backwards, clock-wise, and counter-clockwise. The code that I created interfaces the PS2 remote controller with the Arduino board. In my code I give buttons on the PS2 remote controller different functions. The R2 button moves the car forwards and the L2 button moves the car backwards. Likewise, moving the analog stick [R3] to the left moves the car counter-clockwise and moving the analog stick to the right moves the car clockwise. It was really challenging to create the code and make sure everything worked as it is supposed to.
One of my major problems was that only two motors ran at a time. After hours and hours of research I was still stumped! Sometimes all three motors worked at a time and sometimes it didn’t. After about three days I learned that the ground from the signal wires must be linked with all other grounds! I didn’t know that the signal wire (from the motor controller to the Arduino) had a ground. (THANKS DAVE!).
After I solved that problem I went straight to writing my code. After I wrote my code, it worked. In my next milestone I will try to fix a small bug associated with my project. The bug is that the receiver, for whatever reason, is picking up when I press the button a couple of seconds late. I want the car to move as soon as I press the button. I am looking forward to the completion of my project!
1st milestone-(omnidirectional Robot)
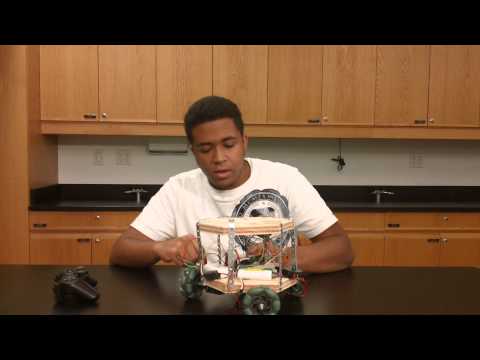
I just finished my first milestone! I was able to assemble all of the hardware for my project and get the motors to run. I cut two hexagons using a handsaw and connected them using bars. I mounted the motors to the base of my project and connected the omnidirectional wheels to the shaft of the motors. I then used Arduino coding to make the wheels of my project go clockwise 180 degrees, wait 15 milliseconds, and then counterclockwise 180 degrees. It continuously does this so long as I have a power source connected to the Arduino board (void loop).
I ran into a couple problems on the road to my first milestone. One of my major problems was that the Arduino board I used burned out. It got hot to a point where it wouldn’t turn on anymore.
Another problem I ran into was figuring out how to link the grounds. This was hard because I didn’t know what a breadboard was! Once I got the breadboard, I finally started understanding how to link the grounds between the motor and the battery. I have learned a lot in my first milestone and I am exited to continue on with my project!
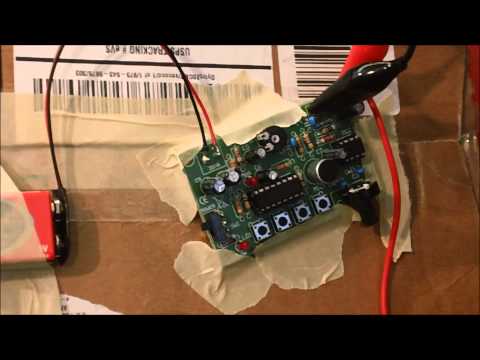
Starter project- Voice changer
My starter project is a voice changing apparatus. I used a PCB board with resistors, IC’s, capacitors, and electrolytic capacitors. There are resistors around the board because some areas require less current to flow then others. The resistors slow down the flow of current in various places. The IC chips in the PCB board work as voice modulators, which increase or decrease the pitch of one’s voice. The capacitors store the energy around the circuit. To adjust the volume the vertical trimmer on the bottom right hand corner is used.
With the help these parts, when someone talks into the microphone their voice will be changed when it comes out in the speaker. With this project I had to learn how to solder and how to eliminate feedback.
When I added all the parts to the PCB board I was experiencing a lot of feedback. Basically, there was a loop between the speaker and the microphone creating a large screeching noise. To eliminate this I added space between the microphone and the speaker, and also put cardboard in between them. Now that I finished with my starter project I can work on one of my intensive projects. I planning to create a 3 wheeled RC car. I am looking forward to the challenge!
That’s an apt answer to an ineretsting question