Motion Detecting Remote Controlled Robot Tank

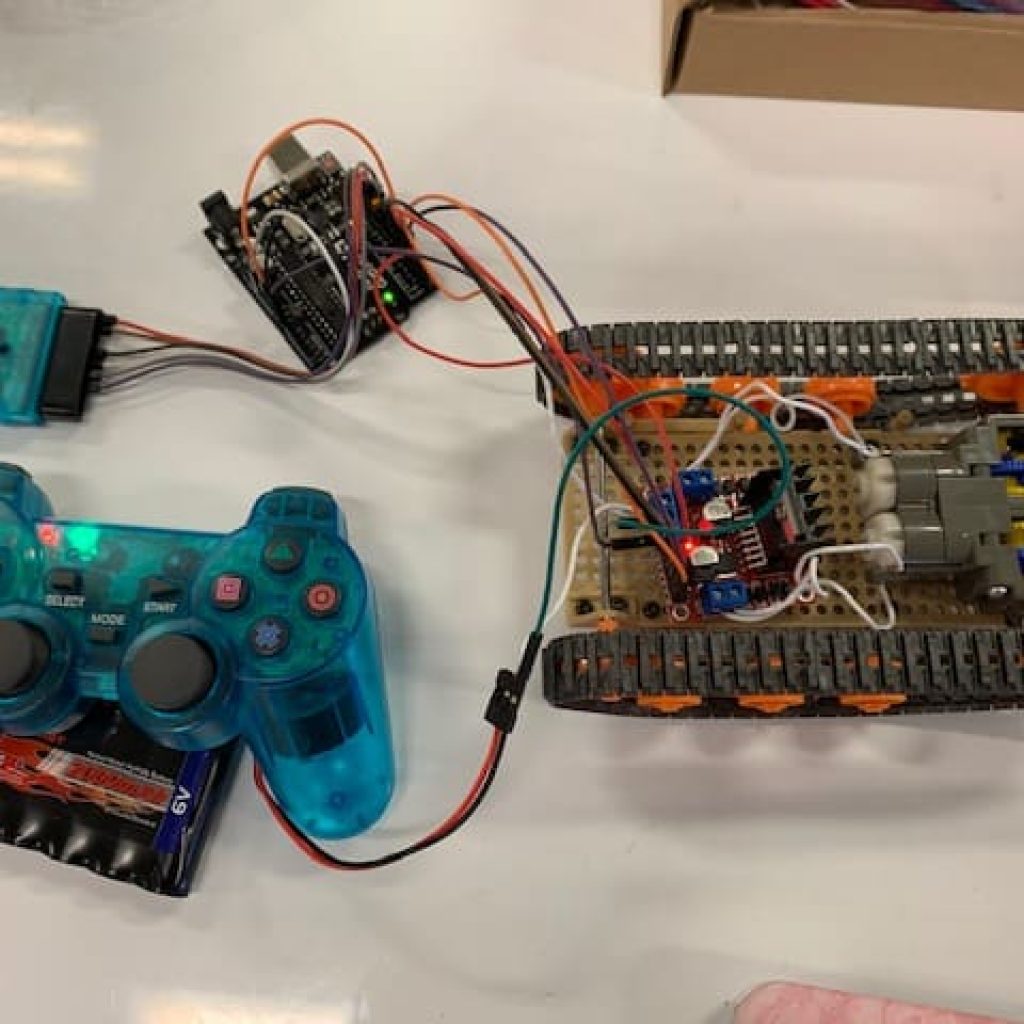
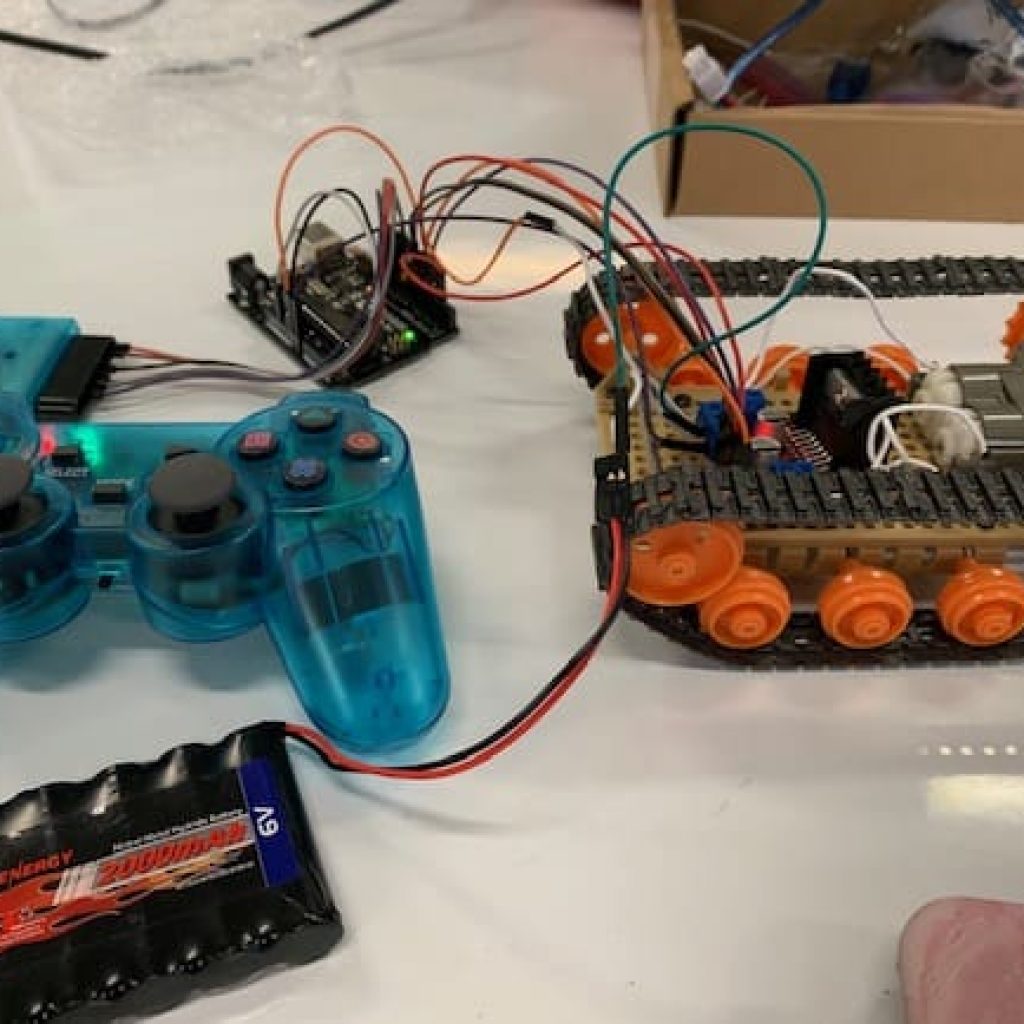
This project is two robots in one, a remote-controlled robot tank and an autonomous obstacle avoiding robot.

Engineer

Victoria B.

Area of Interest

Electrical & Software Engineering

School

Oakland Technical HS

Grade

Incoming Junior

Final Milestone

My final milestone or modification milestone added a new feature to my robot. It made it autonomous. So when I press the square button or when my remote control is not connected to my tank, my tank begins “thinking by itself” and explores its surroundings.

I did this in a few steps the first thing I did was get an ultrasonic sensor so that when the autonomous robot moves on its own it can sense that there is an object in front of it. With the code I was able to tell it when it comes it a certain vicinity it should scan left and right and change its path by either going backward, forward, left, or right.

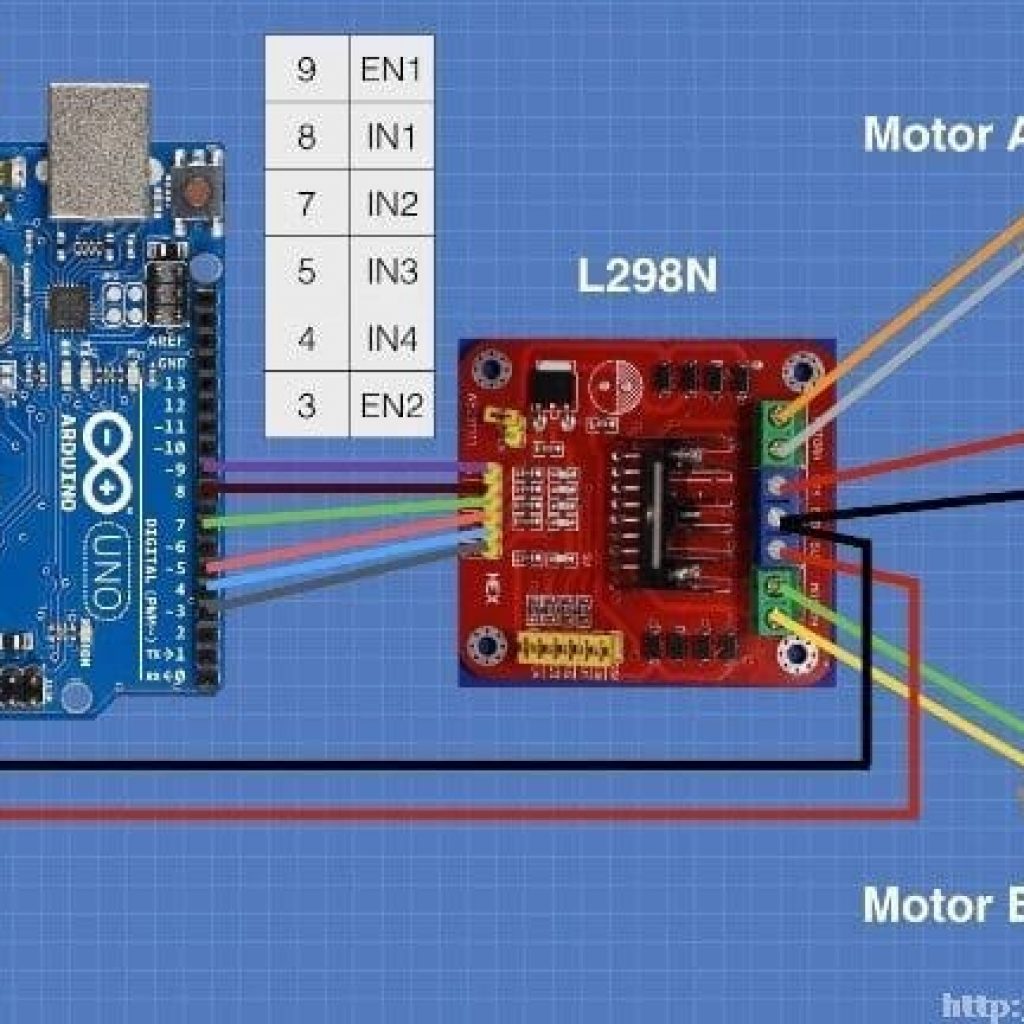
The ultrasonic sensor only senses objects, so to make it move left and right to scan its surroundings, you have to put it on a servo motor. A servo motor is basically a regular motor that moves 180 degrees instead of 360. In my code, I told the servo to scan side to side before sending a message to the DC motors that power the actual tank.

The ultrasonic sensor didn’t fit on the servo motor so I 3D printed a mount that would let the sensor move along with the servo and let them work as one body. I really enjoyed this part of the project because I took control of what I wanted my robot to do.

I not only did that but I also built a case out of plexiglass. At first, it was difficult because I had to use a hand saw and sawing plexiglass was difficult because it was so fragile. I designed my box using TinkerCAD and I really enjoyed experimenting with everything in my project.

amazing-tumelo
surprising-vihelmo-2

Second Milestone

My second milestone was controlling all of the robot’s actions through the Playstation X controller. I made functions on the bottom of code which made it easier to code the other parts of the program. I struggled a lot with the code at first, as I was able to move both motors backward, but I was only able to move the left motor forward and not that right one. I went through my code for a full day trying to troubleshoot by myself, and then I realized I assigned the right motor to the wrong analog pin. Once I fixed that I was able to control forward and backward with the L & R buttons on the controller. Then I realized that if I move the left motor forward and the right motor backward it will turn left and vice versa. So I made a shortcut and assigned those actions to the triangle and circle buttons. Overall, I struggled a bit with my code but it was a really rewarding experience.

First Milestone

My first milestone was connecting the motors, the L298N motor driver, the 6V battery, and the Arduino UNO all together. To get to that step I had to build my chassis, the gearbox which was connected to the motor driver, and I had to program the Arduino. I had a problem with my motors because they weren’t the best quality but when I changed the motors everything else fell apart, including the gearbox, the wheels, etc. Which was a challenge because I had to start everything from the beginning. But I was glad that everything fell apart because I was able to realize that I hadn’t greased the gearbox and that I had forgotten to program the second motor.

Distance Alarm

My Starter Project was the Distance Alarm, an alarm that detects motion or sound in its programmed vicinity. When you wave your hand or an object in front of the ultrasonic sensor it makes the piezo buzzer make a beep. I enjoyed this project because I learned about circuits like parallel and series circuits, I learned how to program and use an Arduino, and lastly, I enjoyed the feeling of finishing the project.

Leave a Comment

Start typing and press Enter to search

Bluestamp Engineering