
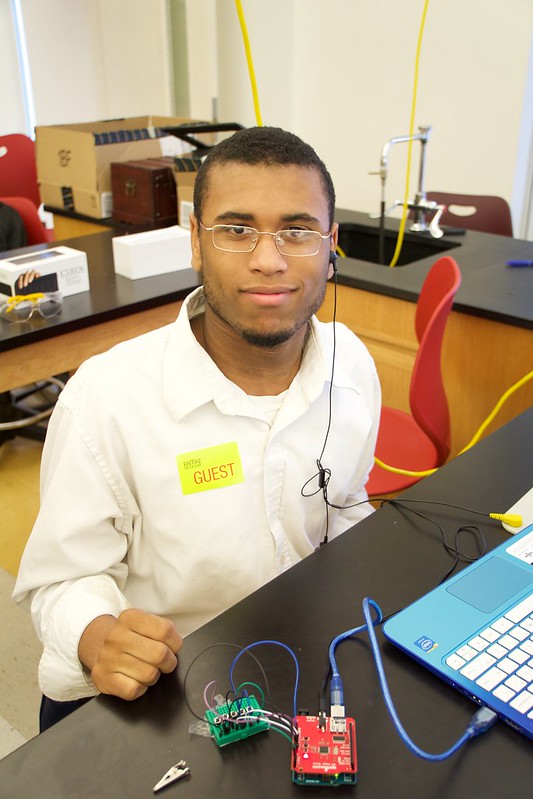
Hi my name is Tre’Von and I’m a rising sophomore at Promise Acdemy. My main project is the MP3 player and my starter project is the Dice Kit. The Program has been a very educational and exciting experience for me. There was many things that I learned about engineering and also about myself. I learned how to solder and how to code for an Arduino. I also learned never to give up on anything no matter hard it seems to be, always try your very best to the very end.
Final Milestone

I have finally coded and wired my buttons to my MP3 player. All the buttons have a different function on the MP3 player. This includes the ability to play a song or stop the song also to play the next song and to decrease and increase the volume.These are some of the few commands that I can do on the MP3 player. The most difficult part of all of this is coding of the buttons to MP3 player. While coding I had to use Arduino example from the SFEMP3Shield library called MP3ButtonPlayer2. While I tried to upload this code, I found out that it needed the Bounce2.h library to upload. I search the Internet to find a site that had the library I need for the Arduino. I was able to download the library from Github.
So the way the coding works for the Arduino is that the Arduino has pins that connect it to the breadboard. These pins receive an input voltage when the button is pressed down. That input voltage can be considered a “true” state so that the Arduino code can take that statement and apply whatever is related to that state being true. The libraries play an equally important role in the coding of the Arduino, as the libraries expand the function of the Arduino so that it can use other programs without taking up too much data in the original code. The library Bounce2’s job is to make it easier for the Arduino to read voltage from the buttons to start a command for the MP3player. The way the bounce2 does this by solving some of the problem for Arduino which in to make sure that Arduino does skip numbers and mess up the Arduino .These are the things that had to be uploaded into the Arduino for it to be independent of the serial monitor input. Instead, I can just press the respective buttons to play, stop, and change volume. I no longer have to type “001” or “s” into the serial monitor!
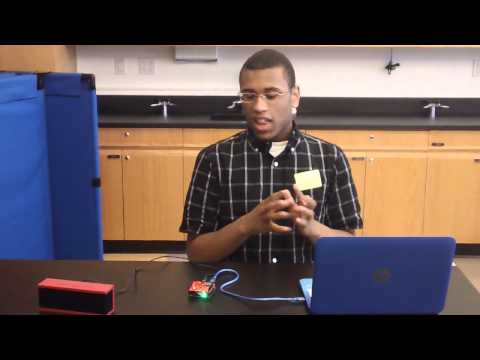
While coding for Ardunio I ran into a problem with the “NEXT” command button. The problem was that the Arduino/MP3Player kept going even if there was no track(number).mp3 on the SD card. For example, I only had 5 songs on the SD card, but the Arduino would try to play track006 and onwards. As a result, I had to enter the number of songs on my Arduino using the int function. Then I used if statements saying that if it goes past the current number of track on the Arduino it will loop back to track one. I still had to edit the code because initially, when it was supposed to go back to track one, it went to track 6 then to 2 (basically it skipped track 1 when it looped back. So I had to re-code to have it go to track one. I found out that I should set the number of songs variable equal to the current_track variable to prevent it from skipping the first track. After the all this coding i finally got the next command button to loop back track 001 after track 005. I also coded to so that Arduino can play music so that music when it hit the max volume or verse vice. So that I added volume greater than or less than deepening on what volume I was working on like either lowering or increasing the volume. Another program that added to the Arduino was previous button so that it can play the previous track. One problem was that it went back even when there was no track there. To solve this problem I modify the program so I understand there was no more track go back to and go to last song. The way I modify the program was by adding if and else statement so Arduino understood the command.
My next step is to create a case for my MP3 player so that it can’t get damage and so it will be protected. I want customize the case so that it suit my personality and my style and I will know that it is my MP3 player. I still want to many other things with MP3 player later so that I can make it better. I can also add a screen to my MP3 player so that i can see the name of the artist and song name. I Can make Mp3 more original and cooler to use and to have, all for myself.
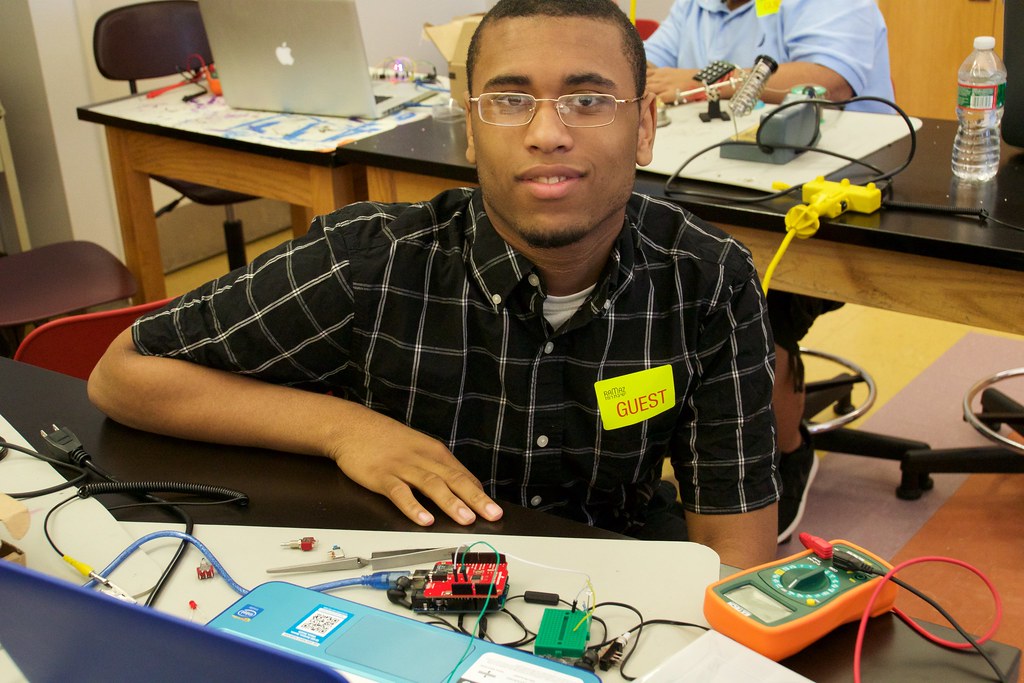
code: MP3ButtonPlayer3
Schematic:

Bill of Materials:click here
First Milestone
For my main project I have decided to do the MP3 Player which was both fun and also frustrating. But everything was worth the wait, now I have my very own MP3 player. The coding was the most difficult part of the project to work for me because I was confused by how to code on the Arduino. Now I can change the song or even change with few simply commands on the Serial monitor. But there was more problem with the coding of the Arduino including it was missing few file to complete the upload. Also there was a lot of research I had to do just to solve some of the many problem I have came cross working on the MP3.
Now I can create a case, buttons, screen, and etc so it can more like a real MP3 player.I can’t wait to see the final product of my hard work. For now all it can do is play music while being connect to the computer so it can follow basic to play or to stop. In the future I will have to do more solder and coding for my MP3 player so it can work like a real MP3 player with buttons and a screen.First I will work on the buttons like where to put, how it will work, and how to wire the buttons. Second is working on my screen to see what song is playing and look at the library. Final I will work on the case of the MP3 player so it can be damage or broken and so it look nice enough for my to take it outside and use in my daily life.

Starter Project
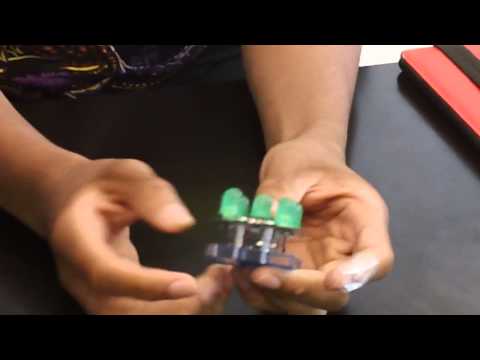
The Dice Kit is starter project that lights up every time it is tapped on the table or any flat surface and the LED’s chose any number from 1 to 6 just like a real die shows 1 through 6, LED are also light emitting diode and diode are electrical device that control the flow of current in one direction better than the other way. The materials required to build it are four 470 ohms resistors, one 10k ohms resistor, one meg ohm resistor, a D1 diode, seven LED lights, a battery, four screws, two wires, and a piezo sensor along with a U1.The material to build the dice kit are simple to buy and get; they can all be found in a hardware shop. The project is simple to use and to build and can be more useful than regular dice used in board games.
The resistance is used to control and lower the energy of the battery so it won’t burn up and break. The LED’s are used as the dots on dice that show up when the dice is roll but it lights the shows dots. The Piezo sensor is to help with activity the dice kit with the battery. The U1 PIC is the part that control the programming of the dice kit so that why it choose number through 1-6 and not 2-7 it make it act like a dice. The battery is powerhouse of the dice kit so can light up the LED’s. P.I.C is another important part of the project it stand for programmable interface controller and the job of the P.I.C is that read signals from the piezo and from the signal it turn into a decimal and a number from one thought six is choose. The project enter sleep mode when the P.I.C is at it lowest power but the piezo can wake it up by tapping it on the table
For my main project I have decided to do the MP3 Player which was both fun and also frustrating. But everything was worth the wait, now I have my very own MP3 player. The coding was the most difficult part of the project to work for me because I was confused by how to code on the Arduino. Now I can change the song or even change with few simply commands on the Serial monitor. But there was more problem with the coding of the Arduino including it was missing few file to complete the upload. Also there was a lot of research I had to do just to solve some of the many problem I have came cross working on the MP3.
Now I can create a case, buttons, screen, and etc so it can more like a real MP3 player.I can’t wait to see the final product of my hard work. For now all it can do is play music while being connect to the computer so it can follow basic to play or to stop. In the future I will have to do more solder and coding for my MP3 player so it can work like a real MP3 player with buttons and a screen.First I will work on the buttons like where to put, how it will work, and how to wire the buttons. Second is working on my screen to see what song is playing and look at the library. Final I will work on the case of the MP3 player so it can be damage or broken and so it look nice enough for my to take it outside and use in my daily life.