
Hi, my name is Tal and I’m a rising junior at Ramaz High School. During my six weeks at bluestamp I built two projects: a watch, a box that only unlocks when it hears the correct sequence of notes. As a returning Bluestamp student I’d already learned how to solder and the functions of some basic engineering components (such as resistors, capacitors, etc.) so I specifically chose the watch as my starter project because it was one of the more challenging options and I would still learn a lot by building it. For my intensive project I chose to build a box with a musical lock because I wanted to build something that I knew I would use regularly, and I also loved the idea of incorporating music, which is a love of mine, with my other love, engineering.
Even though this is my second year participating in Bluestamp, this summer has been a huge learning experience for me because my project this year – which was mostly programming – greatly differs from my project last year – which was entirely mechanical and electrical engineering. My experiences at Bluestamp, both this year and last year, have taught me so much and have only peeked my curiosity. Thanks to Bluestamp I know that I definitely want to pursue a career in engineering.
——————————————————————————————————————————————————————————————————————————————————————-
Box With a Musical Lock


——————————————————————————————————————————————————————————————————————————————————————-
Final Milestone
For my final milestone I put all my components in a box and set up a servo so that once the microphone picks up the correct three frequencies, the servo will spin, unlocking the box. The code for detecting the correct sequence of frequencies follows the same format as when it was turning on the LEDs in my previous milestone. It listens for the correct first frequency and if it hears it, it’ll wait seven seconds to hear the correct second frequency. Once it hears the correct second frequency, it’ll wait another seven seconds to hear the correct third frequency. Once it hears the correct third frequency, it’ll spin the servo, unlocking the box. If while it’s waiting to hear the next correct frequency the seven seconds pass, it’ll reset and start listening for the correct first frequency again. I also added a button so that once the box is unlocked, I can press the button and the servo will spin in the opposite direction, re-locking the box.
The way the lock is set up is there’s a small hook attached to the bottom of the lid of the box, and a peg that’s attached to the servo lays across the hook, preventing the lid from being able to be pulled up. When the correct frequencies are played, the servo spins so that the peg swings up and out of the hook, allowing the box to be opened (see drawings below).


Schematics:


Code:
#include <Servo.h>
Servo myservo;
int pos = 0;
boolean serv = false;
//clipping indicator variables
boolean clipping = 0;
//data storage variables
byte newData = 0;
byte prevData = 0;
unsigned int time = 0;//keeps time and sends vales to store in timer[] occasionally
int timer[10];//sstorage for timing of events
int slope[10];//storage for slope of events
unsigned int totalTimer;//used to calculate period
unsigned int period;//storage for period of wave
byte index = 0;//current storage index
float frequency;//storage for frequency calculations
int maxSlope = 0;//used to calculate max slope as trigger point
int newSlope;//storage for incoming slope data
//variables for decided whether you have a match
byte noMatch = 0;//counts how many non-matches you’ve received to reset variables if it’s been too long
byte slopeTol = 3;//slope tolerance- adjust this if you need
int timerTol = 10;//timer tolerance- adjust this if you need
//variables for amp detection
unsigned int ampTimer = 0;
byte maxAmp = 0;
byte checkMaxAmp;
byte ampThreshold = 15;//raise if you have a very noisy signal
boolean freq0 = false;
boolean freq1 = false;
boolean freq2 = false;
const int buttonPin = 7;
int buttonState = 0;
void setup(){
Serial.begin(9600);
myservo.attach(9);
pinMode(13,OUTPUT);//led indicator pin
pinMode(12,OUTPUT);//output pin
cli();//diable interrupts
//set up continuous sampling of analog pin 0 at 38.5kHz
//clear ADCSRA and ADCSRB registers
ADCSRA = 0;
ADCSRB = 0;
ADMUX |= (1 << REFS0); //set reference voltage
ADMUX |= (1 << ADLAR); //left align the ADC value- so we can read highest 8 bits from ADCH register only
ADCSRA |= (1 << ADPS2) | (1 << ADPS0); //set ADC clock with 32 prescaler- 16mHz/32=500kHz
ADCSRA |= (1 << ADATE); //enabble auto trigger
ADCSRA |= (1 << ADIE); //enable interrupts when measurement complete
ADCSRA |= (1 << ADEN); //enable ADC
ADCSRA |= (1 << ADSC); //start ADC measurements
sei();//enable interrupts
}
ISR(ADC_vect) {//when new ADC value ready
PORTB &= B11101111;//set pin 12 low
prevData = newData;//store previous value
newData = ADCH;//get value from A0
if (prevData < 127 && newData >=127){//if increasing and crossing midpoint
newSlope = newData – prevData;//calculate slope
if (abs(newSlope-maxSlope)<slopeTol){//if slopes are ==
//record new data and reset time
slope[index] = newSlope;
timer[index] = time;
time = 0;
if (index == 0){//new max slope just reset
PORTB |= B00010000;//set pin 12 high
noMatch = 0;
index++;//increment index
}
else if (abs(timer[0]-timer[index]) //sum timer values
totalTimer = 0;
for (byte i=0;i<index;i++){ totalTimer+=timer[i]; } period = totalTimer;//set period //reset new zero index values to compare with timer[0] = timer[index]; slope[0] = slope[index]; index = 1;//set index to 1 PORTB |= B00010000;//set pin 12 high noMatch = 0; } else{//crossing midpoint but not match index++;//increment index if (index > 9){
reset();
}
}
}
else if (newSlope>maxSlope){//if new slope is much larger than max slope
maxSlope = newSlope;
time = 0;//reset clock
noMatch = 0;
index = 0;//reset index
}
else{//slope not steep enough
noMatch++;//increment no match counter
if (noMatch>9){
reset();
}
}
}
if (newData == 0 || newData == 1023){//if clipping
PORTB |= B00100000;//set pin 13 high- turn on clipping indicator led
clipping = 1;//currently clipping
}
time++;//increment timer at rate of 38.5kHz
ampTimer++;//increment amplitude timer
if (abs(127-ADCH)>maxAmp){
maxAmp = abs(127-ADCH);
}
if (ampTimer==1000){
ampTimer = 0;
checkMaxAmp = maxAmp;
maxAmp = 0;
}
}
void reset(){//clea out some variables
index = 0;//reset index
noMatch = 0;//reset match couner
maxSlope = 0;//reset slope
}
void checkClipping(){//manage clipping indicator LED
if (clipping){//if currently clipping
PORTB &= B11011111;//turn off clipping indicator led
clipping = 0;
}
pinMode (buttonPin, INPUT);
}
void loop(){
freq0=false;
freq1=false;
freq2=false;
checkClipping();
Serial.println(“start”);
if (checkMaxAmp>ampThreshold){
frequency = 38462/float(period);//calculate frequency timer rate/period
//print results
// Serial.print(frequency);
// Serial.println(” hz”);
}
//do other stuff here
if ((freq0==false)&&(freq1==false)&&(freq2==false)){ //if none of the frequencies have been hit
if (checkMaxAmp>ampThreshold){ // this if statement makes sure that it doesn’t ignore the amp threshold
frequency = 38462/float(period);
Serial.println((38462/float(period))); // print the frequency
Serial.println(“checking for first”); // print “checking for first” – this isn’t necessary it just helped me keep track of what frequencies had been hit
if ((685<(38462/float(period)))&&((38462/float(period))<715)){ // set range for first frequency
freq0=true;
Serial.println(“hit first”);}}} // print “hit first” – this isn’t necessary it just helped me keep track of what frequencies had been hit
int startT0 = millis();
int endT0 = startT0 + 7000; // create time limit of seven seconds in which to check for the second frequency
if ((freq0==true)&&(freq1==false)&&(freq2==false)){ // if only the first frequency has been hit
while (millis()<endT0){ // while we’re within the seven second time limit
Serial.println(“checking for second”); // print “checking for second” – this isn’t necessary it just helped me keep track of what frequencies had been hit
Serial.println((38462/float(period))); // print frequency
int dif=endT0 – millis();
if (dif<=0){ // if the seven second time limit is up Serial.println(“Seven Seconds Passed Seven Seconds Passed”); freq0=false; break;} if (checkMaxAmp>ampThreshold){ // if the amplitude of the sound is greater than the threshold
frequency = 38462/float(period);
Serial.println(frequency); // print frequency
if ((885<(38462/float(period)))&&((38462/float(period))<915)){ // set range for second frequency Serial.println(“hit second”); // print “hit second” – this isn’t necessary it just helped me keep track of what frequencies had been hit freq1=true; break;}}}} int startT1=millis(); int endT1=startT1 + 7000; // create time limit of seven seconds in which to check for the third frequency if ((freq0==true)&&(freq1==true)&&(freq2==false)){ // if only the first and second frequencies have been hit if (checkMaxAmp>ampThreshold){ // if the amplitude of the sound is greater than the threshold
frequency = 38462/float(period);
Serial.println((38462/float(period))); //print frequency
while (millis()<endT1){ // while we’re within the seven second time limit
Serial.println(“in final loop”); // print “in final loop” – this isn’t necessary it just helped me keep track of what frequencies had been hit
Serial.println((38462/float(period)));
int dif=endT1 – millis();
if (dif<=0){ //if the seven second time limit is up Serial.println(“Seven Seconds Passed Seven Seconds Passed”); freq0=false; freq1=false; break;} if (checkMaxAmp>ampThreshold){ // if the amplitude of the sound is greater than the threshold
frequency = 38462/float(period);
if ((785<(38462/float(period)))&&((38462/float(period))<815)){ //set range for third frequency
Serial.println(“hit third”); // print “hit thrid” – this isn’t necessary it just helped me keep track of what frequencies had been hit
freq2=true;
serv = true;
break;}}}}}
if ((freq0==true)&&(freq1==true)&&(freq2==true)){ // if all frequencies have been hit
myservo.write(180); // spin servo (unlock position)
serv = true;
delay(1000);
Serial.println(“serv”);
}
Serial.println(buttonState);
Serial.println(“serv:”);
Serial.print(serv);
buttonState = digitalRead (buttonPin);
if (buttonState){ // if button has been pressed
myservo.write(89); // spin servo in opposite direction
serv = false;
}
}
——————————————————————————————————————————————————————————————————————————————————————-
Milestone #2
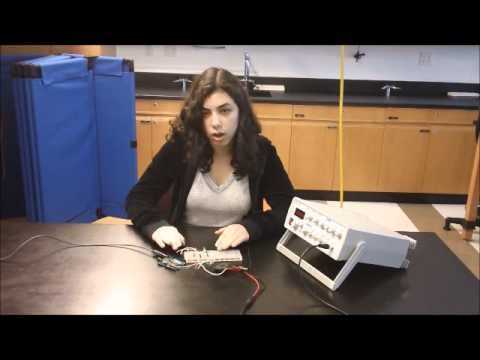
For my second milestone I set up a circuit with three LEDs on a breadboard and added onto the code I already had on my Arduino which detected different frequencies and made it so that it looks for three specific frequencies that I chose which correspond to the three LEDs. I programmed it so that when it hears the correct first frequency the first LED turns on, and it has seven seconds to hear the correct second frequency If it hears the correct second frequency, the second LED will turn on, and then it has seven seconds to hear the correct third frequency. If it hears the correct third frequency, the third LED will turn on, wait one second, and then reset so that all the LEDs turn off and it starts looking for the correct first frequency again. If while it’s looking for the next correct frequency, the designated seven seconds pass, it will reset so that any LEDs that were on, turn off, and it starts looking for the correct first frequency again. Some difficulties I had with this were learning how to code in Arduino for the first time, and later on I figured out that the microphone was too sensitive so it was picking up any tiny sound in the room and was triggering the LEDs much too easily.
——————————————————————————————————————————————————————————————————————————————————————-
Milestone #1
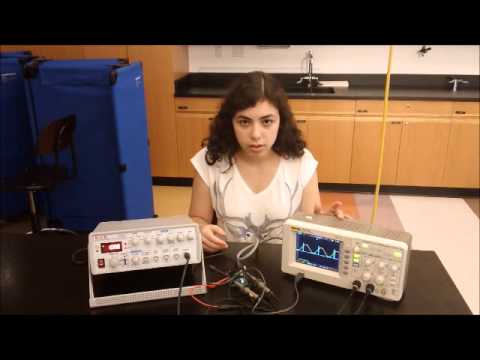
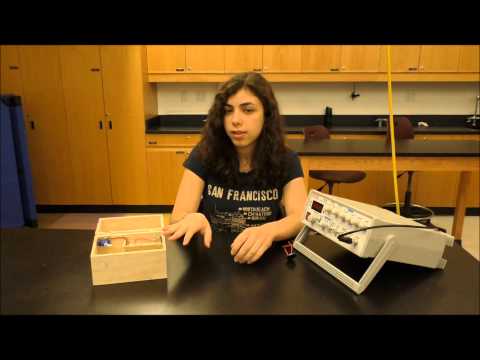
For my first milestone I connected an electret microphone to an arduino and uploaded a code that enables it to detect different frequencies. Devices that detect frequencies can tell different frequencies apart by trying to figure out how many times a second the sound wave is vibrating – and different frequencies vibrate different amounts per second. These sound waves can be represented as a sine wave where each period is a vibration up and down (in my video I used an oscilloscope which is a machine that can display the different sine waves of different frequencies). the way the code on the arduino can recognize different frequencies is by detecting the midpoints of the periods of the sine waves of different frequencies (every time the sound wave passes the mid-voltage of 2.5V). It then measures the period of the sine wave and calculates the frequency.
A more in depth explanation of the code, as well as the code itself, can be found here:
Arduino Frequency Detection by amandaghassaei
——————————————————————————————————————————————————————————————————————————————————————-
Starter Project
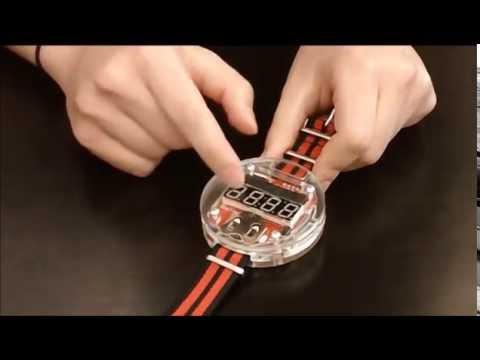
For my starter project I built a Big Time digital watch from SparkFun. The watch has a button on its side which when pressed triggers a 4-digit, 7-segment LED display to show the time. There is a 10k ohm resistor which limits the electrical current flow to the LED display because light emitting diodes don’t require a lot of energy to run and if they receive too much current it might burn the diode. Two 0.1µF capacitors store energy electrostatically in an electric field on the circuit. A CR2032 coin cell battery powers the watch. The watch has an ATMega328 microcontroller which is the main source of control for the PCB. The watch uses a 32kHz crystal that produces an oscillated wave. The microcontroller picks up this wave and uses as a reference to produce the correct time.
The completed PCB fits into an acrylic enclosure which is held together by four screws. A strap fits into two slits on either end. Holding down the button on the side of the watch will cause the numbers to increase on the LED display, allowing you to change the time.
Very clever project!