Hello, my name is Tadg and I’m a rising senior at East High School. During the winter I enjoy snowboarding and during the summer I like to mountain bike. My favorite subject in school is Chemistry, and I hope to one day have a career that involves chemistry. For my starter project at BlueStamp Engineering, I did the miniPOV3. The intensive project that I choose to do was a RC hovercraft.
Main Steps to Complete the Project:
- Make sure all the parts have arrived.
- Draw a design of the body of the hovercraft, and then draw a schematic showing where the electronics will be placed inside of the body.
- Cut out the body from the depron, and cover with a layer of fiberglass cloth. Milestone 1.
- Create the skirt for the bottom of the hovercraft, and attach to the hovercraft.
- Install the electronics within the body, and create waterproof covers for the electronics compartments. Milestone 2.
- Paint the body of the hovercraft to make it aesthetically pleasing.
- Once finished, add attachments and improve upon the design of the hovercraft.
- Create full documentation of the design process, blog the steps in the process, and publish everything on the webpage.
Bill of Materials
Here are three videos showing my progress while building my main project the RC hovercraft.
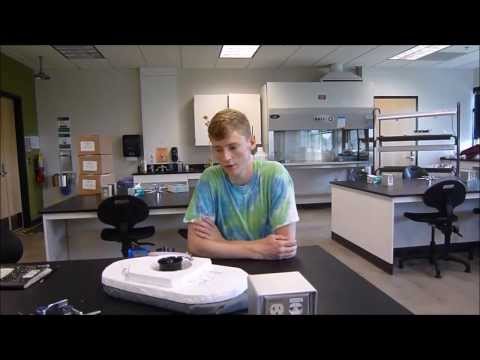
Milestone #3
This is my third and final milestone video for my RC hovercraft. Some changes that I made since the last milestone was the rudder, the skirt, and also the aesthetic look of the hovercraft. My earlier design of the rudder was not working as well as I hoped, so I designed a single finned rudder to direct the airflow better than the previous rudder. For the skirt I cut a an even larger hole and made more slack around the edges. Since I had some extra time, I spray painted the hovercraft black with a gold trim. Although my time at BlueStamp has ended, I hope to further my knowledge and understanding of hovercraft’s and furthermore of engineering in general. At BlueStamp Engineering I have learned that engineering is all about overcoming obstacles in anyway possible, and in the future I hope that my experience here has better prepared me for a career in the engineering field.
Here is a orthographic projection of the rudder that I designed in the CAD modeling program AutoDesk Inventor.


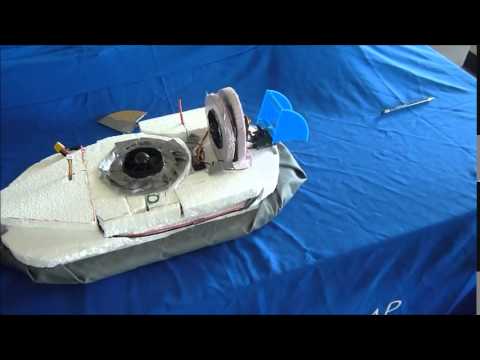
Milestone #2
For my second milestone I decided to show the hovercraft in operation. The hovercraft hovers by riding on a cushion of air created by when the skirt on the hovercraft inflates. The cushion should be shaped like a doughnut for the maximum lift. To steer the hovercraft I placed a servo behind the trust motor and attached a 3D printed rudder to the servo horn. I created this in a 3D CAD modeling system called Autodesk inventor. To control the rudder, thrust and lift motors I connected them to the digital receiver that sends the signal to the controller. I had troubles with the skirt inflating properly, so i cut out a larger hole which seemed to fix the problem. I cannot get the thrust motor to connect to the channel I want it to, but I hope I will be able to have that done by my next video.

Milestone #1
This was my first milestone for my RC hovercraft project that I was doing. The shape of the base of the hovercraft is an oval because it is a fairly aerodynamic shape, and it is an organic shape that is very aesthetic. The lift motor was centered in the center of the hovercraft because it creates a balanced air cushion for the hovercraft to rest on. The hovercraft has two layers so the electronics can be placed in a cut out section on the top layer so that they rest within a pocket so as not to be bounced out of place while the hovercraft is moving. I am looking forward to my parts arriving so I can begin to test my hovercraft and further design it. I think that the hardest part of the hovercraft will be extending the wires from the speed controllers and getting the actual hovercraft to float.

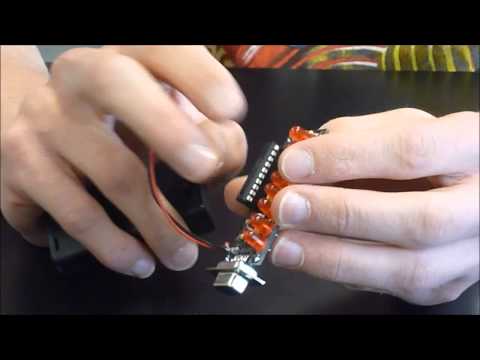
Starter Project
The miniPOV3 is a persistence of vision device that uses eight LEDs that can be programmed in a sequence to show different patterns such as numbers, letters, and even words. To complete this starter project,all of the parts must first be assembled and then soldered together. After the miniPOV was fully assembled, I had to download a program called AVRdude that enabled me to program the eight LEDs by writing the code in binary. To create the T on the miniPOV,I made the top light constantly stay on by always writing a 1 in the space for that LED in the binary code. For the other lights I had them blinking on and off in quick succession to make it seem like the base of the T.