My project is a tool that indicates the strength of wifi around a building. The device is attached on top of a robot car that can be controlled from a mobile device.
Engineer
Leo F
Area of Interest
Computer Science, Gaming
School
Homestead High School
Grade
Incoming Senior
Demo Night / Reflection
Overall, I had lots of fun working on my Bluestamp project as it was very enjoyable to get each milestone done and see my project evolve over the last 3 weeks. A lesson I learned from working on my project is to be patient; when things don’t work out the way you expect them to don’t panic, just keep working with a cool head and things will be fine.
Third Milestone
Milestone 3
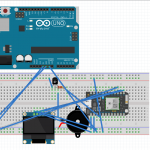
My third milestone consisted of attaching my wifi strength indicator to a small car that can be controlled from a mobile device. To do this I first assembled the car and then added a motor driver to my breadboard. This motor driver allows the photon to control the motors, which power the car. After attaching the motor pins to the photon analog pins, I was able to make the wheels on the car spin by turning the pins on or off. I then used an app called Blynk, which gave me an authentication token which I put in my code, connecting my photon to the app through wifi. I then added some buttons that corresponded to each analog pin, thus allowing me to control the wheels through the app.
Second Milestone
Milestone 2
My second milestone consisted of attaching NeoPixel RGB LEDs to my photon to give the user a better visual representation of the wifi strength. I also added a buzzer to make a sound whenever the wifi strength changes by a large amount. I used the LEDs to signal the wifi strength by converting the number returned by the Wifi.RSSI function into a red color value and a green color value on a scale of 0-255. A low wifi strength would yield a high red color value and a low green color value, and vice versa. The buzzer buzzes a lower frequency sound when the wifi strength decreases by a certain amount and buzzes a higher frequency sound when it increases by a certain amount.
Schematic
First Milestone
Milestone 1
My first milestone mostly consisted of learning simple concepts, such as using resistors and creating a small circuit using wires. In order to learn these concepts I created demos such as making an LED blink on an arduino after pressing a button and having a potentiometer measure voltage and using that value to determine how fast a light should blink on or off. After I learned these concepts I moved on to more project specific things. I swapped the arduino for the particle photon and hooked an OLED to the photon. I then coded the OLED to display the wifi strength using the Wifi.RSSI function included in the photon libraries. I enjoyed learning about hardware aspects of engineering as I had never built an engineering project using hardware.