IoT Weather Indicator
The IoT Weather Indicator allows for the user to easily access information regarding the weather of the day. Code is run through particle.io and is sent to LED lights that change according to weather transitions.
Engineer
Sofie H
Area of Interest
Mechanical Engineering / Chemical Engineering
School
Carlmont High School
Grade
Incoming Junior
First Milestone: Completion of Basic Coding and Electronic Set Up
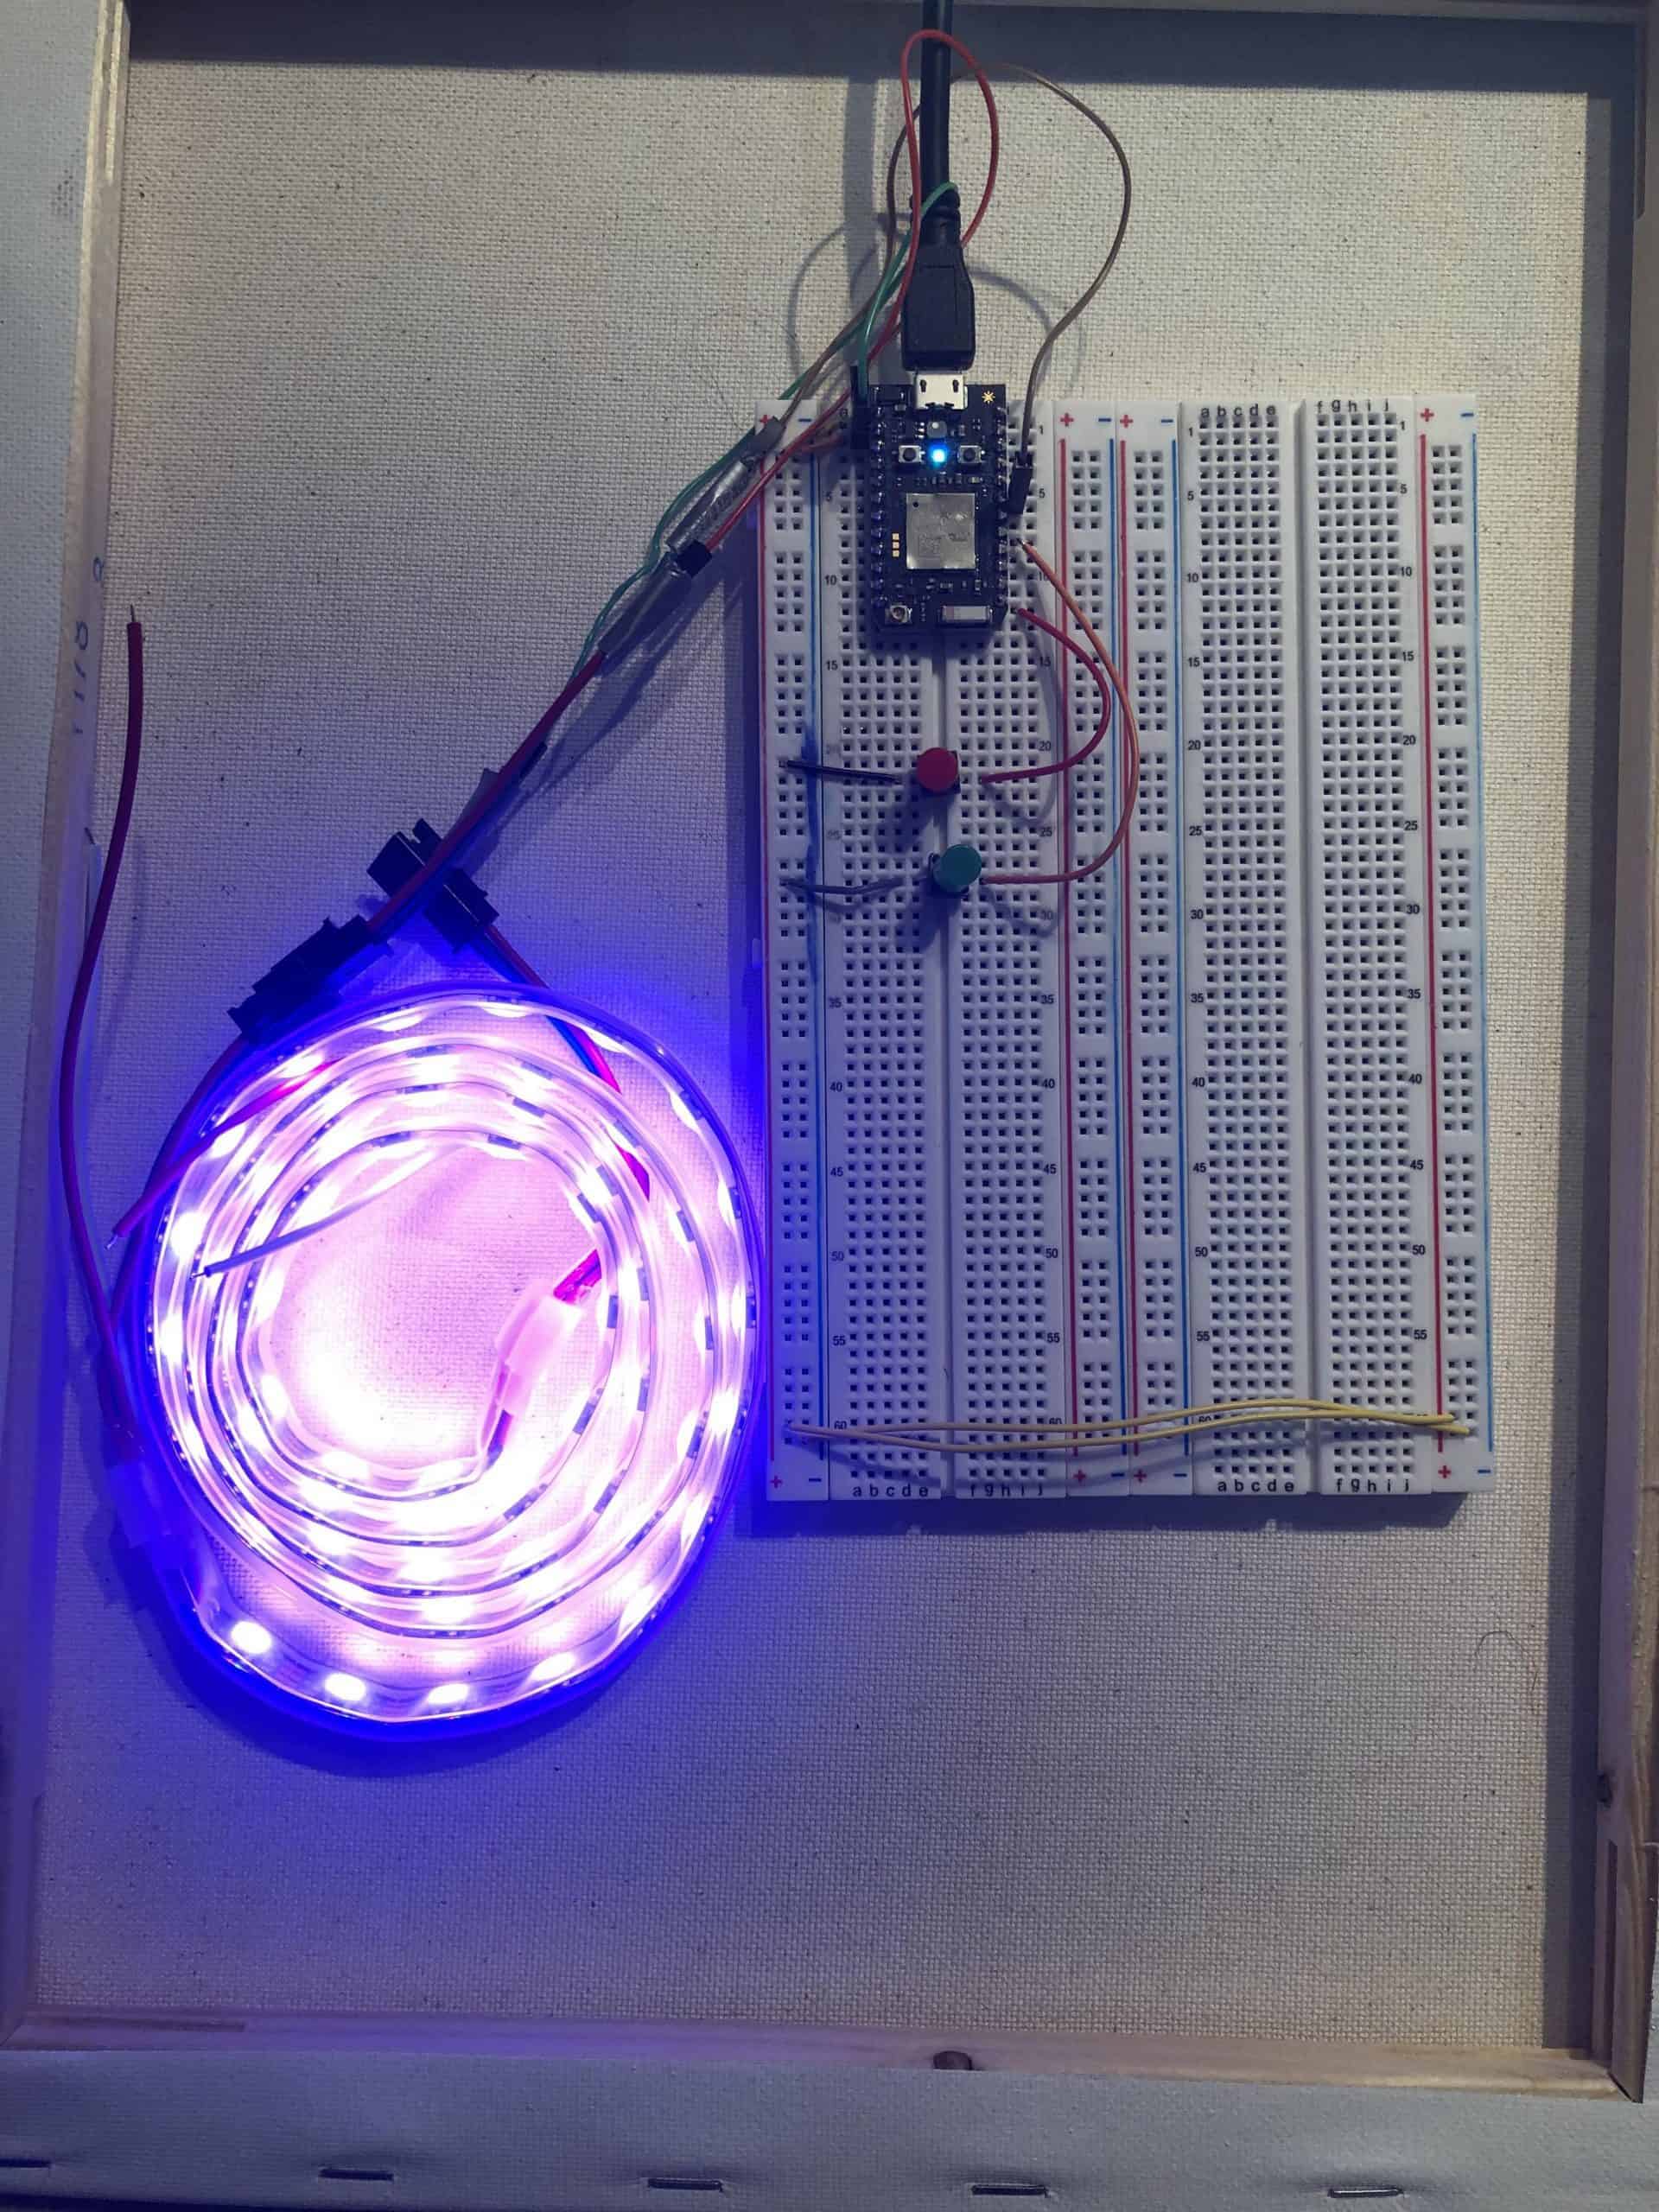
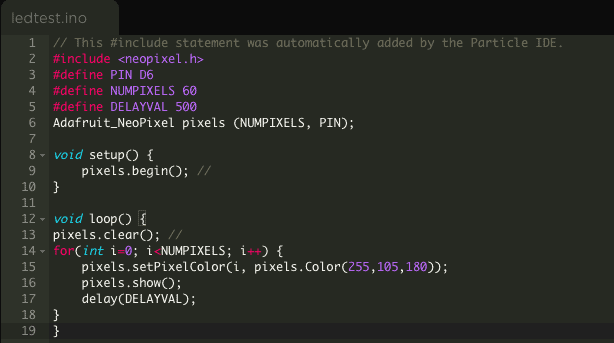
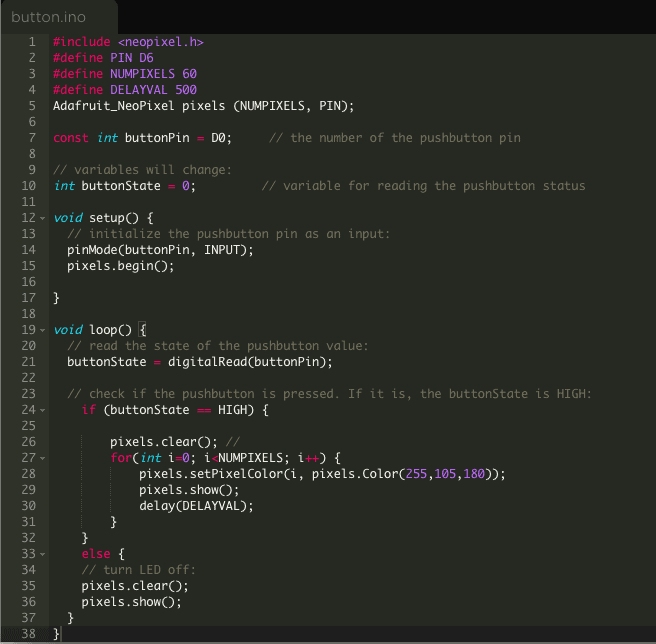
For my first milestone, I completed the basic set up of my IoT Weather Indicator. To begin, I entered a sample code into particle.io to ensure the functionality of the LEDS. I ran into some issues in the electronic set-up, because the way I connected the wires did not create continuity. Afterwards, I adjusted the circuitry by adding buttons, and ran a sample code to test that as well. Once I was able to successfully work both codes, I used the code to connect my particle to IFTTT and change the LEDS based on weather.
LED Code
Button Code
Result of Completed Set Up

In my first milestone, I accomplished getting the basic hardware for the buttons and LEDs set up on the breadboard. I also accomplished getting the initial software using IFTTT up and running, so that the LEDs can change colors every 15 minutes or so.
Second Milestone: Modifications to Original Design
For my second milestone, I focused more on updating the software for better functionality. I used an API from a more sophisticated weather website called Open Weather Maps. This software gives more frequent and accurate information about the weather in a specific area. I also made the modification of adding sunrise and sunset times, so that the LEDs would change colors a given time before sunset. I ran into some issues running the code because I needed to use a more “brute force” method to connect Particle to the API, but once I was able to code the substrings, everything worked.
In my second milestone, I accomplished a bunch of software updates to make the function of my weather indicator a lot stronger. I was able to make the weather conditions a lot more nuanced, so there are a lot more conditions and colors than there originally were. Also, with Open Weather Map, it updates far more frequently.
Final Milestone: Physical Design Completion
The remainder of the time I spent on this project was spent updating the hardware and completing the physical design. I set up a jar with cotton balls to look like clouds, so that the LEDs would look good when lit up. I also made the wiring that was originally on the breadboard more permanent by soldering the wiring. I ran into some issues when soldering, as the wires were very fragile and I had to be careful where I put the solder. Also, I ran into some issues trying to drill a hole in the top of the jar to allow the particle to have a power source. However, after I fixed those issues, everything was complete.


