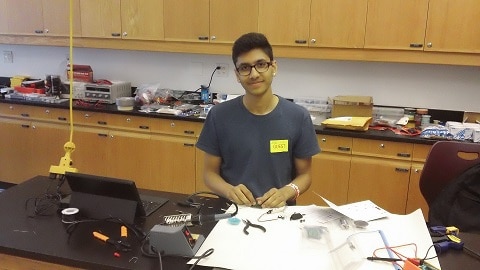
Hi everyone! My name is Shiv and welcome to my BlueStamp Engineering Web page. I am a rising senior and the United Nations International School. These past 6 weeks at Blue Stamp have been amazing. I learned how to develop my soldering skills with the voice changer starter kit and also learned how to define all the items I used for the kit. My main project was the 3 wheeled omni-directional robot. This project had some ups and downs but it was totally worth it. My robot was much bigger than the rest of the robots at blue stamp, and all the weight was pushing down on the wheels so I had to always apply super glue to the motors to keep it firmly in place. In the end, I am really relieved that everything worked out the way I wanted and hopefully I can modify it even more to make it do even cooler stuff.
FINAL MILESTONE:
Robot Hexagonal Dimension: Hexoganal Shape Dimensions
Schematic: http://bluestampengineering.com/wp-content/uploads/schematic.png
Bill of Materials = BlueStamp Bill of Materials – Shiv
I reached my final milestone of my project which means that I have completed my main project as a whole and it is fully functional, which it is. Since my last milestone I had the motor controllers connected to the Arduino board and each motor was connected to a 9V battery. I realized that when I moved the robot with the PS2 controller, only 2 wheels would move and occasionally the 3rd one would two. I figured out that this is happening because of a power issue. The motors best run when connected to a 7.2V battery and I had originally used a 7.4V battery powering all three motors and it didn’t seem to work. This time when I did the same thing it managed to work because the 7.4V rechargeable battery is the ideal power source for the robot’s motors. Now, the robot is fully functional and what I plan to do next is work on the modifications of the contraption, maybe adding an encasement and an ultrasonic ranger which detects if the robot is getting close to any object and is about to bump into it.
SECOND MILESTONE:
I reached the 2nd milestone of my project, the 3-wheeled remote controlled robot. For this milestone I was able to accomplish quite a bit, starting with the connection of the motors, the wheels, and the motor controllers. This was the easy part of the milestone because it only required me to plug in the motor controllers to the motor ports. After this came the hard part which is to make the connection between the motor controllers and the arduino chip, UNO. While doing this, I came across a few problems. The first issue was with the bread board. It wasn’t the bread board that was the problem it was me wiring the motor controllers to the bread board. The bread board I used has 4 different sections and for the motor controllers to work each controller has to be connected to one area on the board powered by a 9V battery.
FIRST MILESTONE:
I have reached my 1st milestone of my main project which is the 3-wheeled omni-directional robot. For this milestone my main focus was directed towards building the main body for the robot. This required 2 hexagonal wood shapes that I cut out with a hack saw, 6 aluminum bars that I ordered from vex robotics which were used to attach both hexagonal shapes together, and 3 wheels that are nailed to the bottom of the robot. I also connected the motor controllers to the motors that are connected to the wheel so that they could be connected to the arduino chip.
STARTER KIT:
For my starter kit, I built and soldered the voice changer kit. It came with 35 solderable pieces and for the most part I had to follow the instructions on how to construct the contraption from the manual. The dimensions of the kit is 3 x 1.8 inches and its main power supply comes from a 9 VDC battery. The max power output is 1.5W (4 ohm) and the voice changer is simply turned on with an on or off switch (slide switch). The main effect of this voice changer is that it makes your voice sound like a robot and has a vibrato effect as well. We also have 4 main pitch buttons that can alter the way we sound, i.e. have a vibrato voice, high voice, low voice, or a robot voice. I also soldered on a built-in microphone and a power amplifier control. However, one thing that did not come with the kit was a speaker and this was the most important part that enables one to hear the change in voice. Robin managed to have one and gave me it which I then soldered on the positive wire and the negative wire. One problem I encountered was the fact that the kit did not come with any PCB tabs. This was an essential part while building the machine as it would allow for more stability and less feedback when speaking in the mic. All in all this starter kit was extremely fun to make and for my main project I am building a 3-wheeled robot. With the soldering skills that I have now I feel like I will be able to complete my main project more efficiently and in less time.


