Floor Cleaning Robot

The Floor Cleaning Robot is designed to move along the floor, sweeping dirt and other particles away, while a sponge behind the brush soaks up excess debris. It is also able to detect a wall and swerve out of the way.

Engineer

Satchin N.

Area of Interest

is Mechanical Engineering

School

Leland High School

Grade

Rising junior

Third Milestone

This is the third milestone for my main project the floor cleaning robot. To summarize my past milestones, I assembled the chassis, battery pack, arduino and motor shield and connected everything with wire. For my second milestone I mounted and wired the ultrasonic sensor and coded the robot to turn right and left when it is near a wall. Now for this milestone, I attached a brush and sponge to the bottom, and crafted a wooden cover to the robot so that no gunk or debris lands on the circuit board, but as you can see, I can easily slide the roof, or take the top off in order to fix any issues. I also stuck the USB port out of the side just in case I needed to tweak my code. For my code, I used the adafruit motor drive shield v2. The only thing I did from my second milestone to now is I adjusted the time it takes to turn so it turns a correct 180 degrees, and I adjusted the speed of each motor to make the robot run forward. For my modifications, I plan to attach a small vacuum cleaner where the back wheel is and program it to run at all times.

Second Milestone

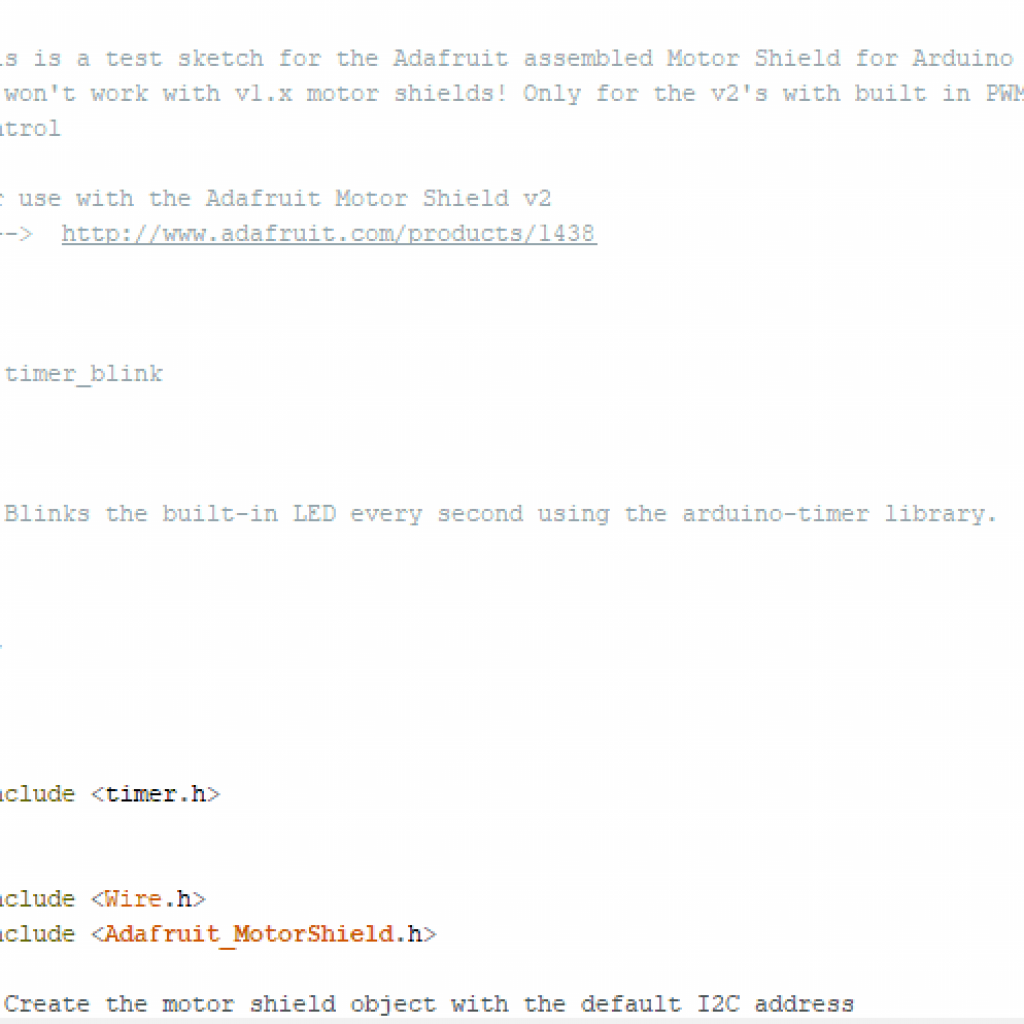
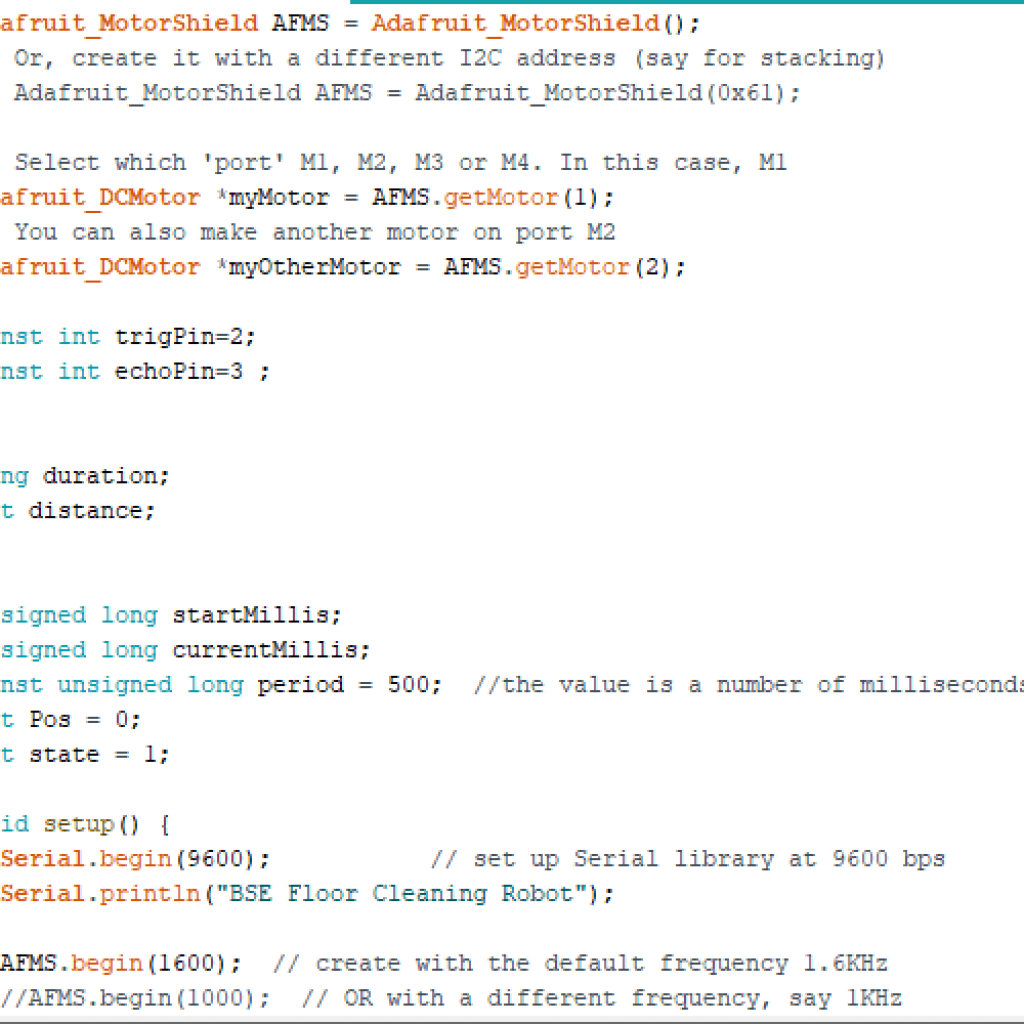
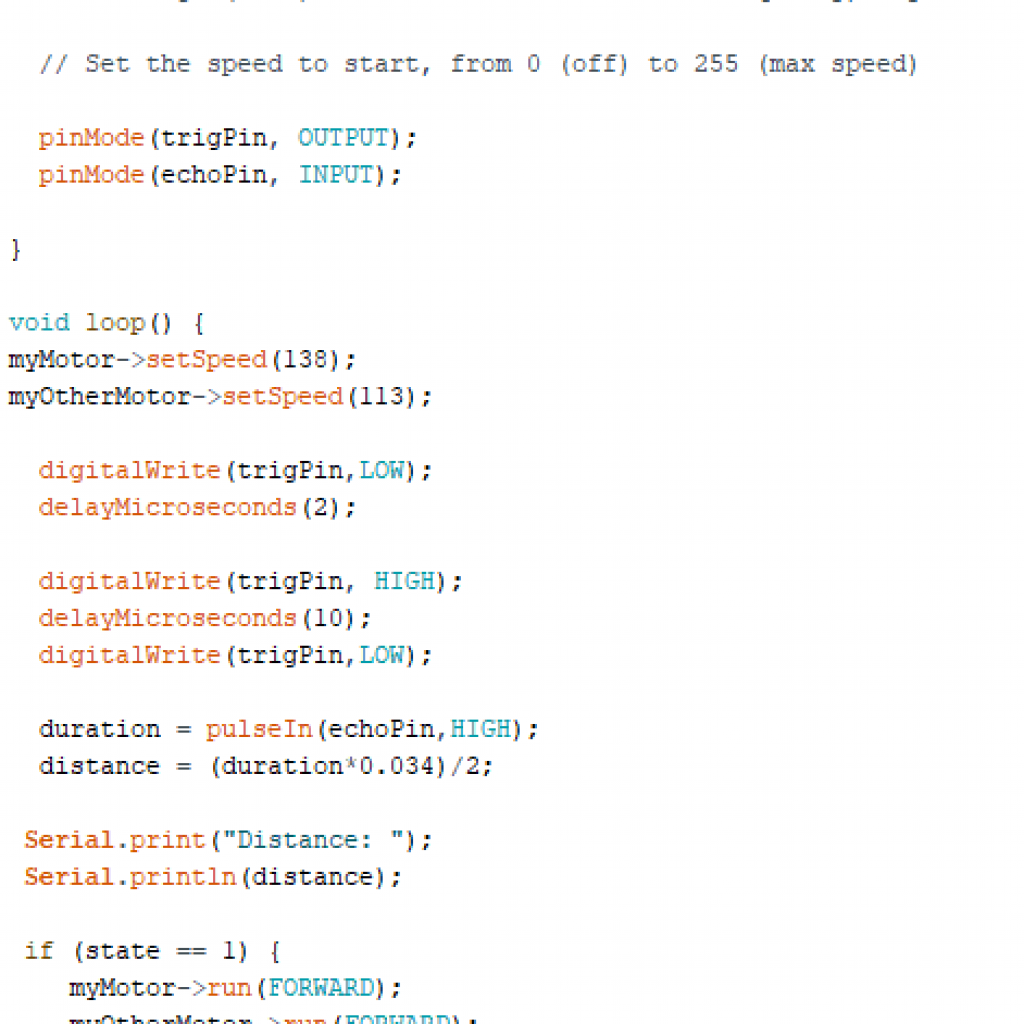
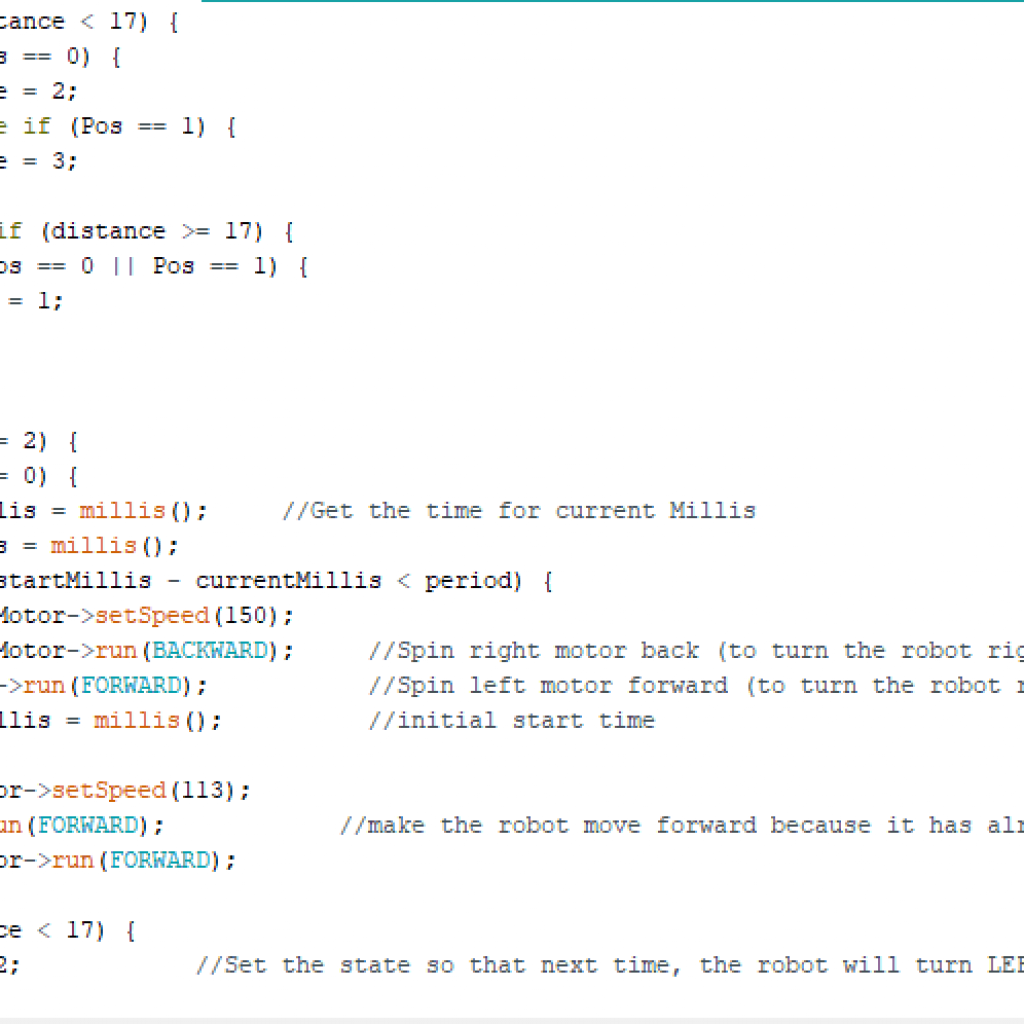
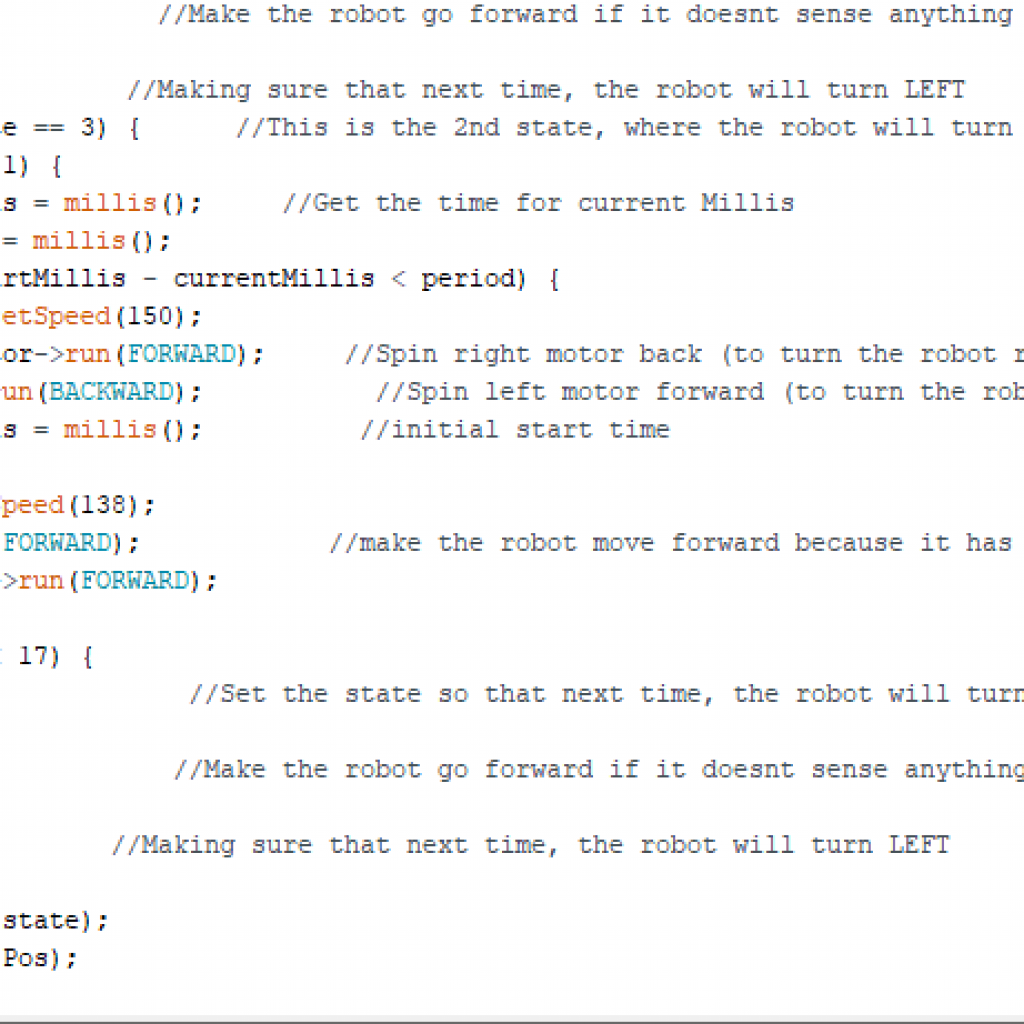
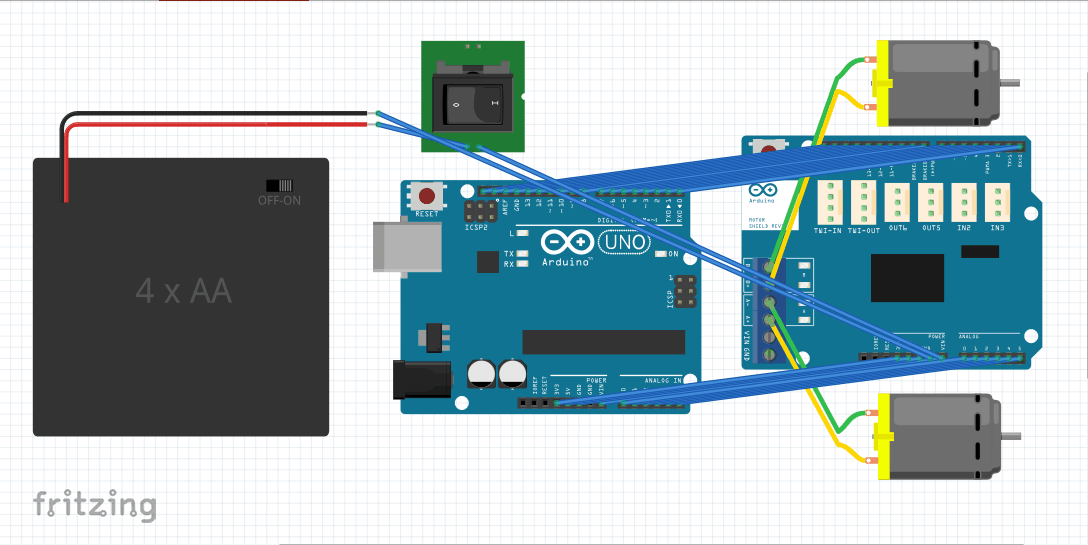
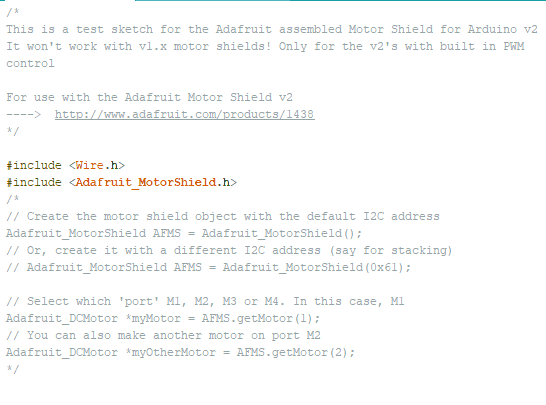
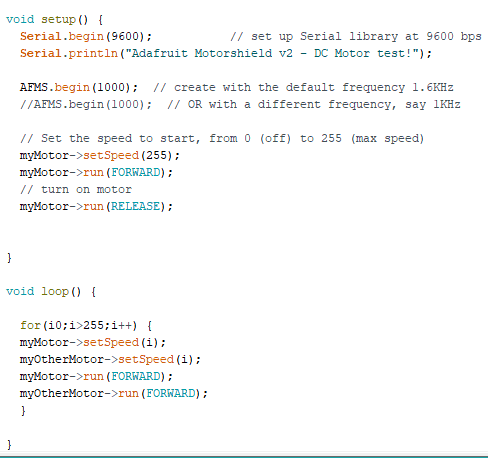
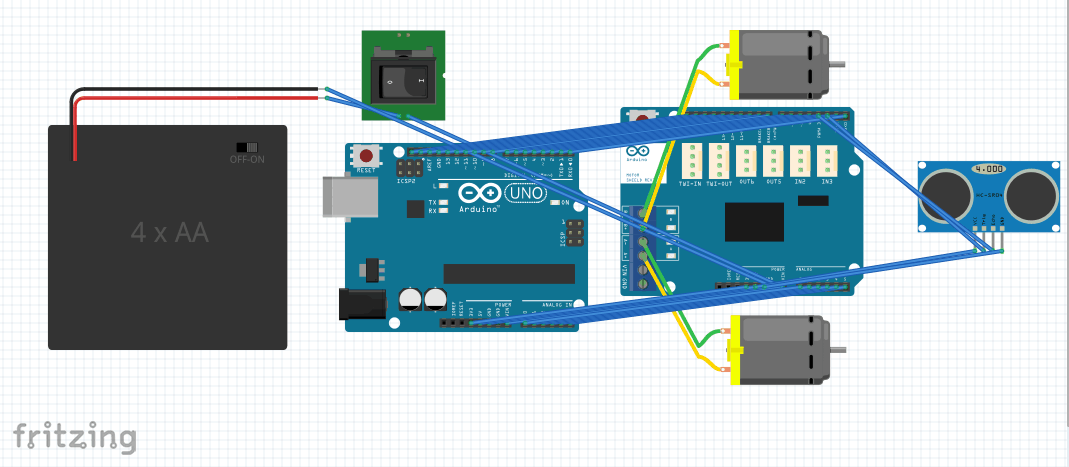
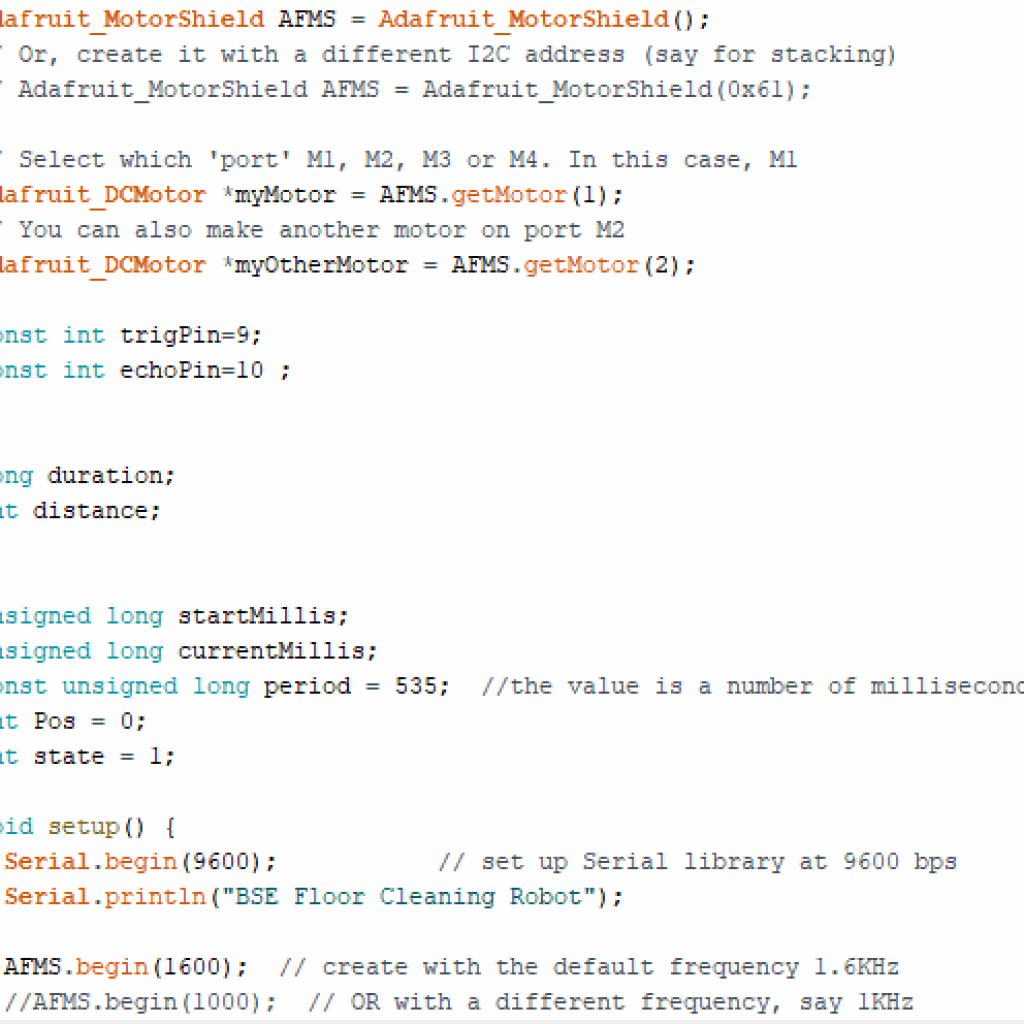
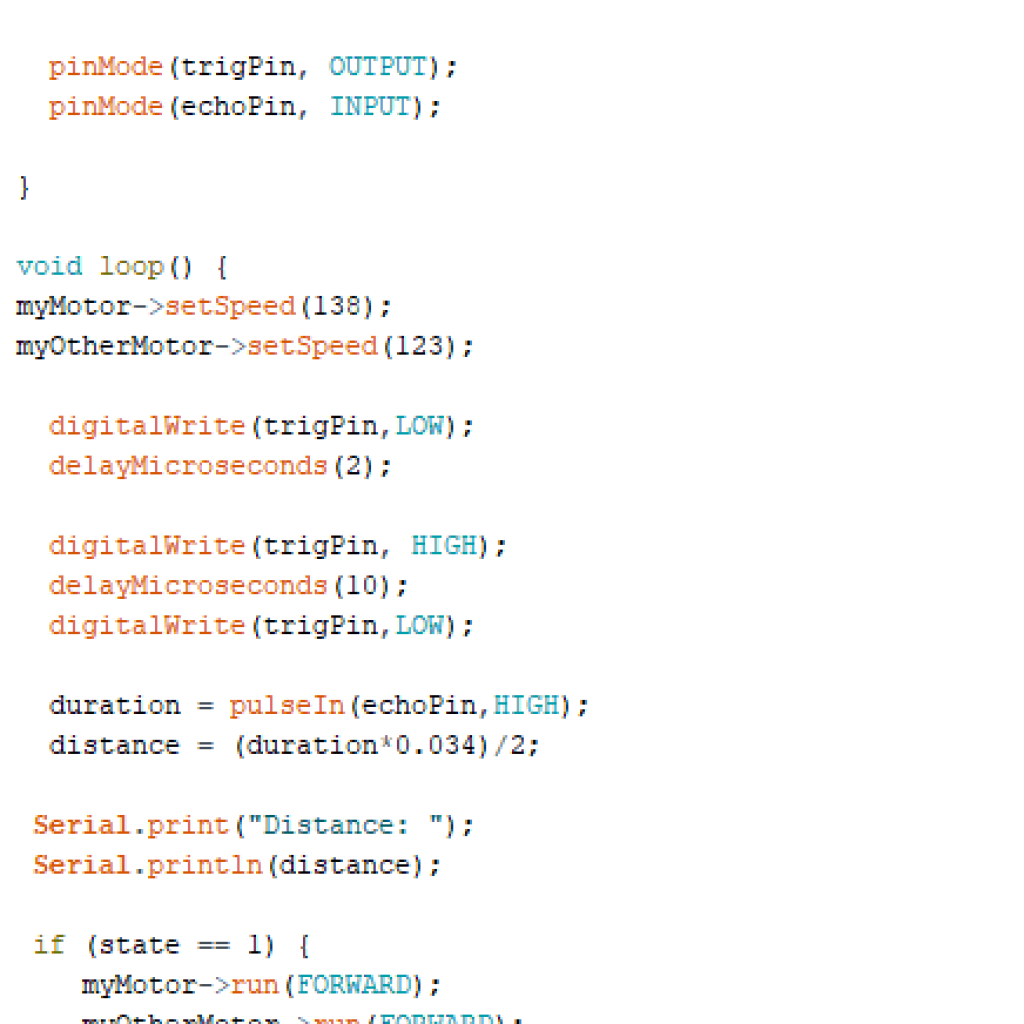
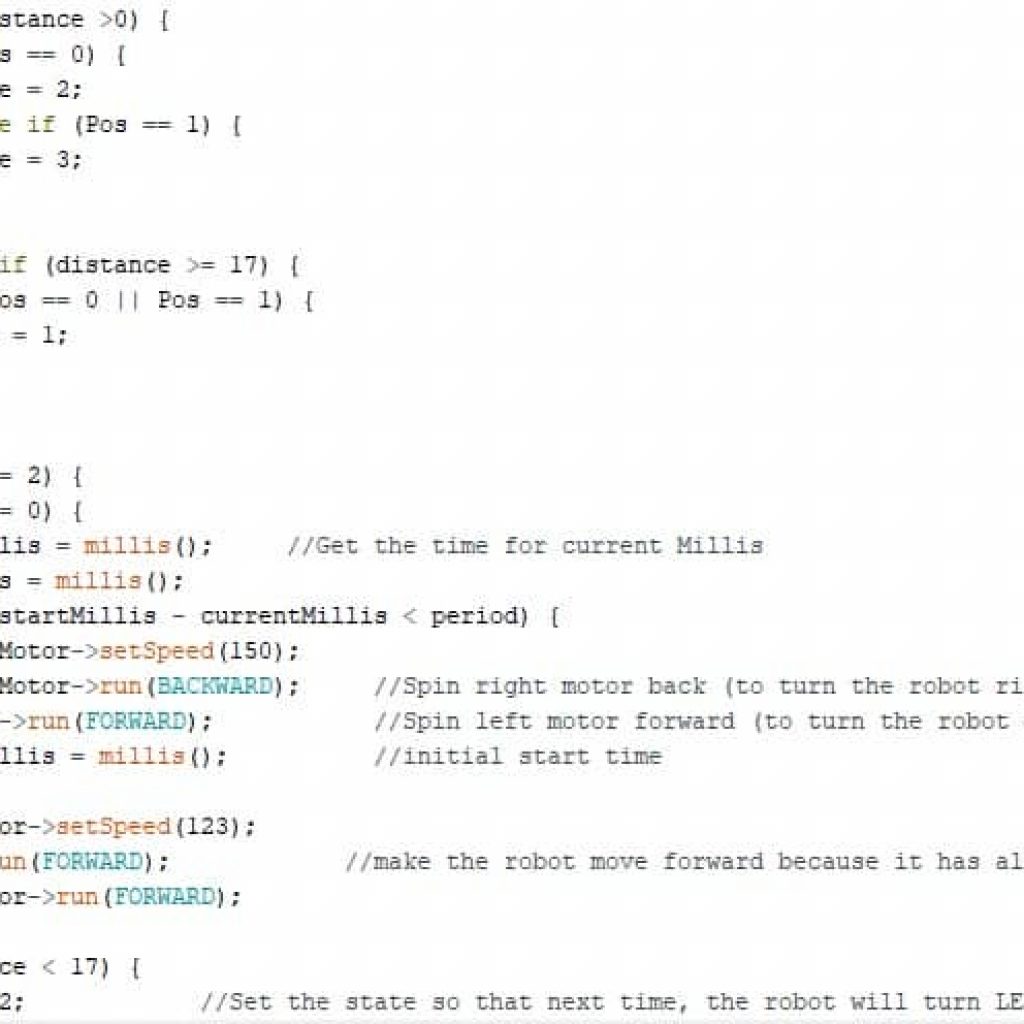
This is my second milestone for my main project, the floor cleaning robot. As I explained in my first milestone, I have completed assembling the chassis, the arduino and the motor drive shield, and all the wire connecting to the battery. Since my first milestone, I mounted the ultrasonic sensor on the front of the robot and connected the 4 wires coming out of it. The 4 wires are the Vcc, for intaking voltage, the trig pin, for emitting soundwaves, the echo pin, for receiving the soundwaves, and one for ground. I connected the trig and echo pin to digital pins 2 and 3 on the motor shield, and connected the Vcc and ground to the 5v pin and ground pin on the motor shield. For my code, I used the Adafruit motor shield v.2 library again to program the robot to turn left then right when it senses an object close to it. Here’s a demonstration. First off, I programmed the robot to calculate distance. I did this by first calculating time. One of the “eyes” of the ultrasonic sensor sends out a soundwave for 10 microseconds, or one hundred thousandth of a second. The other sets a timer until the soundwave sent out bounces off the nearest object and is received in the other eye. I used a variable to store the time. However, I needed the distance, so I multiplied the time by the rate of the soundwave, which is just the speed of sound. But this will give me the distance between the ultrasonic sensor, the object, and back to the ultrasonic sensor when I only need the distance from the object to the ultrasonic sensor. So I divided the distance by 2. I then programmed the motors. To be able to do this, I split my robots functions into 3 states. The first state is the robot moving straight if it doesn’t sense anything in front of it. The second state is the robot turning left if it senses something in front of it. And the 3rd state is the robot turning right if it senses something in front of it AND it has already turned left before. I had a lot of trouble with the code because I needed to write out all the possibilities, and the entire code wouldn’t work if I forgot something. Another setback I had was that I had to move arduino, motor shield, and the battery around because when I mounted the sensor, the USB for the arduino wouldn’t fit. Somethings I plan to do for my next milestone is add the brush and sponge, and program the robot so it acts like a lawnmower and moves along the floor and turn 180 degrees when it sees a wall.

First Milestone

First Milestone: This is my first milestone for my main project, the floor cleaning robot. I assembled the chassis of the robot which consists of the body with 2 DC Motors connecting to 2 wheels and a swiveling wheel in the back for support. A battery pack of 6 volts connects to a switch that determines when the arduino and the motor drive shield, the board stacked on top, is on. The arduino supplies power to the drive shield, which connect to the 2 DC Motors that turn the front 2 wheels. For my code, I used the Adafruit Motor Shield Library to make it possible for me to code the motors. In the code, I established my 2 motors, which are in motor ports 1 and 2, and put in some starter code which tells the motors to move together and gradually increase their speed from a range of 0-255 using Pulse-Width Modulation, or switching rapidly between 255, high, and 0,  low to create  a range of 0-255. Some trouble I had with this was figuring out how to download the library, and what functions I should use to move the motors. For my second milestone, I plan to incorporate an ultrasonic sensor and code it so that robot does not run into any walls.

The Useless Machine

For my starter project I chose the Useless Machine because I was interested in doing a project that requires both mechanical and electrical engineering. As you can see, when a user flicks the switch on the top, an arm emerges from the box to flip the switch back into place. This project consists of two switches, the main switch which tells the motor that if it is switched, the arm should go up. While the arm goes up, another snap switch is turned off, which tells the motor to move the arm back into the box. 2 resistors are required for the LED and motor, which turns red when the arm flips the switch back into its original place. This project runs off of 3 AAA batteries, which supply about 4.5 volts to the motor and LED. One of the main problems I had was soldering every component on the PCB correctly so that they connected properly, but it taught me how to solder better. This is what I used to build my starter project. You can see the video by following this link.

STEM Summer Camps Coding & Robotics Classes For Kids San Francisco Coding & Robotics Classes For Kids New York Coding & Robotics Classes For Kids Denver Coding & Robotics Classes For Kids Palo Alto STEM Summer Camps For Kids in New York STEM Summer Camps For Kids in Palo Alto STEM Summer Camps For Kids San Francisco STEM Classes For Kids in New York STEM Classes For Kids in Palo Alto STEM Classes For Kids in San Francisco Code Classes For Kids Code Classes For Kids in New York Code Classes For Kids in Palo Alto Code Classes For Kids in San Francisco STEM Summer Camps For Kids

Leave a Comment

Start typing and press Enter to search

Bluestamp Engineering