Smart Mirror
The smart mirror displays snippets of personalized information such as the time, weather, calendar, scores, news, and much more. Not only can I get ready in front of the mirror, but I have the latest information.
Engineer
Saagar M.
Area of Interest
Computer Science
School
Monta Vista HS
Grade
Rising Senior
Reflection
Overall, my time here at Bluestamp was extremely beneficial. I learned a lot about software and hardware, including things like soldering, working with sensors, and writing code in Python and JavaScript.
What’s more, I have increased confidence in my abilities as well as learned that I am able to persevere through problems by trying different solutions and not stopping until I have resolved the problem. Bluestamp has also enabled me with many resources and tools that I can use in the future as I work on further projects.
Furthermore, I have made lots of new friends here and also had a great time working with instructors. And finally, I got a major taste of both computer science and engineering.
My favorite memory in Bluestamp was seeing the culmination of the software and hardware aspect of my project coming together and seeing all my hard work come to fruition. This was the most rewarding part of all the time and effort I put into the project.
Final Milestone
My final milestone is completing the lunar phase clock and allowing it to synchronize with the lunar phase in the real world. The clock also features an OLED screen to show the current time, temperature, and humidity. A real time clock in the back enables time-keeping even without power supply.
In order to show the current moon phase, the Arduino Nano takes the current date from the real time clock, then plugs the year, month, and date into a function. This function calculates a phase number and lights up the LEDs according to the value. The data from the temperature and humidity sensor is also sent to the Arduino and then to the display.
When I was working on reaching the final milestone, I encountered the problem of the moon not properly lighting up. Instead, all of the lights are always on and flash extremely rapidly. To fix this problem, I had to replace the code I downloaded from instructables with new code that I wrote. This solved the issue and the moon now lights up properly.
Third Milestone
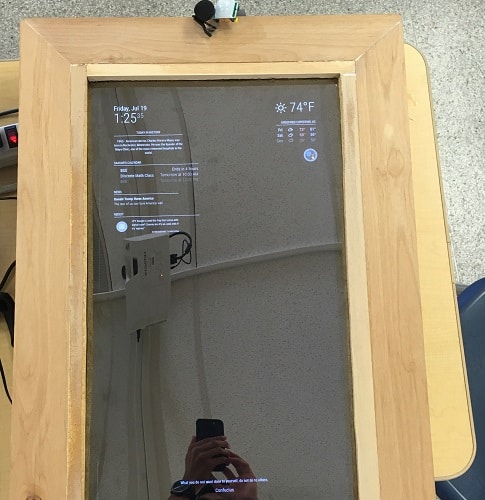
For my third milestone, I have successfully assembled my smart mirror. The way my smart mirror works is that the acrylic mirror is placed on top of the monitor. This is possible because the acrylic mirror allows light to pass through from the monitor which is the “smart” aspect of it and also reflects light back at the user which is the “mirror” aspect of it. These two components are sandwiched to the inner frame using wooden corner brackets. Then, the raspberry pi and all necessary components were duct taped to the back out of sight of the user, powering the smart mirror.
I first built the outer frame, using a jigsaw and handsaw to make the 45-degree angle cuts and then using Gorilla glue to keep it together. However, I didn’t plan properly at the beginning, so I had to make an inner frame because the acrylic mirror and monitor to be sandwiched against it from the back. So, I made some more cuts and glued it together to the outer frame. Afterwards, I cut the acrylic mirror using scissors which was a painstaking process since I had to go very slowly and be careful so that the mirror wouldn’t crack and splinter. Finally, I sandwiched the mirror and the monitor to the inner frame using wooden corner brackets followed by duck taping the raspberry pi and all the necessary wires to the back.
The difficulties I had was getting precise 45-degree angle cuts using only a handsaw and jigsaw. Thus, when I put it together, there were some gaps in the frame which I had to fill in with putty. Also, due to my improper planning, I was a little stressed figuring out what to do, but was happy to finally think of building an inner frame.
Second Milestone
For my second milestone, I added all the third-party modules I wanted by adding the code to the config.js file as a module. I then added my own javascript and CSS/SCSS code to customize it to my tastes.
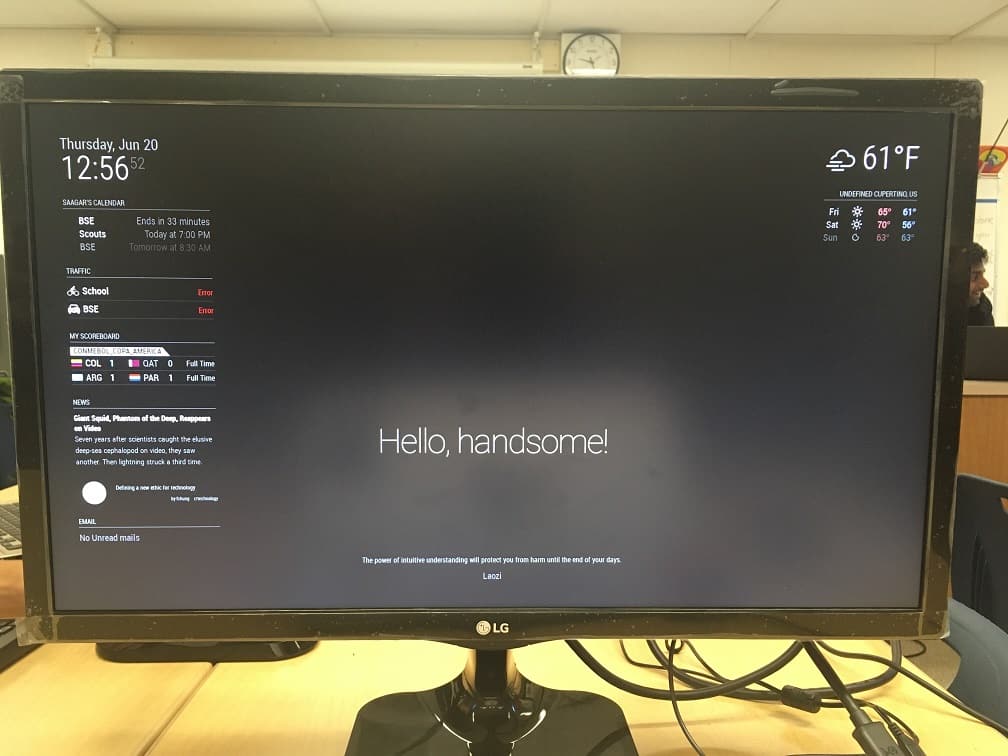
When the mirror is turned on it displays all these blocks of information from all the different modules. If I start playing music on my phone the Spotify module pops up and displays the artist, playlist are, etc. The calendar module updates when I add and delete events on my phone to display my events up-to-date.
The difficulties I had getting my phone to communicate with the mirror through IP addresses and a server created on the port 8080. It took a lot of troubleshooting and reading through forums to solve the problem, but it was well worth the effort because now I can control my mirror with my phone. Another difficulty was initially understanding how to add my own custom design changes in which I learned about CSS and more interestingly SCSS which are web-design languages.
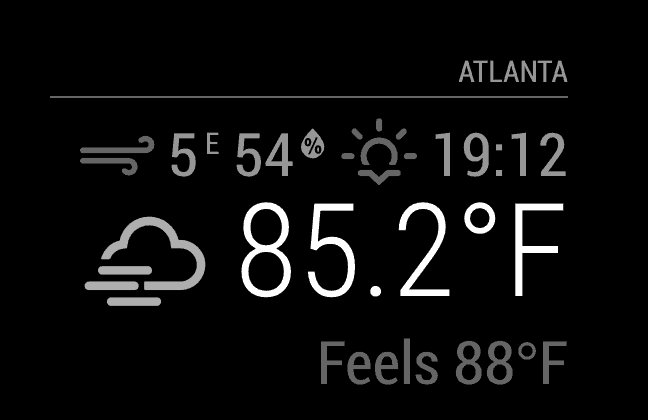
Weather Information
News

Forecast

- Today in history: displays a historical fact that happened today
- Traffic: displays commute times to my destinations
- Scoreboard: displays scores for my teams and sports
- Reddit: displays posts from my favorite subreddits
- Inspirational quotes: random quotes from influential people
- SunRiseSet: displays the earth throughout the course of the day
- Spotify Control: displays the music information and pops up only when the music is playing from my phone
- Phone Control: can use my phone to control my mirror such as add and remove modules and turn it on and off
First Milestone

For my first milestone, I installed Raspbian on my raspberry pi and downloaded the smart mirror code from an open-source GitHub repository called Magic Mirror and now I have a functioning display with minor customization changes for my smart mirror. When the smart mirror is turned on, it displays a black screen with snippets of information such as the time, weather, calendar, news, and compliments. I downloaded NOOBs onto my micro-SD card and placed it in my raspberry pi and connected to my monitor and followed the instructions to install raspbian as the main operating software. Following this, I typed in a command which downloaded all the necessary files to my raspberry pi from the MagicMirror repository. The difficulties I had included using the weather API and adding my personal calendar to the calendar module. The problems that still remain include fixing the time as the raspberry pi is on its own time and the calendar module schedule as it is a few days behind. For my next milestone, I would like to fix the problems I have currently such as the time and the calendar module and add third-party modules like Spotify control, inspirational quotes, and emails.
Starter Project
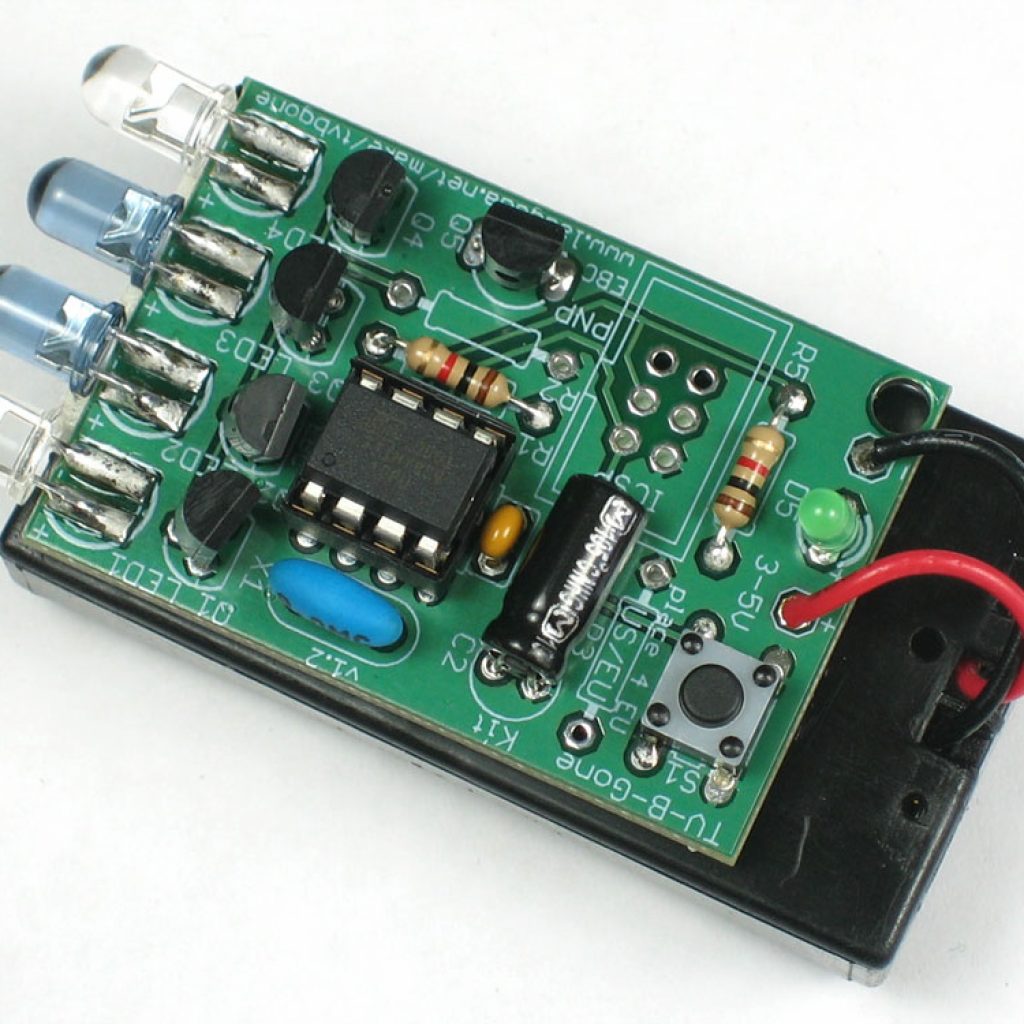
My Starter Project is the TV-B-Gone, a nearly universal remote that can turn off almost any brand of TV.
When the power supply is connected, it supplies the circuit with a current. The button that you press essentially turns the circuit on and off. When the circuit is turned on, the TV-B-Gone sends a signal that is decoded as an off signal by the TV. This off code is found by the micro-controller by running pre-programmed code. Once the right code is found, the transistors amplify the signal and reroute it to the IR LEDs which emits an infrared light that hits the TV and is detected as an “off” function, turning off the TV. During the building process, I faced a couple of problems. This was the first time learned to solder and I had trouble soldering the components onto the circuit. As a result, I had a couple of weak joints and some parts that were stuck together which can be bad because it can cause the circuit to short-circuit. Therefore, I had to desolder some parts which was a very difficult, painstaking process and took multiple attempts to finally fix the joints. Learn more: https://learn.adafruit.com/tv-b-gone-kit/overview