
Third Eye For The Blind
There are 3 components to the Magic Mirror: The mirror, the monitor, and the frame. The monitor is powered by a Raspberry Pi 3 that displays the Magic Mirror interface. The frame encloses both the mirror and monitor to create the Magic Mirror illusion.
Engineer
Pelagia K
Area of Interest
Biomedical Engineering
School
Los Gatos High School
Grade
Incoming Junior
Demo Night
Third Milestone
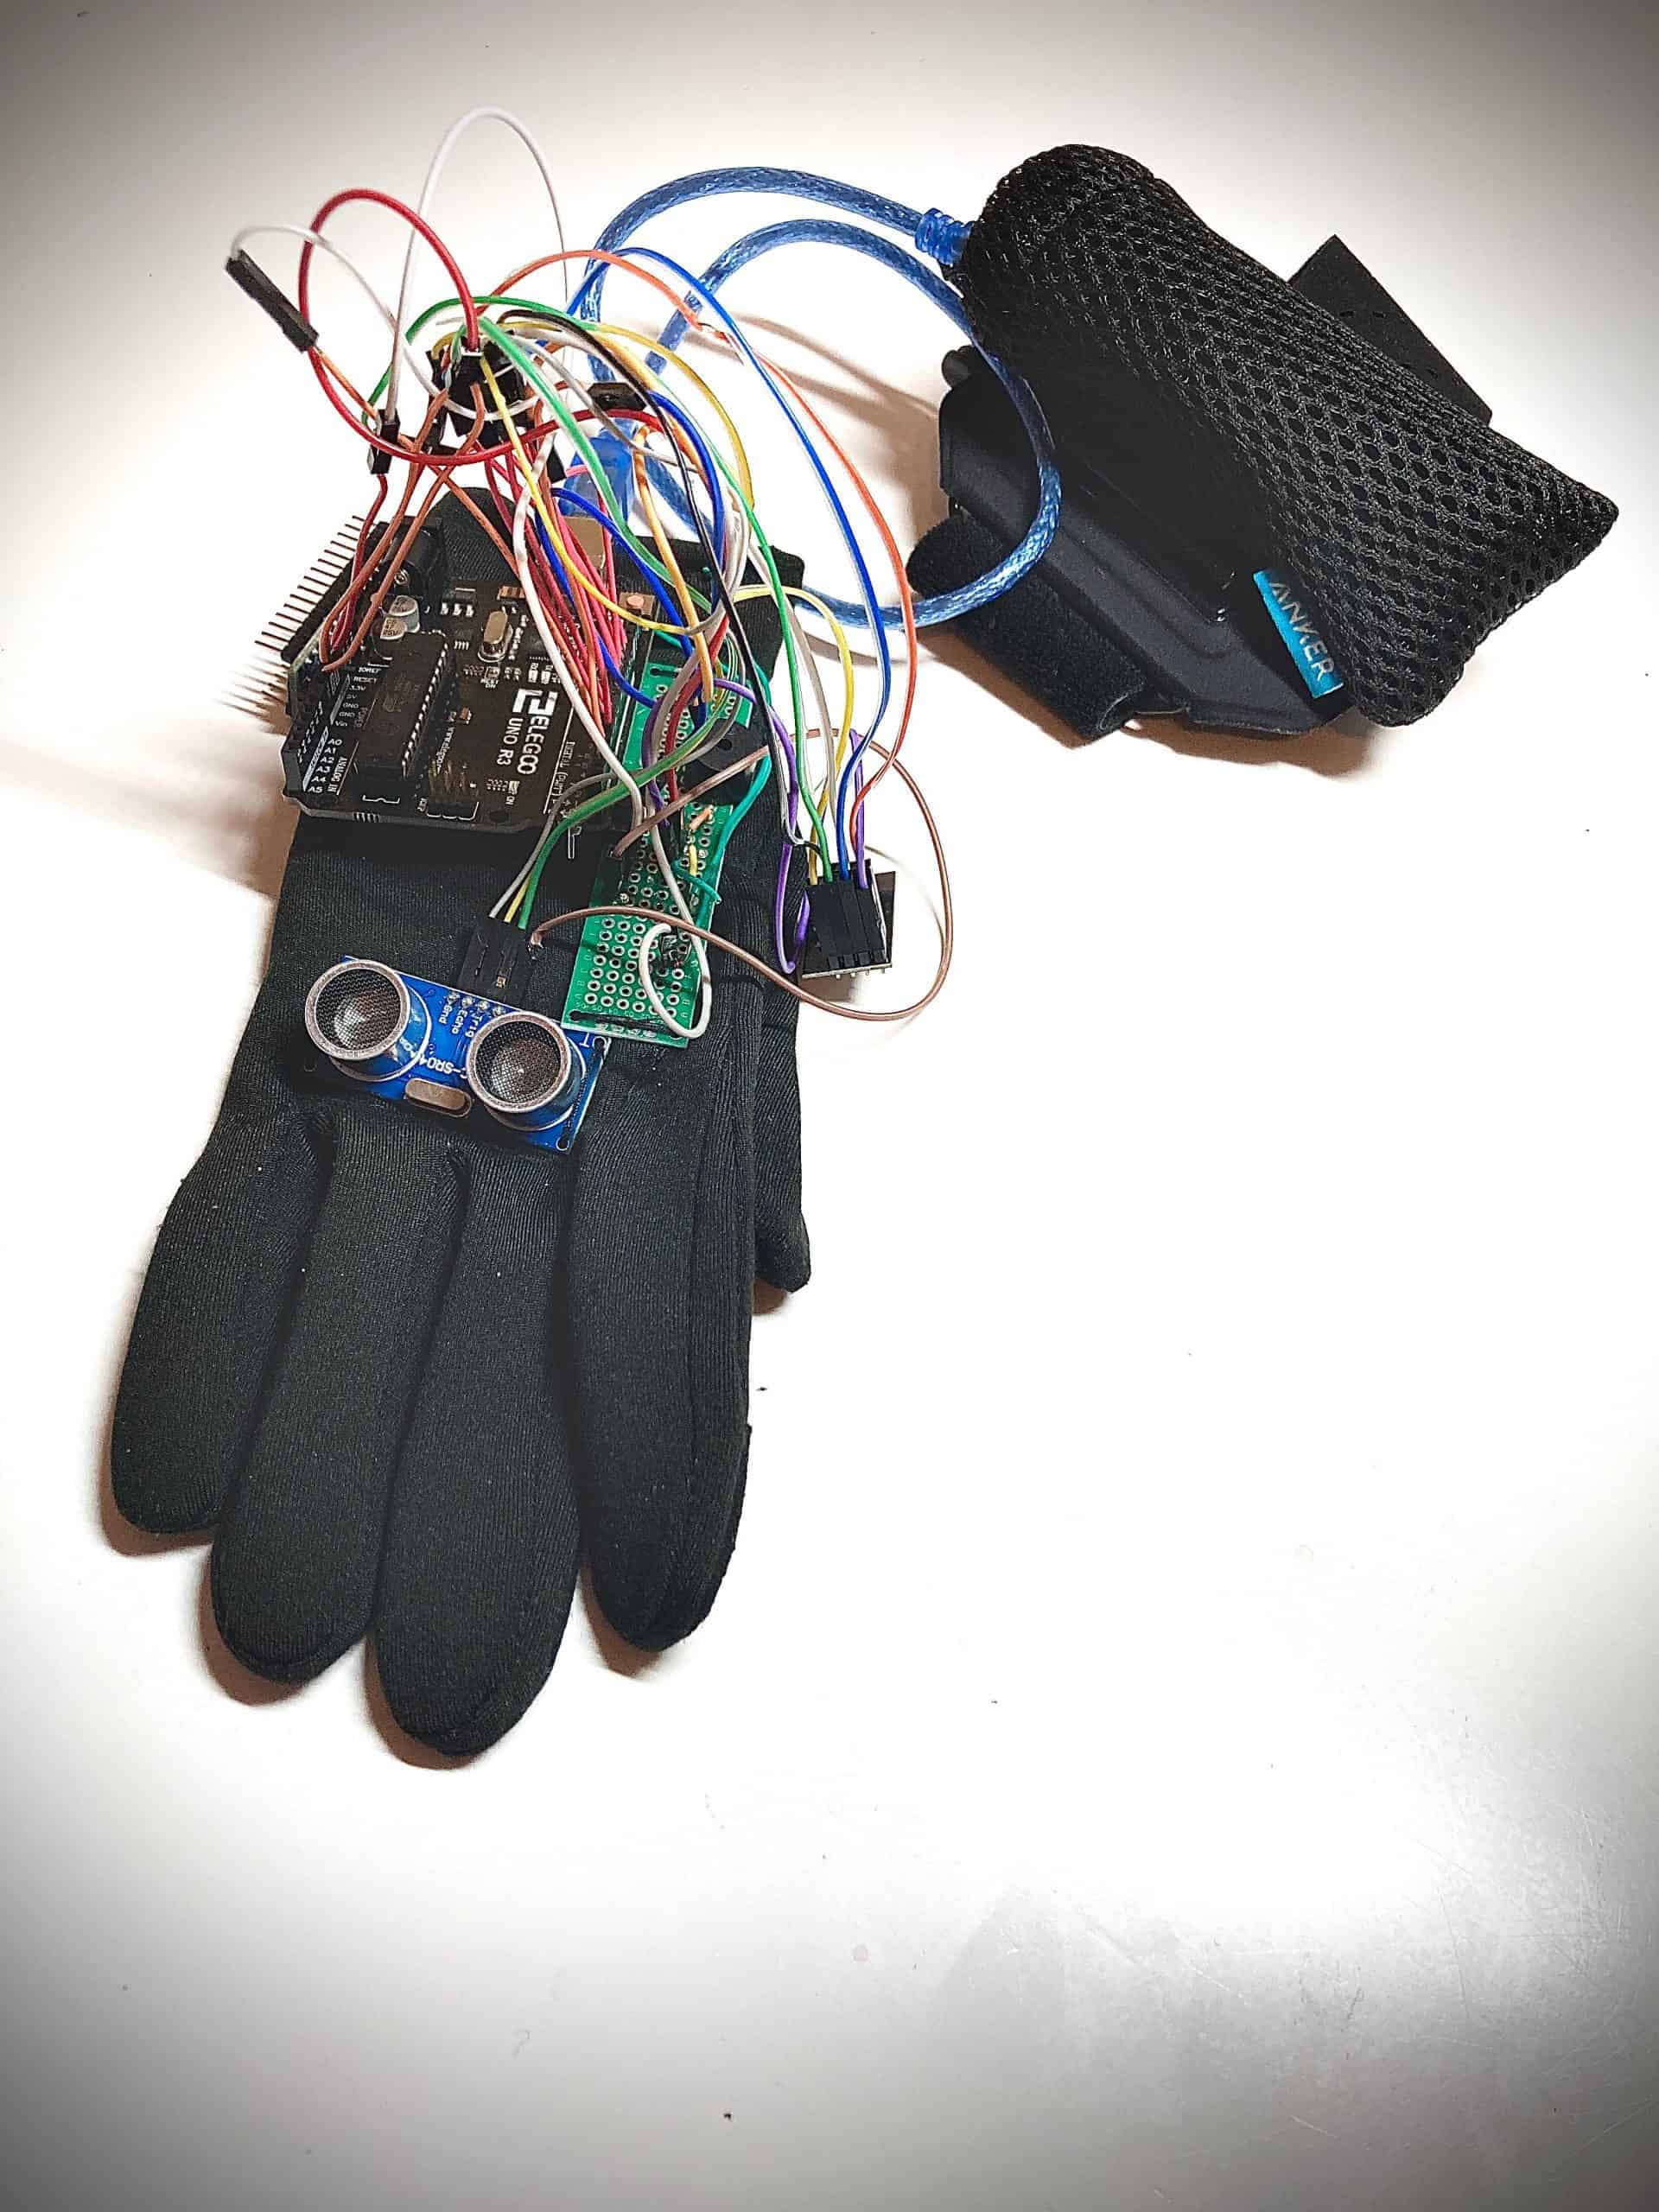
For my Third Milestone for the Third Eye For The Blind, I created a more functional version of my Second Milestone (See below). I attached the ultrasonic sensor to the knuckles of my glove. Because the breadboard was very bulky and inconvenient, I transferred all the wires to a perfboard. I attached the perfboard to the side of the glove so that it would not break, even if someone bent their wrist. I attached the nano to the bottom of the glove so that it would easily connect to the battery. One problem I ran into was that the battery was very heavy. When looking around, I found an armband that holds phones for running. I took it apart and attached the battery. It runs the wire down your arm and connects perfectly to the nano. The NRF, which I am still working on, has not been attached to the glove yet.
Second Milestone

For my Second Milestone for the Third Eye For The Blind, I added a vibrator and a button to the basic prototype I made in my previous milestone. The vibrator is used similarly to the piezo buzzer. When the digitized information from the HC-SR04 sensor is sent to the Arduino, the vibrator is cued to signal at increments that correspond to the distance between the Third Eye and an object nearby. Then I attached the button so that I can switch between modes. When the button has not been clicked, the program automatically runs the buzzer code. This mode is programmed to do exactly what the first prototype did. The Second mode works similarly, but instead of a buzzer it uses a vibrator. The last mode works with both a vibrator and a buzzer. This will allow a person to easily navigate in ways that best suit them. It may also allow people who also have hearing impairment to navigate without worry. My project is getting quite bulky and it’s not easy to use. That is why in my next milestone I would like to transfer the wires from a breadboard to a perfboard. I will transfer all of the wires to a nano instead of an arduino. To be able to use the arduino for future plans, I used two NRF so I can wirelessly connect the nano to multiple sensors. We will also attach the the project onto a glove so that it can be used easily.
define trigPin 9
define echoPin 10
define buzzer 11

int vibratorPin = 7;

const int buttonPin = 2;
int buttonState = 0;

int maxDistance = 15000;

long duration;
float distanceInch;
int timer;

int counter = 1;

unsigned long previousMillis = 0;
long OnTime = 250;
long OffTime = 750;

void setup() {

pinMode(trigPin, OUTPUT);
pinMode(echoPin, INPUT);
pinMode(buzzer, OUTPUT);
pinMode(echoPin, INPUT);
pinMode(trigPin, OUTPUT);
pinMode(vibratorPin, OUTPUT);

pinMode(buttonPin, INPUT);

Serial.begin(9600);
}


void loop() {

buttonState = digitalRead(buttonPin);

if (buttonState == HIGH) {
counter=counter+1;
delay(1000);
} else {
counter=counter;
}

if (counter == 1){
buzzerFunction();

}

if (counter == 2) {
vibrator();
delay(10);
}

if (counter == 3) {
buzzerFunction();
vibrator();
}

if (counter == 4) {
counter=1;

}


int pulseWidth = pulseIn(echoPin, HIGH, maxDistance);
pulseWidth = 0;
analogWrite(vibratorPin, pulseWidth);

}

void buzzerFunction(){
digitalWrite(trigPin, LOW);
delayMicroseconds(2);
digitalWrite(trigPin, HIGH);
delayMicroseconds(10);
digitalWrite(trigPin, LOW);

duration = pulseIn(echoPin, HIGH);

distanceInch = duration * 0.0133 /2;

digitalWrite(buzzer, HIGH);
delay(50);
digitalWrite(buzzer, LOW);

timer = distanceInch * 5;

delay(timer);
}

void vibrator(){
digitalWrite(trigPin, LOW);
delayMicroseconds(2);
digitalWrite(trigPin, HIGH);
delayMicroseconds(10);
digitalWrite(trigPin, LOW);

duration = pulseIn(echoPin, HIGH);

distanceInch = duration * 0.0133 /2;

digitalWrite(vibratorPin, HIGH);
delay(50);
digitalWrite(vibratorPin, LOW);

timer = distanceInch * 5;

delay(timer);
}
First Milestone
My First Milestone for the Third Eye For The Blind is to create a working program for the basic prototype of my project. The software uses an HC-SR04 ultrasonic sensor, which uses ultrasonic waves to detect objects around it. The HC-SR04 sensor uses ultrasonic waves to calculate the distance using a formula of (speed of sound*time/2). The Ultrasonic sensor sends back the digitized information through two wires, which connect the echo and trig pins to the Arduino UNO R3 board. The Arduino then signals a piezo buzzer to signal at increments that correspond to the distance between the Third Eye and an object nearby. Piezo buzzers work by using a piezo crystal ( it changes shape when voltage is applied to it). If the crystal pushes against a diaphragm, it generates the beeping noises.
//Code For First Milestone

#define trigPin 9
#define echoPin 10
#define buzzer 11

long duration;
float distanceInch;
int timer;

void setup() {
pinMode(trigPin, OUTPUT);
pinMode(echoPin, INPUT);
pinMode(buzzer, OUTPUT);
}

void loop() {

unsigned long currentMillis = millis();

if((ledState == HIGH) && (currentMillis - previousMillis >= OnTime))

digitalWrite(trigPin, LOW);
delayMicroseconds(2);
digitalWrite(trigPin, HIGH);
delayMicroseconds(10);
digitalWrite(trigPin, LOW);

duration = pulseIn(echoPin, HIGH);

distanceInch = duration * 0.0133 /2;

digitalWrite(buzzer, HIGH);
delay(50);
digitalWrite(buzzer, LOW);

timer = distanceInch * 5;

delay(timer);
}