Hello, world!
My name is Nathan, a rising senior at Saratoga High School. In my free time, I enjoy reading, making video game levels, and occasionally designing parts in CAD software to 3D-print. Additionally, I partake in both the glory of the PC master race, and exorbitant amounts of sleep. My favorite genres are science fiction and fantasy. My Bluestamp Engineering starter project was the Mintyboost phone charger, and my main project is the Keypad and Fingerprint Scanning Safe. This safe will unlock to either a correct passcode typed into a matrix keypad, or to a registered finger being scanned by the fingerprint scanner. The locking and unlocking is handled by a servo mounted inside my box, and an L-bracket. All components are connected to an Arduino Uno via wires soldered to a PCB. Additionally, a speaker will play various sounds depending on if a button is pressed or if access is granted or denied.


In reflection, looking back, I had a stellar time building this project. Constructing a working project from scratch, wiring components, and creating code was a great experience, and it feels incredibly satisfying seeing that work pay off! This journey still had its share of problems and issues, such as fraying wires or a finicky fingerprint scanner; However, they were great learning experiences, and I learned a good amount while dealing with problems as they appeared.
My Final milestone was the completion of all remaining elements of my safe. I used epoxy to attach all my components for good. Because my wiring was a duct-taped, I cleaned it up with the use of cable ties and hot glue. I also drilled a few holes for my power switch and speaker sound hole. Plus, I looked over my code and cleaned it up some more, taking out a commented-out section of test code and removing code for an unused servo. I also changed the password from the boring “1111” to the more interesting “1234!”

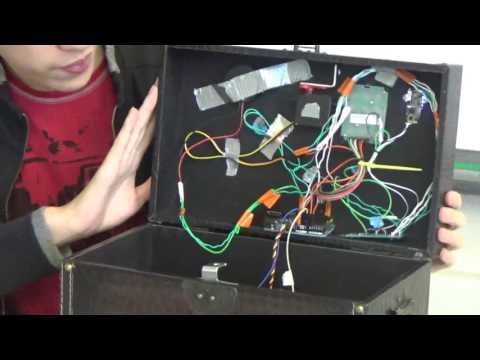
Upon my third milestone, I had transferred all of my wiring onto a PCB board from my breadboard. The wires are all soldered (with the exception of a few jumper wires leading to the keypad) and should last longer and be more reliable. I soldered the ends of the wires to double-sided header pins, so that they would fit in the Arduino pin sockets. I also wrapped any exposed wire soldering connections with electrical tape to prevent shorting. After a quick test to confirm the circuit worked, my milestone was complete. Additionally, I’ve moved the entire circuit inside my safe. Some components, such as the keypad, have been permanently attached with epoxy to the box. Others have been temporarily mounted with hot glue. This allowed me to test the entire safe in it’s final hosing.
At my second milestone, I was able to get the fingerprint scanner and matrix keypad to work together, with either component opening the safe (turning the servo) upon a successful input. I had to overcome multiple difficulties, which all arose from the fingerprint sensor. Because I originally had two separate programs that I merged- one for both the keypad and fingerprint scanner turning the servo- the problems did not manifest until after the code merging. Strangely, once the fingerprint sensor was part of the wiring and code of the merged program, the program would be unable to run without the scanner’s presence. Moreover, the Arduino would also require a hard reset (unplugging and re-plugging its power source) before it would run any code loaded onto it. Due to these difficulties, for the longest time I believed I had a faulty fingerprint scanner! Luckily I discovered the actual problem before tossing the scanner before ordering a new one. However, the most irritating problem by far was that the fingerprint scanner caused my servo to “shake” incessantly. The arm’s constant movement back and forth caused no real issues, but was so annoying that I revised my code to get rid of it- an ordeal that took many days of troubleshooting.
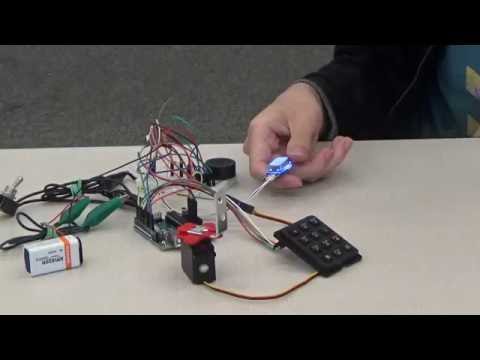
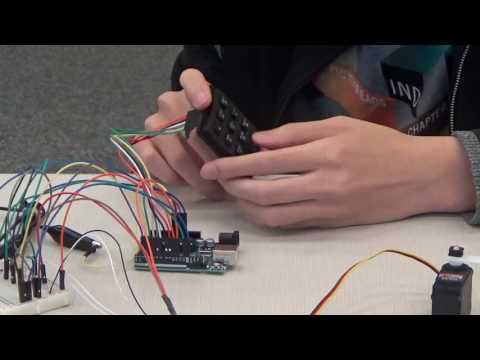
My first milestone on my main project was successfully connecting my Arduino with my lock servo and keypad, and managing to set up the pass code that, when correctly put into the keypad, would turn the servo and unlock the safe. I managed this with the help of the Arduino keypad library, and some online code study. I had no experience coding with the Arduino before this project, so this was certainly a challenge. The keypad library did not come with the Arduino IDE, so I had to manually import the library. I then took the keypad example code and edited it to fit both my needs.
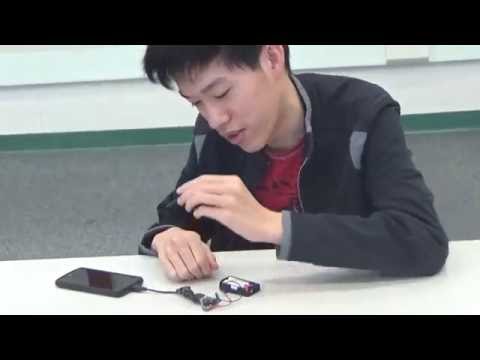
My starter project, the Mintyboost, is a portable charger that runs off of two AA batteries. It’s suitable for charging portable electronics such as a phone or music player. The Mintyboost was a great opportunity for me to learn the basics of soldering and about common electrical components, such as resistors and capacitors. Some previous experience with soldering helped me greatly here, though it was sill difficult making connections with parts that were so small and close together! I managed to burn off some of the cover of a capacitor by accident, but the end product works fine.