
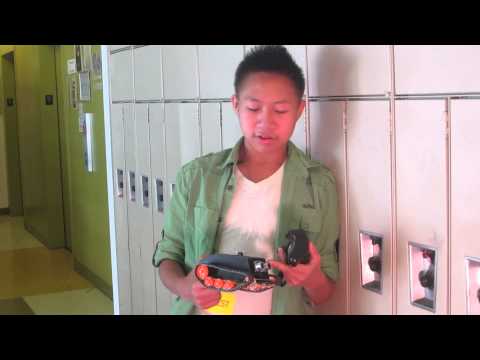
Hello, I’m Mitchell a rising senior in Stuyvesant High School. So here in Bluestamp, I made two projects. The first one was my starter project which was a light seeking robot which I spent about a few days on. It is a micro-controller that responds to light and moves accordingly. It is basically an autonomous robot in that it moves towards the light. My second was my main project which started as a RC tank, however I made adjustments so that it can become an autonomous tank as well. I liked the thought of having a remote control machine however I also liked it to have a mind of its own so I blended them together so it can do both.
Here is the code that I put together for the arduino.
Schematic

I had also created a shell for my tank


RC Tank Final Video
Finally after all my struggles and hardships I have finally completed a prototype of my project. It all started with a bunch of parts in a box and I had to build up my entire project from scratch. Starting with the gearbox arranging the gears so that it could move fast and also provide a lot of force so it will be able to climb things. The motorbox is comprised of two motors each independent from each other and I hooked them up into an arduino with a motor shield attachment. The motor shield is designed mainly for motors and it has selective ports for its direction speed and movement. I coded the arduino so that it moves according to a program. But thats too plain. I wanted to control the tank without a computer so i decided remote control. I used the PS2 wireless controller wired it up to the arduino and programmed them together to work with each other. It worked however it kept crashing into walls so I decided to prevent that by adding a distance sensor so that when it detects anything within 5 cm in front it would stop and can only move back. How with a distance sensor, I can make it move on its own and navigate by itself so that when i does sense something it would move another way. Driving the tank also messed up the wires so i made a case for it using 3D printing from a design i made in autocad.
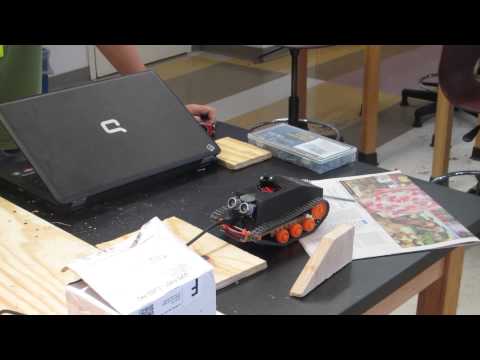
RC Tank milestone #3
I have added an new ultrasonic sensor to the robot so that it can sense distance and react to it. The sensor that I got was the HC-SR04. It has four pins: Vcc, ground, trig and echo. The way this sensor works is that the trig pin sends emits out a sound wave of a specific frequency and the echo receives it. It determines the distance by using SONAR and the speed of sound. I have hooked it up to the arduino and found a conversion from the measurement of distance which originally set to micrometers and change it to centimeters. I made it so that when the tank moves and comes across and object that is 5 centimeters in front of it, it stops and can only move backwards. Following the sensor, I decided that with the module, i can make the tank autonomous. So making it move by itself and react to the things round it. I made the autonomous function able to be turned on and of with a push of a button.
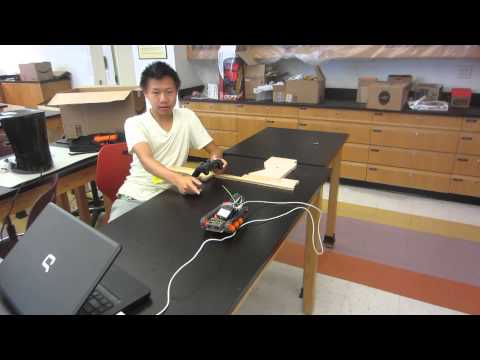
RC Tank milestone #2
After I had gotten the structure of the tank and got the motors running, I thought of controlling the tank with a controller. I found a spare wireless ps2 controller at home that I don’t use anymore and attached it to the arduino. This was a little challenging since I had to code the remote and its functions in arduino. I also had to wire up the wireless part of the remote onto the arduino. At first I was stuck on it for a while then I googled how to connect a playstation controller onto an arduino into google. Luckly for me there was someone who posted on a website how to connect and the code for arduino. The website also listed the wires necessary for the controller. I looked into the code and there were a lot of stuff that i didn’t need so I modified the code and deleted some stuff that did not relate to my project. Then i merged my moving code and the edited controller code together. When i finished the code i found out that the robot was barely running so I had to change the battery from a 6-volt to a 9-volt. I also changed the orientation of the wheels because it felt plain just being able to move on flat ground and not being able to climb stuff.
billporter.info/2010/06/05/playstation-2-controller-arduino-library-v1-0/
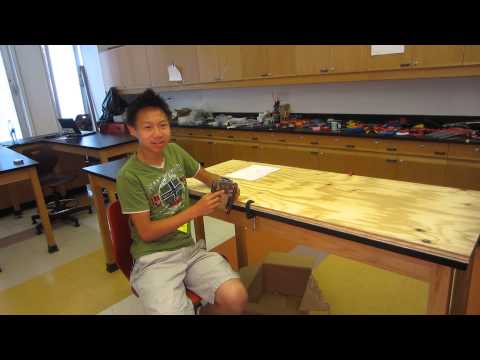
RC Tank milestone #1
My main project is an RC robot tank. My first milestone was getting the tank to move with a 9-volt battery source. The tank was put together by hand with parts that I ordered online. It is comprised of a gearbox that is connected to motors to turn the gears. The gears turn the wheels and which move the tank. The motors are connected to the arduino board and motor shield. The arduino motor shield is an attachment to the arduino uno board. It allows the arduino to program and run motors through coding. I programmed some test runs for the tank to make sure that it was working. Having it run straight forward accelerating and then returning back as well as turning. The 9-volt battery is the power source which powers the arduino which gives current to the motors spinning the gears.
Light seeking robot bug
What I did for my starter project was building a light seeking robot. What the robot does is that it detects light and it moves towards it. How the bot works is that, it has these photoresistors that senses light which lowers the resistance and sends a signal to the potentiometers which allows the user to manually change the amount of voltage going into the motors. The motors move accordingly to the amount of light the photoresistor senses. Aside from the photoresistors, the robot consists of a lot of other parts. They included capacitors, transistors, LEDs switches and regular resistors. Capacitors store up energy and releases them after a period of time. Transistors are basically amplifiers, allowing a low amount of voltage to enable a circuit that requires a higher voltage. The motors are electromagnetic and are connected through jumpers. The kit for the robot came with the circuit board and I had to solder in all the parts. They gave instructions on which parts to place where which made it extremely easy, however, the soldering requires skill and precision. If you would like to make one, here is the link to order it : http://www.apogeekits.com/robot_bug_2.htm .
Reflection
This program gave people experience that they probably would have never gotten to do at such a young age. Bluestamp has offered the students a wide variety of engineering projects which allows us to explore the realm of engineering. Bluestamp allowed me to attain some more hands-on experience with electronics, hardware, modeling and more. Every one has a project that they chose based on their interests and can expand on their project even further.
I did something similar, I started with an RC tank but then I had finished the project early and wanted to make my tank more robust. I added sensors to the tank so that it can self navigate and not crash. It was difficult to code everyday and some days I sat there driving my tank around for fun. When I finished adding extra functions and tested it around the floor and make it climb onto blocks of wood. I also constructed obstacle courses out of cardboard. I also wanted to make it more aesthetically pleasing to look at so I designed a case for the tank in which I had to learn how to draw it with a Computer Assisted Design (CAD) software called AutoCAD. I had to make a sketch of the the entire case and gave it to Matt an instructor to printed out using a 3D Printer.
This allows us to be more individualistic with our projects and the instructors here are really nice and they help out whenever you have a problem. They encourage you to try and solve your own problems and provide help you if you are really stuck. Encountering problems and overcoming them by yourself are great experiences for the future when you have to encounter big problems int the real world and industry. Other than providing great experiences, Bluestamp also provides a good environment to make new friends that have the same hobbies and interests.