I am a rising senior. I became interested in engineering since I was a Freshman in high school, but this is my first hands-on experience. The starter project that I worked on was a Light Organ, and my main project is an LED display.
My Complete project!

Reflection
Attending Blue Stamp Engineering program has been a once in a lifetime experience. I did not only learn more about engineering itself, but I was also challenged by the completion of my project. We were able to hear from engineers and also from multiple entrepreneurs. Many of the entrepreneurs that we heard from were driven from wanting to create something that helped the world, by using many household items.
Although this was my first experience with engineering (coding and hardware), I was able to complete my project. This experience has helped me with my engineering skills, and also with my classroom work. Whenever I faced a problem with my project, I looked up information on the topic. However, when I needed help, I was able to push myself to ask for help from my instructors whenever I needed the help.
This has been an extraordinary experience that will help me with the career that I hope to take in my future.
Final Project Video!
The final step that I needed to complete for my project was to have my stand 3D printed properly. I used Inventor Fusion software to design my stand. After 4 attempts of 3D printing my stand, I was finally able to 3D print it properly. The measurements for my stand had not been accurate for the first 3 attempts. After modifying my CAD files, I made sure that my measurements were accurate. For my project, I have carved my acrylic board, soldered my circuit together onto a perfboard, programmed my LEDs with an Arduino, and 3D printed a stand for my final project. Furthermore, I was able to make modifications to my project.
Modifications!
The modification for my project was to have the LEDs on my project controlled with a remote control. This modification allowed me to have my LEDs stay one certain color instead of having them blink to different colors. For my remote, I added an IR Receiver to my circuit. I also programmed my universal remote control to a SONY remote control. By programming my remote control to a SONY TV remote, I was able to configure my control remote with my Arduino. Ultimately, I had to write a new code for my remote control.
CAD Files Images for Stand


Since I decided to have the stand for my display 3D printed, I had to create a CAD file. In order to 3D print my stand, I had to splice it in half so that it could fit in the 3D printer that we had available. These are the images of my CAD. The first is my complete stand, then the left side of my stand, lastly, the right side of my stand. I created my CAD with software called Inventor Fusion.
Schematics for my Circuit

I based my circuit from these schematics made by a former BSE student, Cindy from Houston 2013.
My Arduino Code
I have 3 different Arduino codes that I can use. I downloaded one that fades through the rainbow colors. The second code that I have, is one where I was able to change the levels of green, red, or blue that is being shown. The third one is a basic code of having the LEDs blink in different colors by either turning “off” the red, green, or blue in the LEDs.
Procedure to Make LED Display:
1. First you will need to get all of your materials together. You will need to make sure that you know all the pieces that you are using. Also, look over your schematics so that you can begin to work on your circuit.
2. You should first practice making your circuit on a breadboard before placing it onto your perfboard.
3. When you are connecting your LEDs make sure that they are connected properly into each other. Also, make sure that you connect them to your Arduino so that you are able to control your lights. You really only need resistors on your first LED, but you may add some to the other LEDs if they are getting too warm. However, the resistors may make your LEDs be a bit dim.
4. Once you are sure your circuit works on your breadboard, you should practice controlling it with your Arduino. Then you can solder your circuit onto your perfboard, and your display.
5. You will need to choose the images for your display and print them out. Once you have your images, tape them in place on your board.
6. Take your hobby knife and begin to trace your image. Then, you can work on sanding down your image. Make sure that you sand it down in the same direction or it will show on your display once it is lit up.
7. Drill holes on the bottom of your board where you plan on placing your LEDs.
8. Finally, you can make a stand for your LED Display, I 3D printed my stand.
*If you need more help, here is the original project that I used to work through my project.
http://www.instructables.com/id/RGB-LED-Love-Heart/?ALLSTEPS
suggestions:
- You should make sure that you connect all of the legs of your LEDs with each other and not get them mixed.
- Make sure that you practice making holes on a spare acrylic sheet before you do them on your final display board.
- If you are 3D printing your stand, make sure that you measure your display properly.
Bill of Materials
My Second Milestone!
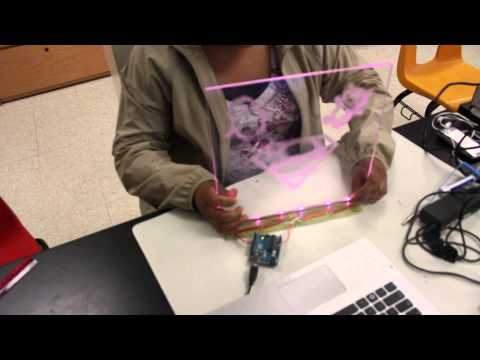
After I made my circuit, I started to work on my display. I carved my image to place and soldered my circuit onto my perfboard. I taped my image to my acrylic board and carefully traced the image with the hobby knife. I used sand paper to enhance the image so that it will show when it is illuminated, making sure I do it in the same direction. Once I was done with my display, I drilled holes on the bottom of my board making sure that they are centered. I had to make sure that they were big enough for the LEDs to fit. I made sure that I placed the holes on the board according to where I placed my LEDs on my perfboard. I also placed aluminum tape on the edge of the board so that the light will reflect on the image.
My First Milestone!
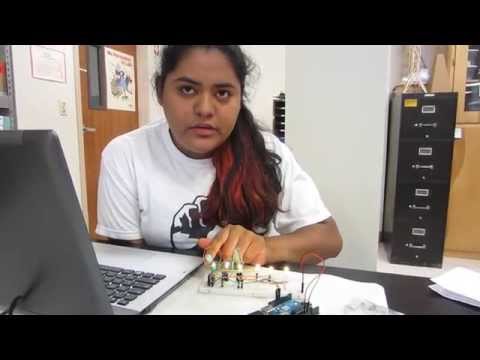
For my main project, I am working on an RGB LED display. My first milestone for my project was joining my 6 LEDs together on the breadboard. Each leg of the LEDs had to be connected to the same legs as the first LED. Before actually starting on my circuit, I had to figure out what LEDs I was using. For my LEDs, I had to connect each of the LED legs (red, green, and blue) to my Arduino pins. Once I connected my first LED to my Arduino, I just had to connect all of my other 5 LEDs with my first one. Once I had my LEDs connected to each other and to my Arduino, I started the coding section for my LEDs. For my coding, I first used the blink example given with the Arduino software. With this, I was able to mix the colors of the LED to make the LED turn yellow, cyan, or purple by turning on or off each color of the LED. However, since I am working with common anode LEDs, for my coding ON meant off and OFF meant on. Once I worked with the blink program, I downloaded a code that allowed me to change the levels of the green, red, and blue.
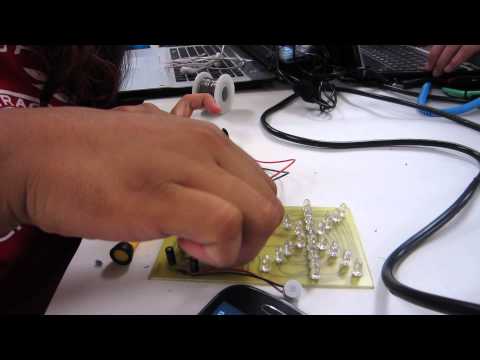
My Starter Project!
Since this was my first hands-on experience with engineering, I struggled with my starter project. My first step was to try to figure out what each part in the kit was and how they worked. I looked up what transistors, receptors, and capacitors did, since these were the main components of this starter project. I also had to make sure how every LED should be placed on the board since there’s a positive and a negative leg on the LEDs. Even after I made sure what every part was and I looked at the diagrams to see where every piece went, I had to desolder some parts, such as the resistors, and place them correctly on the board. After placing all of the components on the board properly, I completed my starter project and tested it to see if it worked, and it did.