
Hello everybody, my name is Juno. I am a soon to be senior at Arrupe Jesuit High School. Most of my time is devoted to enhancing my skills either in school or on the basketball court. For my starter project at Bluestamp Engineering, I built the light organ. The Light Organ is comprised of 25 LEDs that illuminate according to the beat of music. My main project is a solar panel sun tracking mechanism. The mechanism is built to maximize the energy input of a 12v 5w solar panel. I entered this project with no prior experience of engineering. My love for math and a better future in solar energy motivated me to get some experience in engineering by completing a project that could help me in my future studies.
Proud Student at Arrupe Jesuit High School: Link to School’s Main Page

Documentation:
My Bill of Materials: Bill of Materials
My code on Arduino: Solar Panel Tracking the Sun
Instructables where this idea generated
What I am Taking Away from BlueStamp Engineering
I came into this program with a love for math and science and a rudimentary experience in engineering. Due to my perseverance, passion, and great help from the instructors here at BlueStamp, I now know what it takes to be an engineer. I am truly grateful for having the opportunity to attend this program because now I am aware of what I am capable of; the sky’s the limit!
Room for Improvement:
Now that I “finished” this model of my solar panel sun tracking mechanism ,the engineer in me knows that there is room for improvement. Some people say that if it is not broke, you shouldn’t fix it, but I am not satisfied with what I have here. There are parts of my code that I can ameliorate. I can potentially add a light sensor to my solar panel so it can naturally detect the sun. If time was on my side, I was going to make my seven segment display also display the voltage that my solar panel is outputting. For the time being, I am jubilant to have this mechanism be the first build of my life, however, I hope I can inspire a future BlueStamp student to take my idea and build on it so he/she can have an even greater build for their first build of the lives.
Third Milestone for the Solar Panel Sun Tracking Mechanism
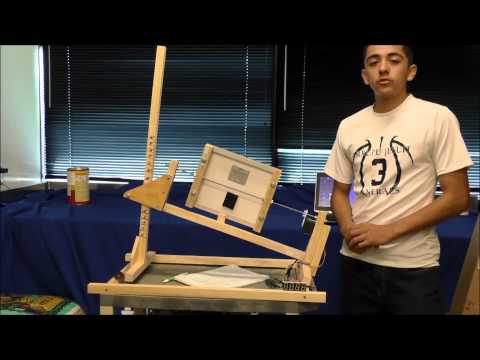
Hello everybody, I just finished the entire model for the Solar Panel Sun Tracking Mechanism using an Arduino and a Servo Motor. In this milestone, I coded my Arduino to track the sun based on the time of a given day.
The coding on my Arduino mostly revolves around this map function. The Map Function in Arduino gets two values relative to one another. In my case, I wanted to get the time that was on my seven segment display relative to the degree of my servo motor. The code states that as my total time increases, the map function makes time relate to the degree of the servo motor based on the time of day. Here is a rough template of the map function in my code pos= map(total_time, Sunrise, Sunset, 150, 0); The values I input on the Sunrise and sunset will go according to my location using www.timeanddate.com.
Although for a first time coder such as myself, the coding aspect of the mechanism was not too difficult. There is still much to be learned so I will not just stop here; I plan on looking online to find more ways to learn coding. A problem I encountered after a day’s of rotation from my panel was resetting the panel back to its starting point. After the sun has been set, I have to push the reset button on my Arduino to reset the code that the Arduino has to run through. Whenever I pushed the reset button, the panel would rotate at such a high velocity that it could not simply halt at its starting point. When the panel would reach the starting point of the servo, the momentum of the servo would cause the gear on the threaded rod to skip over the teeth of the gear on the Servo Motor. To fix this problem, I made a mechanical stoppage to physically stop the panel at its starting point.
3-D model of my Full Mechanism on SketchUp


Schematic on Fritzing (Click to Enlarge)

Solar Panel Sun Tracking Mechanism 2nd Milestone:
For my second milestone, I built the “U” bracket and base of my mechanism, finishing the construction portion of my project!
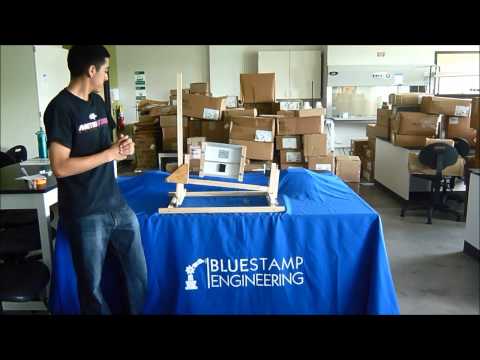
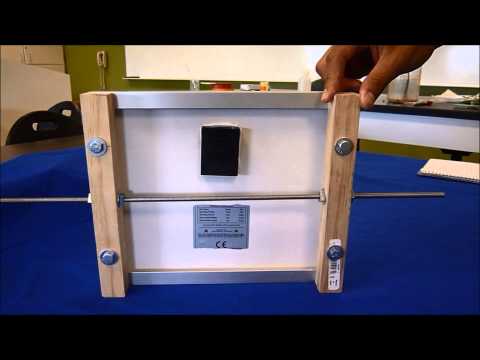
When I put my solar panel outside, I have to be sure to point my “U” bracket to true north since I live in the Northern Hemisphere. My solar panel must face south in order to get full exposure to the sun. The Earth’s tilt is at 23.5 degrees and its orbit around the sun causes my solar panel to have to be adjusted to different angles throughout the year. 
The picture above shows the different views of the sun we get throughout the year. To account for these multiple views, my solar panel’s “U” bracket can easily slide up and down the standing wooden dowel. Along this dowel I have numbers that depict the angle of the solar panel. To determine this angle, I have to find the altitude angle of the sun depending on my location. I used the University of Oregon’s Sunpath Chart program to determine the altitude angle of the sun for Denver, CO. I use noon’s solar angle as my benchmark since that is when the sun is highest in the sky.

My solar panel lies on the North/South axis and the sun follows an East to West path so the solar panel’s angle and the sun’s altitude angle will bisect . In order to make them perpendicular, I have to determine the solar altitude angle for the specific day and location that the Solar Tracker will be in, then I must subtract that angle by 90 degrees. Setting my solar panel to this calculated angle will give it the most exposure to the sun’s rays.
University of Oregon’s Sunpath Chart Program
1st Milestone for the Solar Panel Sun Tracking Mechanism
For my first milestone, I completed the 3-D drawings for my solar panel sun tracking mechanism using SketchUp and finished building the “frame” for my solar panel. This was my first time using SketchUp but with a little time and determination, I got acquainted with the basic functions of the program and was able to illustrate my mechanism.
Pictures of my frame in SketchUp are shown below. I used 1x1 inch wooden dowels to attach to my panel and a quarter inch threaded rod intersects the two wooden dowels. The threaded rod will have a gear with 36 teeth that is interconnected with another 36 tooth gear on a servo motor. My servo motor will be programmed using Arduino. The coding on Arduino will dictate the Servo Motor’s rotations, allowing for my solar panel to track the sun. By tracking the sun, my solar panel will maximize its energy input thus it will feed off more energy to be used.


Starter Project: Light Organ
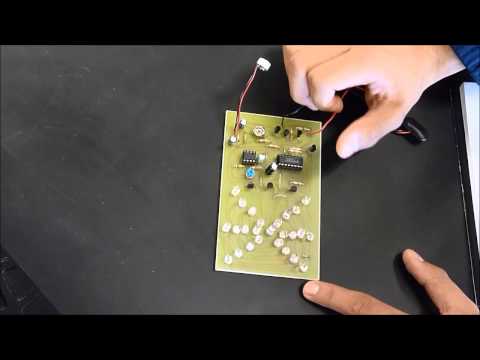
For my starter project I created the Light Organ. The Light Organ has 25 LEDs connected to four transistors via a circuit board. The circuit board contains 25 LEDs, 7 transistors, 2 potentiometers, 4 capacitors, and 2 integrated circuits. My entire Light Organ is powered by a 9 volt battery. A picture of my Light Organ can be found below.
The Light Organ has a microphone that receives a signal to send to one of my first three transistors. These transistors act as amplifiers in order to send a readable signal to my first integrated circuit a 555 timer. The 555 timer sends this signal as clock pulses to the other integrated circuit. The second integrated circuit sends these clock pulses to the other transistors so they can disseminate those pulses to my LEDs: allowing them to light up.
Link to where you can get your own Light Organ to build