
Hi my name is Joshua Verschleiser. I go the Abraham Joshua Heschel school in New York City where I will be a senior this winter. For my main project here at BlueStamp, I decided to build an RC Tank. I chose this project because I have also been fascinated with RC cars, and I wanted to see if I could make them better. So, logically, I jumped at the chance to make my own RC vehicle. My time here at BlueStamp has been amazing, and I have learned so much in such a little amount of time. The experience I received at BlueStamp was valuable because it allowed me to explore different fields of engineering and to make an informed decision on what major I would like to pursue in college.

Final Milestone
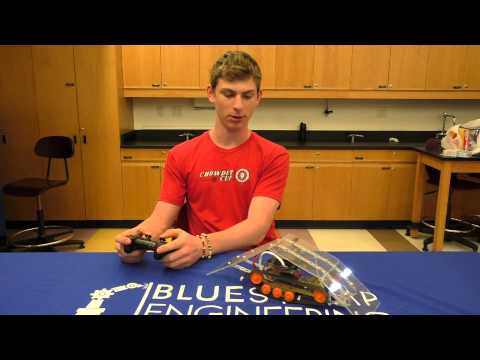
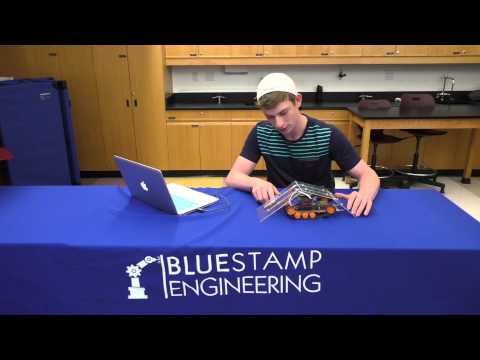
My experience at BlueStamp these past 6 weeks has been so much fun, and I have learned so much. Since my second milestone all my parts have finally come together into one final product. The biggest modification that I have made since my second milestone was that I added an acrylic and steel shield around the robot. The steel holds the three acrylic panels in place and is attached to both sides of the robot. One problem that I ran into with this shield, originally, was that I had only two front shields. This interfered with the center of gravity of the tank, and the front of the tank would dig in to the ground every time I moved. I solved this problem by attaching a third shield to the back. This moved the center of gravity back and stabilized the robot. I also attached another steel bar to the back of the tank, locking it in. Now the shield rides a perfect quarter inch off the ground. The last modification that I made was that I added two banks of white LEDs to the front of the robot. Although they serve little purpose during the day, I feel that it adds another element to the robot which in my opinion is always good.

Second Milestone
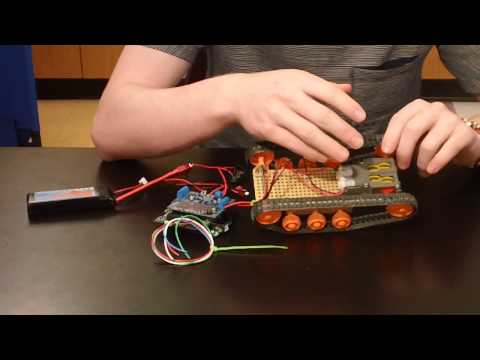
My second milestone has been very hard to achieve. Since I finished my first milestone, I was left with a working chassis, but a very uncooperative WiFly shield. I spent the next week trying to solve the shield’s problem. However, after many different attempts and multiple internet tutorials, the board still did not work. At this point, I had to move forward in order to ensure that I had a completed project. The last two weeks moved much faster than that week. I hooked up a PS2 controller dongle and wrote the code for my Arduino. The tank is controlled by the left and right joysticks of the controller. As you push the left joystick forward, the robot gains speed of the left track and as you pull it back, it decelerates and then begins to run backward. The same applies for the right joystick and the right track. Another modification that I made was that I mounted the battery by cutting out the base of the tank and putting the battery there. This served two purposes. First, it moved the center of gravity of the tank back and down, as the battery is one of the heavier components of the tank. This ensured the tank would have ample traction on the back part of the tracks. The second reason was that it opened up space in the middle section of the tank for the set of boards and the dongle.


Now that I have completed my second milestone, I am going to continue on to my final milestone. For my final milestone, I hope to add some sort of shield on the robot to protect the hardware and I hope to work out some bugs in the code.
First Milestone
For my main project at BlueStamp Engineering I am building a tank controlled over wi-fi. For my first milestone I set up the chassis, gearbox, and electronics. For the chassis I used a universal mounting plate and the Tamiya track and wheel set. For the gear box I also used a Tamiya gear set. While assembling my gearbox I realized that I had two options on how to set it up. One was with the gears in a 204:1 ratio and the other was a 53:1 ratio. I decide to go with 53:1 ratio as it would allow my tank to go faster. The last part that I completed for my first milestone was the electronic assembly. I used an Arduino Uno as the brain of the tank. I hooked up a protoshield to the Arduino as this allowed me to make all the extra connection to the Arduino. For now, I have the wires for my laser, servo, and my ping sensor hooked up to the protoboard. On top of all of this I have my Adafruit motor shield.
Reaching my first milestone has been a lot of work, as I have had trouble with the code provided. The code would not compile in Arduino as the necessary libraries for the code to run do not exist. In the end I wrote a simple code that would run each motor in an opposite direction so that the motor would spin.
My next step is to set up the tank on a PS2 controller and to mount all the hardware on the tank.
Starter Project
For my starter project I created the “light organ.” It is a set of lights in a star shaped pattern with a mic attached at the other end. When the mic picks up sound it sends an electrical signal through the board to the microchips. The microchips take that signal and they send out the current needed to light up the correct lights. There are a handful of capacitors on the board that provide the initial spark for the lights and they get re-charged as the current goes through the board. There are resistors on the board to ensure the power does not get too high. There are also transistors, which are like switch gates that add or subtract voltage. One problem I ran into was with the lights and their orientation. I learned that they need to be placed based on their cathodes and anodes. I solved this problem by paying extra attention to the schematics and working carefully. However, some of the lights still didn’t work. I thought that this was a small problem with the voltage. I solved this problem by using a jumper wire in order to add more current to the line.
