Create a 2D Video Game with Unity (Coded in C#)
My main project is making a 2D video game using Unity: a cross-platform game engine. I have access to some directions from an Instructables created by a programmer who made this project 3 years ago, but most of the coding was done by me (Coded in C#). I have also made several additions to my game, as well as a second version.
Engineer
Jonathan Y.
Area of Interest
Mechanical/Software Engineering
School
Gunn High School
Grade
10th Grade
Intensive Project
I decided to do this project because I have an interest in programming, and I would like to expand my knowledge of it. I have coded in Java before, and I thought that applying my experiences in Java to C# and to creating a game in Unity would be interesting and fun.
The greatest challenge with this project was getting used to Unity’s interface and learning about the freedom and limitations involved with Unity. I had never coded in C# before this project, but I am familiar with Java, which is quite similar to C#, and the other C languages. Because of my initial unfamiliarity with Unity, I relied heavily on tutorials and Unity forum posts to learn, and slowly, I expanded my knowledge and experience with Unity throughout the program.
This project was very fun, and I got to learn a lot about programming, and how it can be applied to creating something visible and real, and not just within abstract concepts. Unity allowed me to create and interact with real objects in a 3D environment, which was a very rewarding experience since in the past, I had always coded in Java through Eclipse, and I was never really seeing any interesting products result from my code. During the time I spent at BlueStamp, I learned how programming can be applied in various ways, and realized that I want to pursue software engineering in the future, as I found it easy to work with code and create my ideas using it. Through Unity, I was able to put my ideas and imagination to work, and implement them in creative ways, while also drawing from my programming knowledge. All in all, it was a great experience to learn about the functions and capabilities of Unity, and see how my code can be used in real-world applications.
Modification 2
Pictures of New Features (Music Changer and Particle Effects)
Modification 1
Pictures of New Features (Backgrounds and Power-Up)
Final Milestone
Pictures of Game and New Features
Milestone 2
Pictures of Code (C#) and Game
Milestone 1
Pictures of Game and Animation States of the player
In my next set of modifications, I created particle effects that would occur during player deaths, as well as a music-changer.
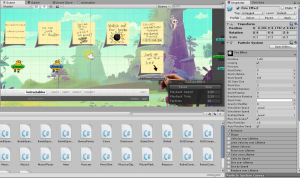
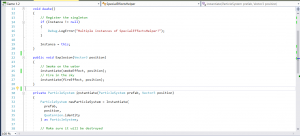
In Unity, it is easy to represent solid objects such as characters and props through use of colliders and rigidbodies. However, other entities, such as liquids and flames, are fluid and intangible, and thus, cannot be portrayed through meshes or sprites. However, I was able to create two particle systems, one for a flame effect and another for smoke, to display special effects in my game, thus simulating an explosion (guide). I adjusted the settings of my particle systems to account for the particles’ lifetime, emission rate, and size, among other properties, and by adding a script to my Main Camera, I was able to instantiate a particle effect each time a player died.
Next, in order to implement a music-changer into my game, I had to first create a GUI button. In addition, I applied the same concept that I used in my BackgroundChanger script to a new Music script, in which I was able to switch between the music soundtracks that I have in my game.
After completing and filming my final milestone, I decided that I wanted to make further modifications to my game. In an update, I included a background-changer to my game, as well as an immunity power-up.
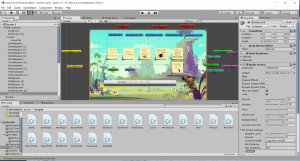
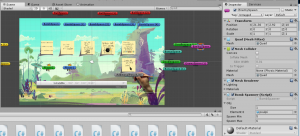
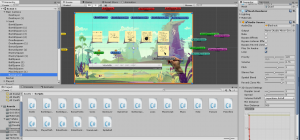
I was able to make the background-changer button by adding multiple backgrounds (link) as quads, and then creating a BackgroundChanger class with a GUI button. If the button was pressed, I would use GameObject.activeSelf to check if there was only one background active. Then, it would turn off that background, and activate the next one, and this process would continue before eventually looping back to the first one.
Since player deaths in my game revolve around the enemy/obstacle scripts detecting that a Game Object with a player tag has collided with them, the immunity power-up temporarily sets the player’s tag to “Immune”. In addition, it would set the player tag above the player’s head to “Immune”, thus telling the player that they are in an immune state and cannot be killed by enemies. I then used an Invoke function to call a method that would reset the player’s tag and name tag after 10 seconds have passed.
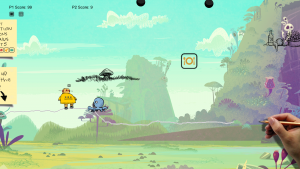
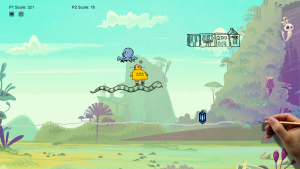
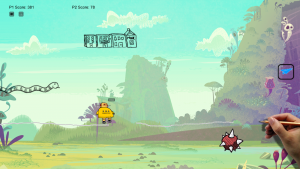
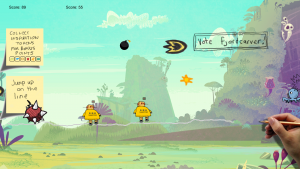
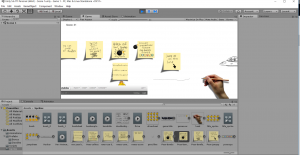
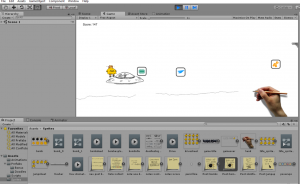
The third and final milestone for my Unity project is creating a second version of my game, complete with a two-player mode as well as new in-game features. Since my second milestone, I was able to add a second player with a different set of controls, a button that would display a warning about how the bombs work, new enemies and obstacles, a background picture, and music. In addition, I was able to fix several bugs and add other visual details to my game since my last version.
In order to create a fully-functioning second player, I not only had to create a complete duplicate of my first player, but I also had to change up how the scoreboard would work and points are calculated, as well as creating a separate RobotController script. An extra player, as it turns out, also results in extra problems! Since I wanted the game to continue even when one player died, I had to change up the if-statements in my Pancam class, which was what kept the game moving along and what ended the game. I was having trouble getting my second player to move, and when I was eventually able to do so using a Transform function, its movements were, unlike that of the first player, rather stiff and robotic. In the Input Manager settings of my project, I realized that I could change the controls and game actions regarding my project. As a result, I had to create a new set of input axes with the “W-A-D” controls instead of the arrow keys, which would result in two separate controls that would create the same movements within two players: an offline multiplayer game.
Next, I was able to add in new enemies and obstacles, the sprites of which I got from an online tutorial. As a result, I had to create new scripts for these components. In the Update method of my MoveScript (which I have attached to an enemy character), I have added a movement to the character using two Vectors representing speed and direction. In my void OnTriggerEnter2D method, I have the enemy check to see if the Game Object colliding with it is a player, and if so, destroy the player. I used this same script and similar version of it for other obstacles as well.
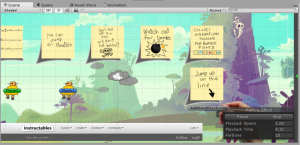
Since I was unable to fix my previous problem regarding how the bombs that dropped would have an explosion that looked off-center, I realized that I could add a warning to the player about the surprises that were to come. Thus, I ended up creating a GUI button that would turn the visibility of a Canvas Panel on and off. This canvas contained two images regarding how the bombs worked, and the button would display these in-game.
In order to create a background picture for my game, I had to first make a 2D Quad (quadrilateral surface used to represent flat surfaces). I then added the background image I wanted (link) as a Shader to the Quad, and afterwards I simply adjusted the scale of the image to fit the resolution and size of my game screen.
Finally, I was able to implement music into my game through the use of AudioSource. In Unity, AudioSource can be attached to a Game Object for playing music/sounds in a 3D environment, which can be done by attaching an AudioListener to the camera. Thus, I was able to successfully add music to my game, which plays as the game progresses.
The second milestone for my Unity project is having a completed game that is user-friendly and has no bugs. Since my first milestone, I was able to add a loading screen and gameover screen to my game, as well as complete my bomb spawners, platform spawners, and bonus-point spawners. In addition, I was able to fix my previous infinite-jump problem that would result in my player being able to “fly”. Finally, I was able to fix a bug that resulted in my character being stuck in the ground occasionally while moving.
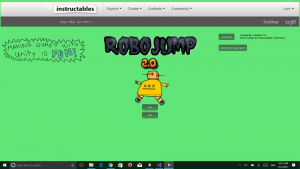
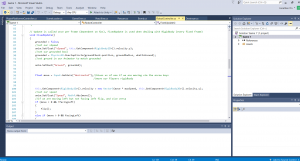
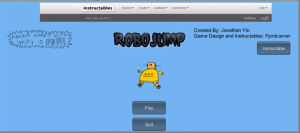
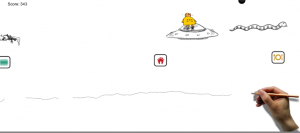
I was able to make these changes by adding several scripts to my game. In the Spawn method of my BombSpawner class, I used Random.Range to get a random number between 0 and 1000. If the random number is larger than 700, then I instantiate the gameobject with this script at the transform position of the bombspawner and with no quaternion rotation (represented with quaternion.identity). This BombSpawner class is also used for spawning platforms (represented with a series of doodles) and bonus-point pickups. In my BonusPoints class, I use “void OnTriggerEnter2D” which will trigger when another object enters a trigger collider attached to this object (in this case, the bonus-point pickup). If the player is the one who did so, then the score of the player will increase by 100, and the object will be destroyed. In my GameOver class, I start by retrieving the score of my player. On my separate GameOver scene, I have a GUI Text component which displays this score, as well as two GUI buttons for “Retry” and “Quit”. The retry button takes the player back to the game scene, and the quit button takes them to the loading screen scene. Similarly, in my loading screen scene, I have a SceneLoader class with a “Play” and “Quit” button, as well as one that leads to the Instructables website. Furthermore, I added a title to my game, an acknowledgment to the creator (me) and the original maker of this game (fjordcarver), as well as some visual details. Since I was unable to fix my groundcheck function in my RobotController class, I settled with making a delay between each jump. I did this by using Time.time, which is a float representing the time that has elapsed since a method/function was called, which creates a delay of 1.75 seconds between every jump of the player, regardless of whether they are in the air or on the ground. Finally, I was able to solve the ground-glitch problem by changing the position of my groundcheck circle collider, which was attached to the base of my character. I moved this circle collider a bit closer to the body of my character, which resulted in the collider not getting stuck in the nooks and crannies of the pencilline, thus fixing the problem.
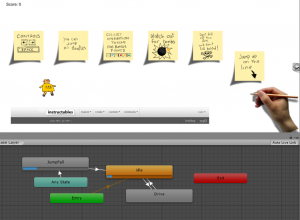
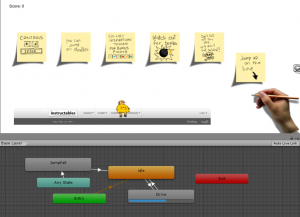
The first milestone for my Unity project is having my character be able to move and jump. Currently, I have a character who can be controlled using the arrow keys and the space-bar, but there is a problem in my code that is causing my character to be able to jump infinitely, even when not on the ground.
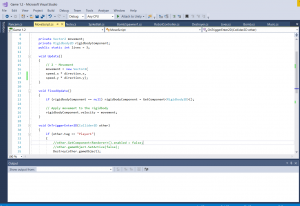
I was able to make these controls work by writing a script for my player (Robot Controller script). In my script, there are several main methods that I use to control my character. First of all, I have everything but the player object set as “Ground”. Next, I have a 2D Circle Collider attached to the ball of my robot character’s foot. In my code, I use the Physics 2D Overlap Circle function to check if the Circle Collider is tangent to the ground. I then use this information in an if-statement, resulting in the robot jumping when the spacebar is pressed, with the additional parameter that it is currently grounded. All of this is in an Update method, which is continuously called every frame.
In addition, I use the Animator Set Float function, as well as another if-statement to check if the character is moving left but not facing left, or if they’re moving right, but not facing right. If this is the case, then a flip method will be called, which is used to change the direction that the character is facing, as well as the direction in which they are moving. This allows the character to move with the arrow keys.
Starter Project
My Starter Project is the Electronic Dice Kit. It is composed of seven LED lights on a board, which light up to represent a random number from one to six: just like a real die.
A challenge that I faced in this project was dealing with the wires of the piezo sensor. Since I had not fully attached my piezo wires through the board the first time, I had to desolder it and reattach the wires. However, I ended up trimming off parts of the wires, which resulted in my wires being too short. I had to then replace the wires of the piezo, but since those wires were long and thicker than the original ones, I had difficulty fitting the board onto the acrylic base. Ultimately, I used a dremel to drill down part of the plastic side walls of the base, but it still would not fit well. In the end, I made a compromise and screwed in the sides of the walls without attaching the board to it, resulting in the board being left hanging loose on top of the base.
How the Circuit Board Works
The electronic dice kit is activated by tapping the device, as there is a piezo sensor near the bottom, on top of the acrylic base. The piezoelectric pressure sensor deforms when pressure is applied to it, and it turns that mechanical energy from the movement and converts it to voltage (electric energy output). It can detect vibrations and can be used for shock and touch measurement. There is also a battery (CR2032 button cell battery) on the bottom of the board which supplies power to the LED lights. On the top of the board, there is a PIC chip (12F675), which is an electronic microcontroller that can be programmed with code. Since all possible results of a die throw can be represented with a combination of four patterns, these possibilities have been stored in the memory of the PIC microcontroller, and is used to represent the possible results of a die throw. The seven LED lights on top of the board are used in place of the dots of a regular die. LED stands for light-emitting diode, and they are used as semiconductor light sources. A semiconductor is a solid that has a conductivity below that of a metal, but higher than that of an insulator, and is primarily used in electronic circuits. When voltage is applied to the leads of an LED, electrons are able to react with the electron holes in the LED, and release photons (light particles that carry energy). In addition, a p-n junction, which is a boundary between a p and n-type semiconductor, is used in the LED so that current can flow from the anode (p-side) to the cathode (n-side). Thus, the current can only flow in one direction, resulting in the LED being a directional light source. A diode is also used on the circuit board. Diodes are components that allow current to flow in only one direction. It is comprised of an anode and a cathode, and are used to prevent damage from being done to the electrical components, as it can protect against current flowing in the wrong direction. Finally, resistors are used to reduce current flow, and in this project they are used to limit the current in the LED. Resistors are electrical components that provide electrical resistance, and have colored bands on the bodies that indicate the resistance. All of these individual components are connected on a circuit board, and the PCB is placed on the acrylic base.









Very nice work. Keep going.
Thanks!
Great work, Jonathan! I look forward to seeing more of your work throughout summer.
Thank you!