
3-Jointed Robotic Arm
The 3-Jointed Robotic Arm is an efficient mechanical appendage which utilizes servo motors to maneuver in the x, the y, and the z axes, while also being able to grab on command. These features make it a highly effective and easily controllable third arm in any situation.
Engineer
Jeffrey Z.
Area of Interest
Mechanical Engineering
School
St. Francis High School
Grade
Incoming Senior
First Milestone
Project Description
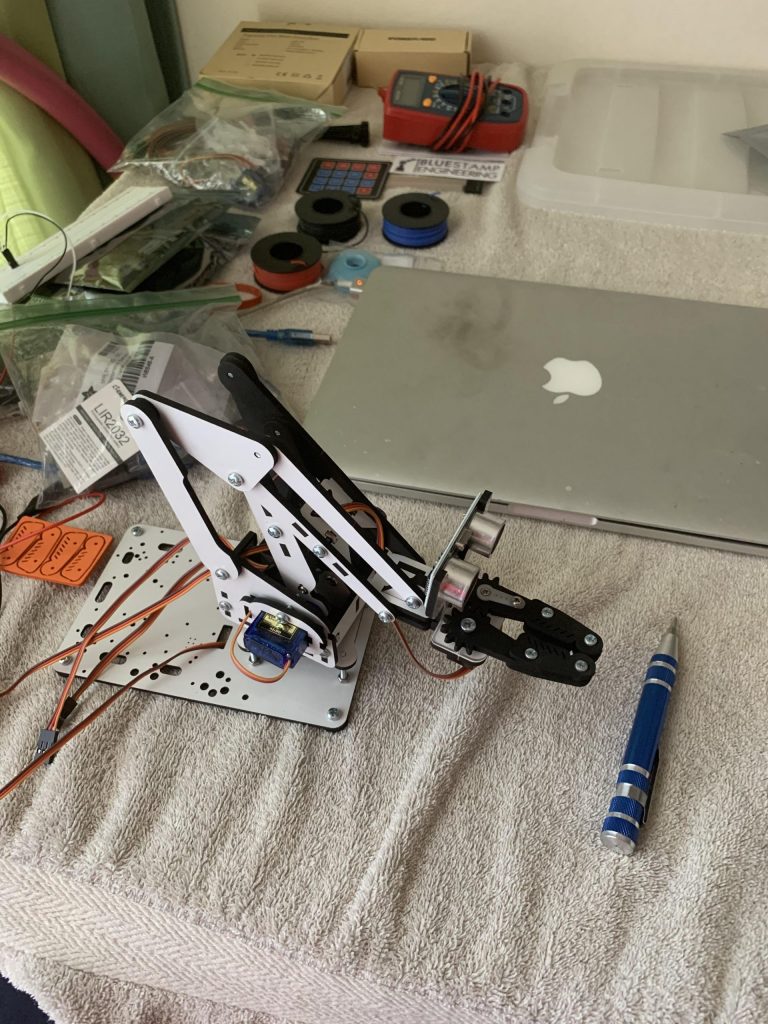
For my first milestone, I completed the assembly of the robotic arm’s main body. Using the parts and information given to me by Microbot Labs, I successfully put together a motorized arm that could travel in all three axes. Using a combination of Arduino and Processing, I was able to get the arm controlled using the arrow keys and other buttons on my computer keyboard. However, due to a fault in the battery pack, I could not get all the servos to work at once and as such, that will be my next milestone.
The Arm
Milestone Video
Arduino Code
#include<Servo.h> // include server library
Servo ser1;// create servo object to control a servo
Servo ser2;// create servo object to control a servo
Servo ser3;// create servo object to control a servo
Servo ser4;// create servo object to control a servo
int poser = 0; // initial position of servo
char val; // data received from the serial port

void setup() {
  Serial.begin(9600); // Serial comm begin at 9600 bps
  ser1.attach(11);// servo is connected at pin 9
  ser2.attach(10);// servo is connected at pin 8
  ser3.attach(9);// servo is connected at pin 7
  ser4.attach(8);// servo is connected at pin 6
}

void loop() {
  if (Serial.available()) // if serial value is available
  {
    val = Serial.read();// then read the serial value


    //Left/Right
    if (val == '1') //if value input is equals to 1
    {
      poser += 3; //the position of servo motor increases by 3 (left)
      ser1.write(poser);// the servo will move according to position
      delay(15);//delay for the servo to get to the position
     }
    if (val == '2') //if value input is equals to 2
    {
      poser -= 3; //the position of servo motor decreases by 3 (right)
      ser1.write(poser);// the servo will move according to position
      delay(15);//delay for the servo to get to the position
    }


    //Up/Down
    if (val == '3') //if value input is equals to 1
    {
      poser += 3; //the position of servo motor increases by 3 (up)
      ser2.write(poser);// the servo will move according to position
      delay(15);//delay for the servo to get to the position
    }
      if (val == '4') //if value input is equals to 1
    {
      poser += 3; //the position of servo motor increases by 3 (down)
      ser2.write(poser);// the servo will move according to position
      delay(15);//delay for the servo to get to the position
    }


    //Front/Back
    if (val == '5') //if value input is equals to 1
    {
      poser += 3; //the position of servo motor increases by 3 (front)
      ser3.write(poser);// the servo will move according to position
      delay(15);//delay for the servo to get to the position
    }
    if (val == '6') //if value input is equals to 1
    {
      poser += 3; //the position of servo motor increases by 3 (back)
      ser3.write(poser);// the servo will move according to position
      delay(15);//delay for the servo to get to the position
    }


    //Open/Close
    if (val == '7') //if value input is equals to 1
    {
      poser += 3; //the position of servo motor increases by 3 (open)
      ser4.write(poser);// the servo will move according to position
      delay(15);//delay for the servo to get to the position
    }
    if (val == '8') //if value input is equals to 1
    {
      poser += 3; //the position of servo motor increases by 3 (close)
      ser4.write(poser);// the servo will move according to position
      delay(15);//delay for the servo to get to the position
    }

  }
}
Processing Code
import processing.serial.*;

 Serial myPort;

 void setup(){
 size(400, 300);
 //println((Object[])Serial.list());
 myPort = new Serial(this, Serial.list()[4], 9600);
 }

 void draw(){}

void keyPressed() {
 if (key == CODED) {
    if (keyCode == LEFT) {
       myPort.write('1'); // send 1 to the serial port
       println("left");
}

 else if (keyCode == RIGHT){
       myPort.write('2'); // send 2 to the serial port
       println("right");
}
 else if (keyCode == UP) {
       myPort.write('3'); // send 3 to the serial port
       println("up");
}
else if (keyCode == DOWN) {
       myPort.write('4'); // send 4 to the serial port
       println("down");
}
else if (keyCode == DELETE) {
       myPort.write('5'); // send 5 to the serial port
       println("front");
}
else if (keyCode == ENTER) {
       myPort.write('6'); // send 6 to the serial port
       println("back");
}
else if (keyCode == SHIFT) {
       myPort.write('7'); // send 7 to the serial port
       println("open");
}
else if (keyCode == ALT) {
       myPort.write('8'); // send 8 to the serial port
       println("close");
}

}
 println(myPort.readStringUntil('\n'));
}
Second Milestone
Second Milestone Overview
For my second milestone, I attached my robotic arms to a pseudo-car chassis. After soldering the Arduino’s 5V pin, Ground pin, and every motor on the arm to perfboards, I was able to operate every motor at once. Using the combined powers of Processing and Arduino, I exploited the servo library to control motors which were decidedly not servo motors. Since servos only work in a 180-degree range of motion and the servo library is designed for servomotors, I had to go beyond the original range of numerical values and send values in the negatives to fully spin the wheels. However, there soon was a malfunction in the battery pack, rendering all my efforts to be in vain and sending my project to a screeching halt. What was once a glorious moving project was turned into a near-useless lump of acrylic, plywood, and rubber.
This setback, however, gave me a great opportunity to work on some more physics-related classical engineering skills which come into play in the next milestone
Third Milestone
How it works
My final milestone was to build and attach a trebuchet to the back of my car chassis. In order to reduce the load on the release pin enough so that a servo motor could pull it, I threaded it through a spring connected to a platform that suspended the weights. As the pin gets pulled, the spring would retract, taking the platform with it. To increase the efficiency of the throwing arm, I designed it so that the arm was two jointed and wrapped around the weight. This made it so that the arm was directly affected by the dropping of the weight, with the addition of centripetal acceleration on the end of the launching mechanism.
Reflection:
- Over the past three weeks at Bluestamp I’ve gained quite a bit of experience in the field of mechanical engineering. Though there were a few challenges that impeded the full development of my robot, they also allowed me to work on skills that I otherwise would not have used. Overall, this camp built not only mechanical and electrical engineering skills such as soldering but also let me make new friends and develop new connections.
Trebuchet Design
