
My name is Jamarber B., I’m a rising junior, and during my time at Bluestamp I built a Robotic arm. Walking into the BlueStamp workspace for the first time left me feeling intimidated and uneasy due to how little I knew about engineering and programming, but it also left me amazed at the sheer amount of things there was to learn. As the days passed, I became more comfortable in this work environment, not only with my peers, but with my projects. My starter project was the Theremin, and my intensive project was the Robotic Arm, and while building I was learning new things constantly. After my first two weeks I realized that I had myself to thank for it. The thing I love about BlueStamp is that instead of teaching me directly, it sets up an environment in which I can teach myself better than any other teacher has ever taught me. My BlueStamp experience has made me more independent, and more prepared for the rest of my High school career, and more prepared for the rest of my life. At BlueStamp I didn’t just discover my passion for engineering, I also discovered a part of myself that I would otherwise have neglected. In hindsight, there are definitely things I would have done differently, both when coding and when building, such as my decision to switch from a breadboard to a proto board and back to a breadboard, but I realize that if I hadn’t made these mistakes, I wouldn’t have learned nearly as much as I did.
![]()

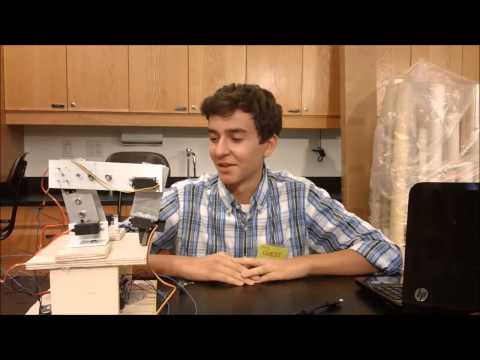
Robotic Arm: Completed!
After numerous changes, revisions, and then changes which fixed my revisions, I’ve finally finished my project! In my last milestone, the arm itself hadn’t been assembled. Now, two weeks later, my arm stands over one foot tall, and it’s made out of sturdy aluminum. I chose aluminum because it’s a relatively strong metal which is also readily available in the Bluestamp environment. My instructors had experience working with aluminum, and it seemed like they would have a lot to teach me. So over the last two weeks, I’ve seen my project come apart slowly, and at times I’ve seen it slowly break down without knowing why. While that is the worst feeling in the world, it also feels great knowing that you are making progress towards finishing your creation, which you’ve been nurturing for weeks. Most of the problems I faced while building my arm were related to the servos. There were times when the servos would begin twitching uncontrollably. This uncontrollable twitching was caused by a voltage problem which I spent days trying to fix. I eventually fixed it by switching from a proto board back to a breadboard. This twitching was eventually becoming dangerous to myself and the people around me. At some point, I became scared to even turn on my project because it began throwing itself off my work table. After I fixed this reign of terror, the rest of the project came relatively easily. The only other notable problems which I experienced while finishing the project were all related to the dremel. I had to use the dremel for days on end, trying to shave off some of my aluminum parts so that I could fit servos into their compartments. After I solved these two main problems, my arm started to come together, and now I can use it to pick up multiple different types of objects. Looking back, I’ve learned more during this one month of Bluestamp than I did in 6 months in certain classes in school. Instead of giving me repetitive lessons, Bluestamp provided me with useful skills that I won’t be forgetting throughout my (future) career as an engineer.
Robotic Arm: Second Milestone
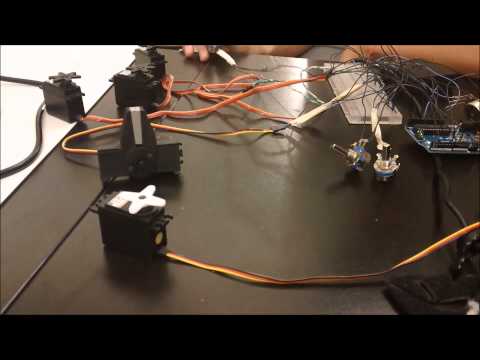
After completing the first milestone, I was left with the challenge of attaching multiple additional servos and parts to my Arduino Uno, and to my breadboard. While doing so, I experienced multiple problems in coding my Arduino, and in wiring involving the breadboard and the arduino itself. On multiple occasions, the servos wouldn’t turn corresponding to the potentiometers to which they were connected. Usually, it was a problem with code which I had missed or miswritten. However, the most tedious problem I faced while completing my second milestone was definitely keeping my wires in order. At some point, my wires were so disorganized that fixing them became a part of my daily morning routine. Despite facing multiple problems, I added four servos to the arduino after adding the initial servo. Three of them will be acting as servos which will control the positioning of the arm, whereas the fourth will be controlling the gripper, which I will be using to pick up different objects with the arm. I attached my code to the bottom of this post.
Robotic Arm: First milestone
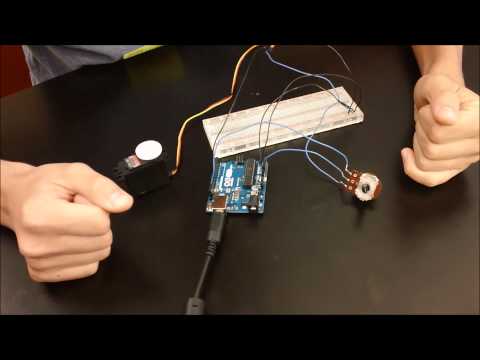
My first Milestone on the robotic arm required me to connect a servo along with a knob (potentiometer) to my Arduino, and then after connecting those parts I needed to program the Arduino so that the rotation of the servo was controlled by the knob on the potentiometer. So, now that I have programmed my arduino, I can spin the knob on the potentiometer, and the servo will also slowly spin according to how much I spun the knob. When doing research to complete this milestone, I learned a lot about wires, arduino, coding, and especially the different uses of breadboards. Breadboards are amazing, because they hugely expand the uses of a single slot on an arduino. By using the breadboard, I can power multiple servos using the single 5V slot on the arduino, because the breadboard functions in column of the same potential, meaning that one wire on the breadboard connected to the power slot (5V) on the arduino can power multiple different servos and devices.
The Theremin 6/26/14
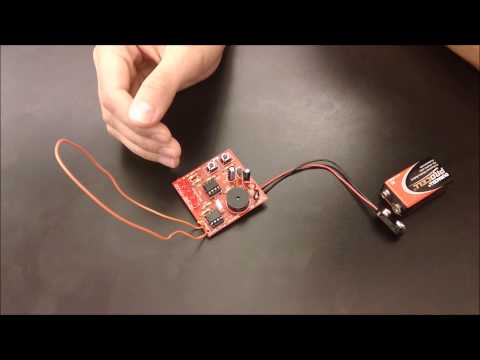
The Theremin is an electronic musical instrument which creates different music notes based on motion sensing, and using your hand or any other object, you can trigger the motion sensors to makes notes based on how close or far your hand is from the aerial wires, which are being used to sense the motion. The notes intensify based on distance. A note that is closer is very high and sometimes screech like, while a note that is too far is very low and displeasing, which is why, just like in traditional musical instruments, the Theremin requires delicate usage to actually create a pleasant melody. The Theremin functions in two different modes, discrete mode and constant mode. Discrete mode makes eight separate notes which also differ in pitch values based on how close or far your hand is from the aerial wires. The push buttons dictate the octave in which the notes are operating, so pressing the plus makes the octave higher, and then the minus buttons make the octave lower. While the motion is sensed by the aerial wires, the battery itself is connected by the battery snap. The battery snap is a pair of wires which connect to the circuit board (after being soldered on) on one end, and on the other end they connect to a 9V PP3 battery. The majority of the problems I came across were solder related. As a person who had never soldered before, soldering was naturally difficult and problematic. In many cases, connections were formed when they shouldn’t have, and in many cases the opposite occurred. This meant that I often had to re-solder and un-solder constantly. Another problem I encountered involved the Aerial wires, in which they constantly picked up interference. I fixed this problem by changing my regulator, which had previously been damaged.
BlueStamp Bill of Materials Jamarber B
BlueStamp Build Plan Jamarber B. – Robotic Arm