Voice Controlled Robot
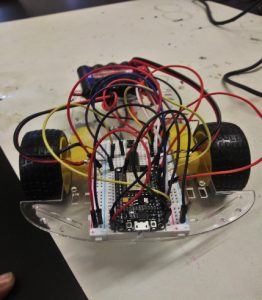
My voice controlled robot is a robot that I built that is able to recognize speech to move in a variety of directions as well as being controlled using an app I created
Engineer
Hunter A
Area of Interest
Computer Science/Mechanical Engineering
School
KIPPNYC College Prep
Grade
Rising Sophmore
Modifications.
After completing the base project, I had decided to add on some small modifications with the time I had left. I had added a NeoPixel light strip, after adding the light-strip I had coded it to make it change color when I have the robot change direction as well as stop. Once that was done I cut a mouth out to be able to attach the USB cable so I can attach the CPU to the computer so I could change the code if need be,as well as a flap on top to access the battery back so i could recharge it if needed or adjust the wiring
Third Milestone
My Third Milestone was to create my app and connect it to my present Arduino code, then be able to use my app to move my robot, most importantly using my voice. With the app Im able to register my voice and move my robot using my voice through the app. The arduino code takes my voice translates it into a text command takes the block command, and turns it into a command that the NodeMcu can intercept and acts accordingly
Second Milestone
My Second milestone is to get a test code I had found, to run to my motors and move them. The test code is supposed to move the code forward,back,left and right. This Milestone was difficult to get to, I had a lot of setbacks in terms of not having the current polarity correct or creating a power surge and frying a laptop. But after a lot of trial and error, debugging and restarting I got the code connected and running. Getting to this milestone taught me quite a bit about perseverance and how, Especially in engineering, I have to take my time and work carefully. Learn from my mistakes and move forward, hopefully not frying another computer on the way
First Milestone
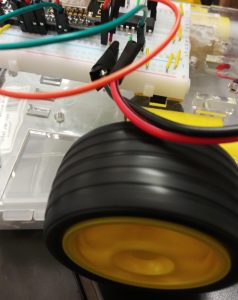
My first milestone was to complete the chassis as well as connect power to the motors. Completing the chassis was difficult due to the fragility of the main body, their was a lot of trial and error in getting everything built without a part breaking for the 3rd time. But I feel as though it taught me a valuable lesson, that being that you have to push through a lot of setbacks and problems especially in this field. Other than that connecting the battery to the motors was pretty simple, so there wasn’t many problems aside from me almost frying the circuit by switching the polarity
Completing the chassis and getting power to the motors is the first step in completing the voice controlled robot, which is my main project, for my milestone I had to learn how to use a breadboard. A breadboard is a solder-less device for temporary prototype with electronics and test circuit designs, which essentially means I can create circuits that aren’t permanent meaning I can change the circuit depending on what I need. This is great for someone like me who is new to engineering and circuity. To connect the motor to the breadboard I had weld wires to the motor on one side and and connect the other side to the breadboard. Once I got the battery connected I was able to get the motors running. The chassis was pretty simple in comparison to the breadboard and the circuity because it came as a kit, although a certain part did break a few times and gave me trouble.
Starter Project : MintyBoost
My Starter project is the MintyBoost, a battery powered portable charger for your phone. This project was enjoyable because it showed me how to work with things like solder, and also taught me to not give up when something goes wrong, learn from my mistakes and keep pushing till I succeed.
Demonstration
How does it work
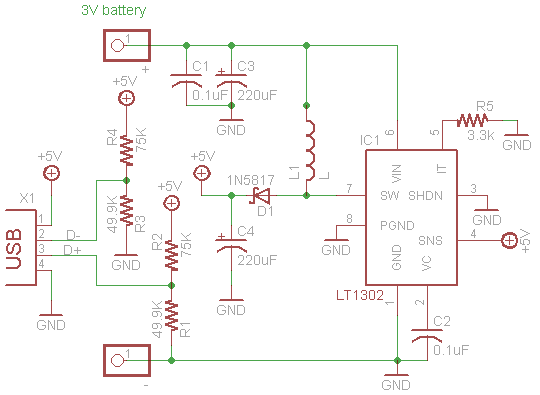
The MintyBoost is powered by two 1.5v batteries. The resistors on the circuit keep the voltage from overloading the circuit. The power from the battery is kept in a current created by the inductor. The inductor is a coil wrapped around metal wire and when the current hits the inductor it creates a magnetic field. The boost convertor chip controls a switch in the current, when the switch is flipped the magnetic field partially collapses which sends the voltage to an alternate current. The collapse of the field ups the voltage of the current, and send it through a diode- A diode makes sure the current doesn’t go backwards- and the diode sends it to the capacitor, where it’s stored until its needed to charge your phone.


