Demo Night
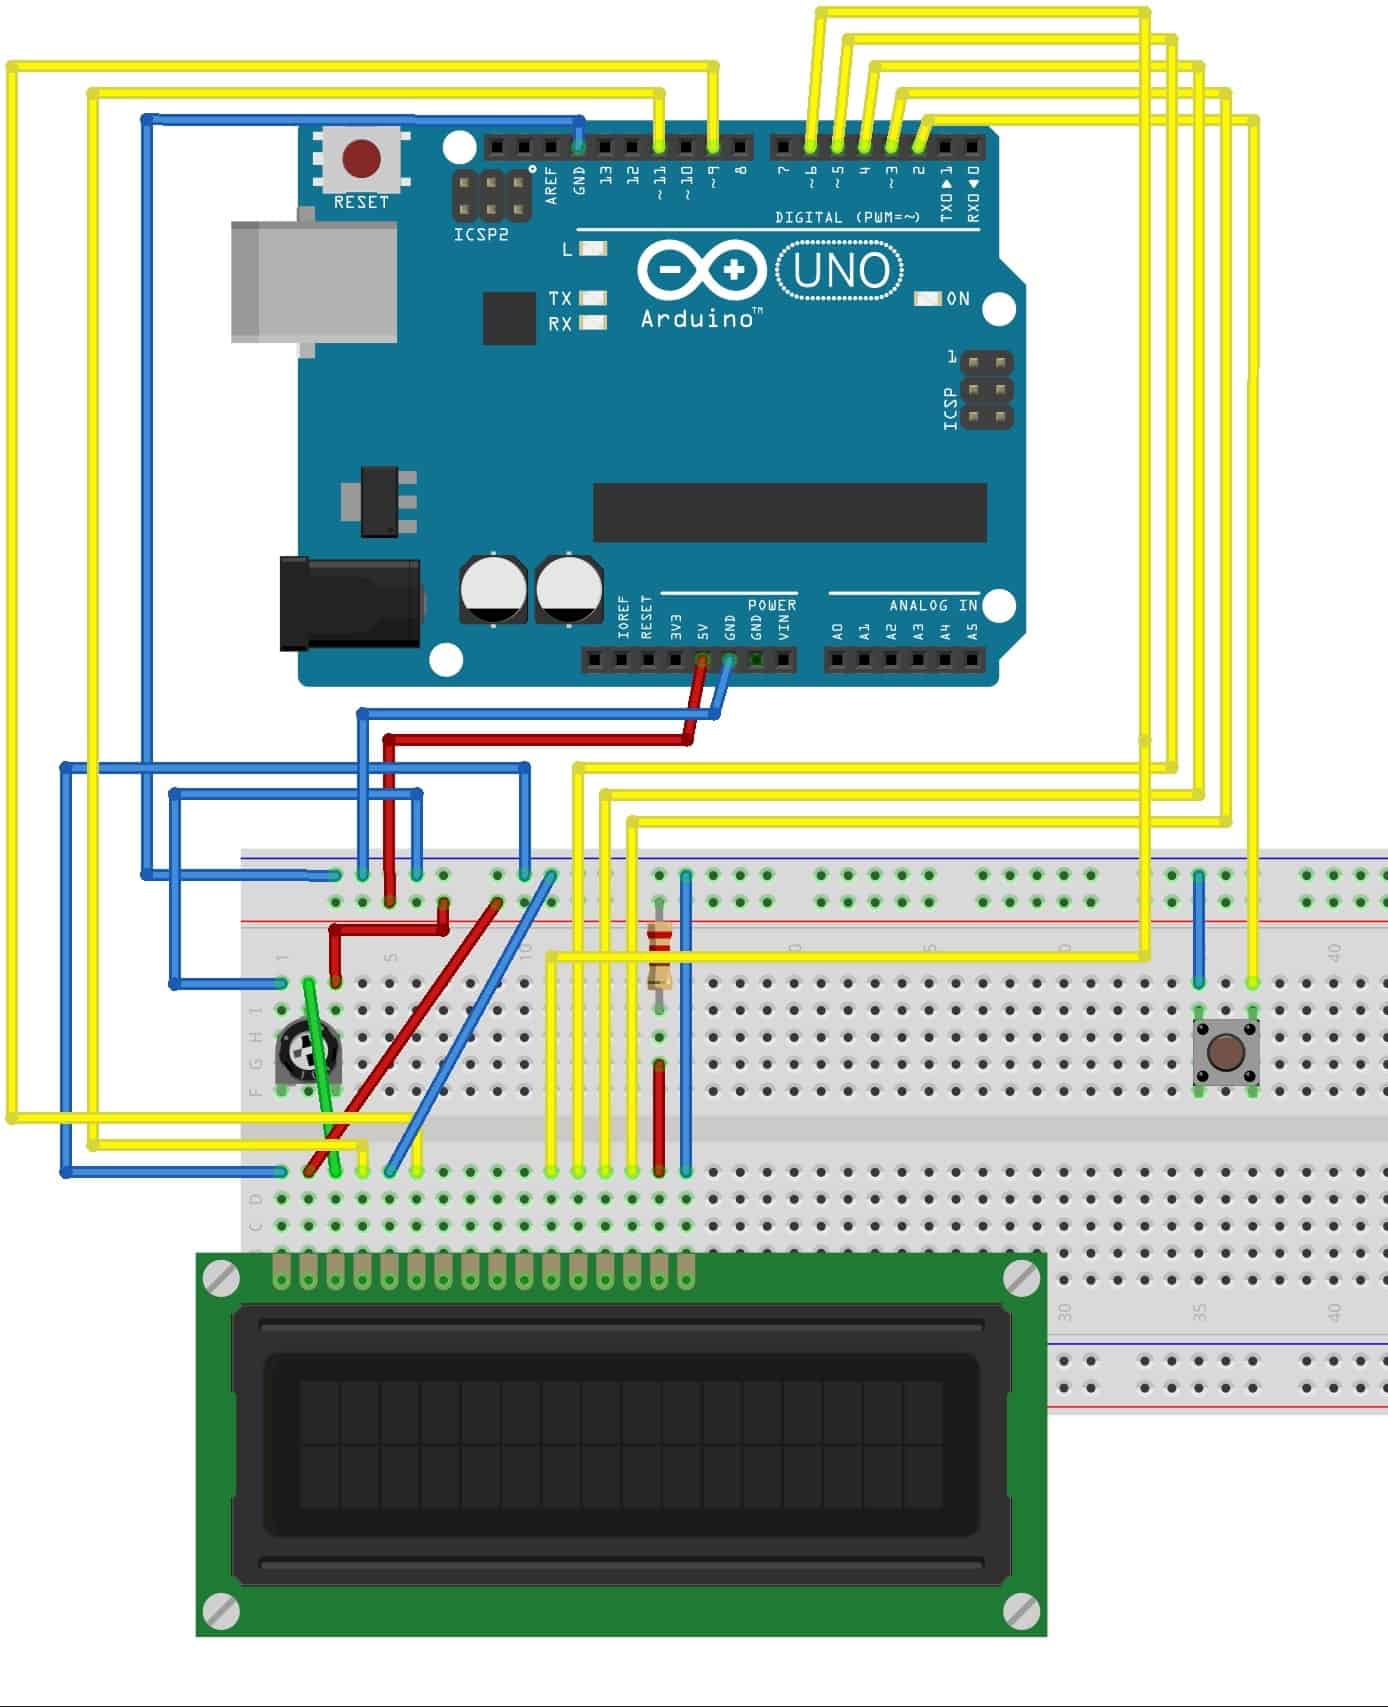
Fritzing Diagram

Third Milestone
For my third milestone, I created the code for my scoreboard, collisions, and terrain generation, which makes my game fully functional now.
I used the Arduino IDE to code the rest of my project. I used void functions for the terrain generation, and to detect collisions. I learned how to use a random seed in order to make my game completely random, with the IDE’s random number generator. I had to use some very large and complex if statements to detect whether the character is supposed to run on top of the terrain, or if the character collides with the terrain. I made my scoreboard display how many stages that the player passes, and have the game move faster as you complete more stages.
My character is running on top of the terrain.
My character just fell off of the block(not visible in picture),my terrain has moved, and new terrain has generated.
Second Milestone
For my second milestone, I created my character’s running, jumping, and falling animations, and I made my terrain scroll across the screen.
I used the Arduino IDE to create my character’s running, jumping, and falling animations, and I learned about that from the example LCD CreateChar code. I learned how to make my game scroll from the right to the left with the example LCD Scroll code. I created the animations using many variables and if statements, along with a void statement which could update my character, and make it appear on the screen.
This shows my character jumping
This shows my character falling, and my terrain has moved.
First Milestone
For my first milestone, I completed most of the hardware for my project. This included soldering my 16 pin header to my LCD, and connecting my LCD to the arduino through the breadboard.
I connected everything from the LCD to the Arduino using male-male pins and the breadboard. I used the example “Hello World” code from the Arduino IDE, and then I edited some aspects of it. What I edited was that I changed the text from “Hello World” to “It works”, I moved everything to the middle, and I made the counter count by tenths of a second.
My project
Here is an image of my project in action. It is hard to see the screen from the video because of how small the screen is.
MintyBoost
The MintyBoost is a AA battery powered phone charger, which could also be used to charge anything which uses a USB type A charger.
The MintyBoost uses a boost converter chip to allow it to transfer the 5V of electricity needed to charge the phone, instead of the 3V the battteries normally supply. It uses resistors, and capacitors to smoothen the circuit, and a schottky diode to make the electricity flow to the phone, and not from the phone.


