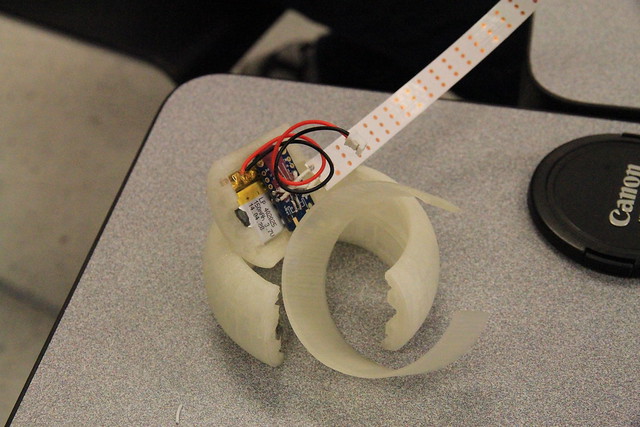
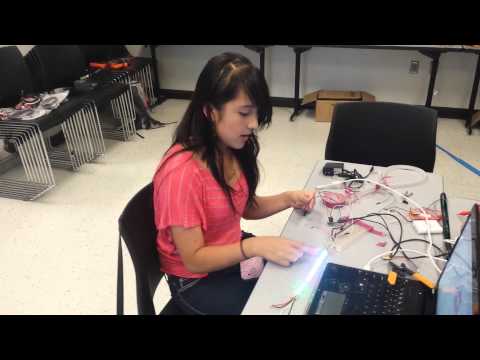
Hello, my name is Graciela. I’m a junior at KIPP Denver Collegiate High School. As soon as our school counselor mentioned this program to me, I was really excited to become part of it. I’ve always wanted to be in the engineering field, and this program was going to provide me with some experience. Not only was it great because I was going to learn a lot, but also it was mostly all hands on. For my final project I chose the LED bracelet. This bracelet is 3D printed and motion sense. I was able to make some changes to it. I became interested in this project because I thought a bracelet that will have LEDs in it was a really cool idea, and it will also make the bracelet stand out. For my starter project I chose the Minty Boost. I became interested in this project because it allows me to charge my phone on the go. I always have problems with having my phone charged. The Minty Boost is a great solution for that problem.


Final project:
I had to make major changes due to time. I wanted to leave this program with a completed project. One of the big changes that I made was that I removed the accelerometer. This means that my bracelet is no longer motion sensitive. Another big change that I made was that I changed the code. Because the bracelet is no longer based on motion, the code that I originally had on the trinket does not work. I used the tester code it was originally given. Now my bracelet is functioning and completed.
The code and libraries needed for my project are from Adafruit, and it can also be downloaded here: Adafruit_NeoPixel-master. I used 3-D printed parts, and you can find it on thingaverse Here is the bill of materials (BOM) describing the parts used for my project. Below is the schematic, but I ignored the part with the accelerometer. 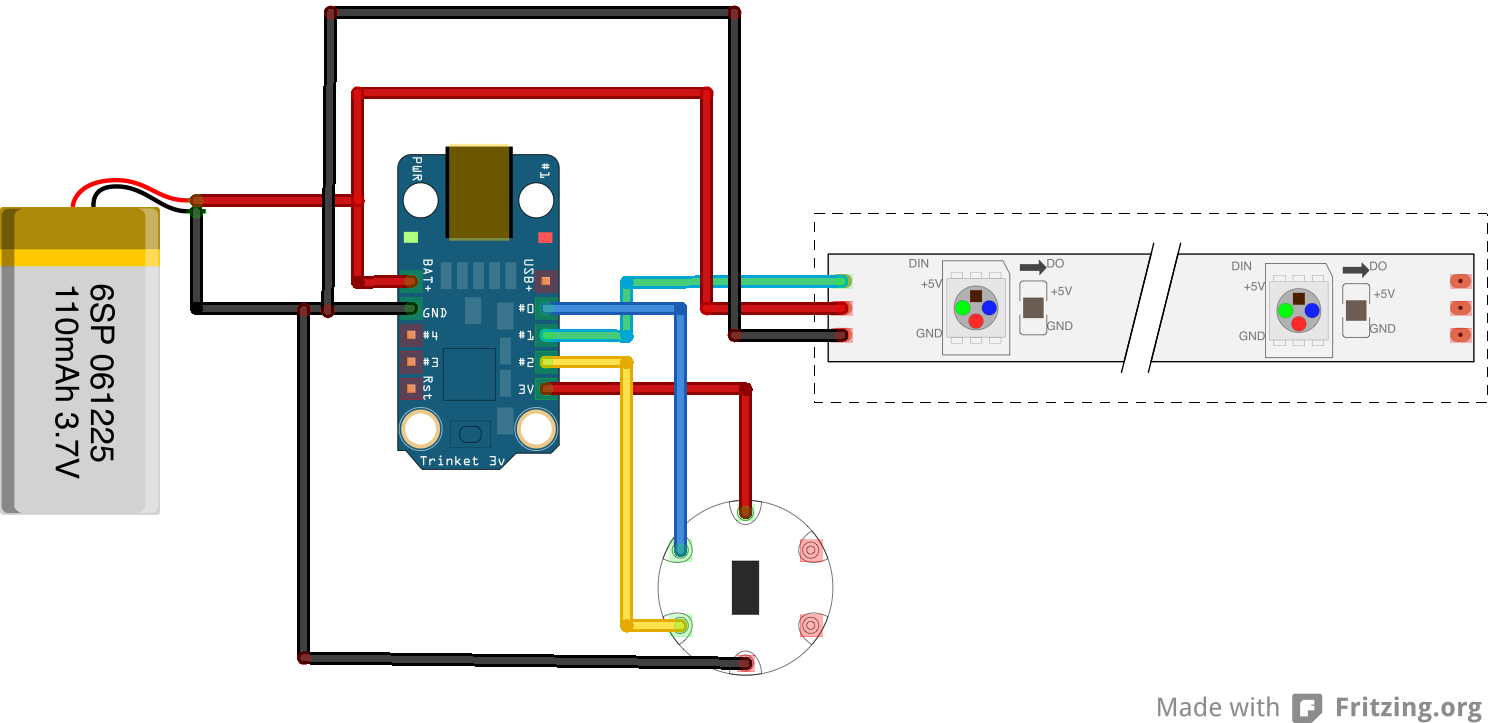
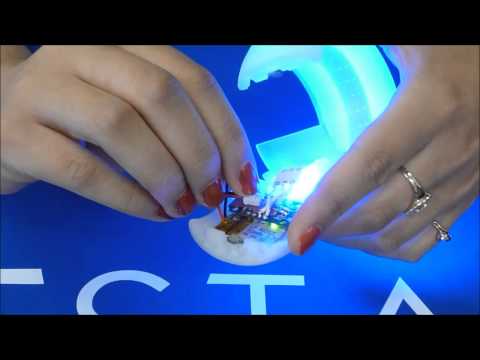
Final Project Milestone 2:
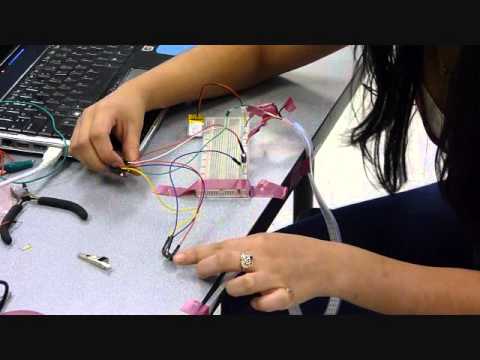
Just like I mentioned on my first milestone, my next step was to get more colors to light up. For this to happen several changes were made. I changed the accelometer because the one that I had was not working. While I was soldering some wires I was not paying attention and placed the voltage one where the ground was suppose to be; therefore, it may have burned out. Changing this allowed my bracelet to be motion sensitive. We can see that once you start moving it more colors show up.
Final Project Milestone 1:
I was extremely happy once I finally reached this step with my LED bracelet, for I had several complications with the trinket. The first time I placed the code that was given to me by the people who originally came up with this project the code wouldn’t work. The problem that I found was that I needed to install the libraries that were, in fact, also on the website. After I downloaded these libraries, the code finally was able to pass the verifying test. However, I was placed with a new challenge; this challenge was getting the code into the trinket. Since the trinket needs to have a button pressed in order to upload the code, I discovered that this button not only needs to be pressed before uploading the code to activate the boot-loader, but you also need to press it during because the boot-loader turns off after 10ish seconds. I know that now the LED strip is currently only turning the red color on,but hopefully soon I can make it change into various colors.
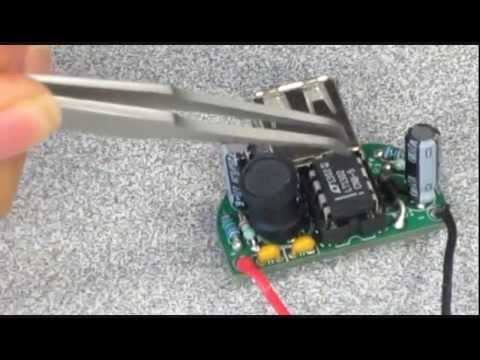
Starter project: Minty Boost
My starter project was the Minty Boost version 3.0. The purpose for the minty-boost is to charge devices on the go. The Minty Boost consists of several important parts. The first part is the boost converter which takes a small voltage and brings it up to a higher voltage. The next important parts are the resistors. The minty-boost has 4 resistors. The resistor reduces the current flow and the voltage levels in the circuit. In this particular project the resistors are all non-polar; therefore, it doesn’t have a side that goes first or second. To continue, the bypass capacitors are another important part. The bypass capacitors prevent unwanted noise from power supplies. This reduces the effect the noise might have on the rest of the circuit. The schottky diode only allows the current to flow in one direction. Finally, the power conductor helps form the electromagnetic field. The next steps I would like to do would be to case this charger. Casing it would make it even better because it will be easier to carry it or place it in your pocket.