
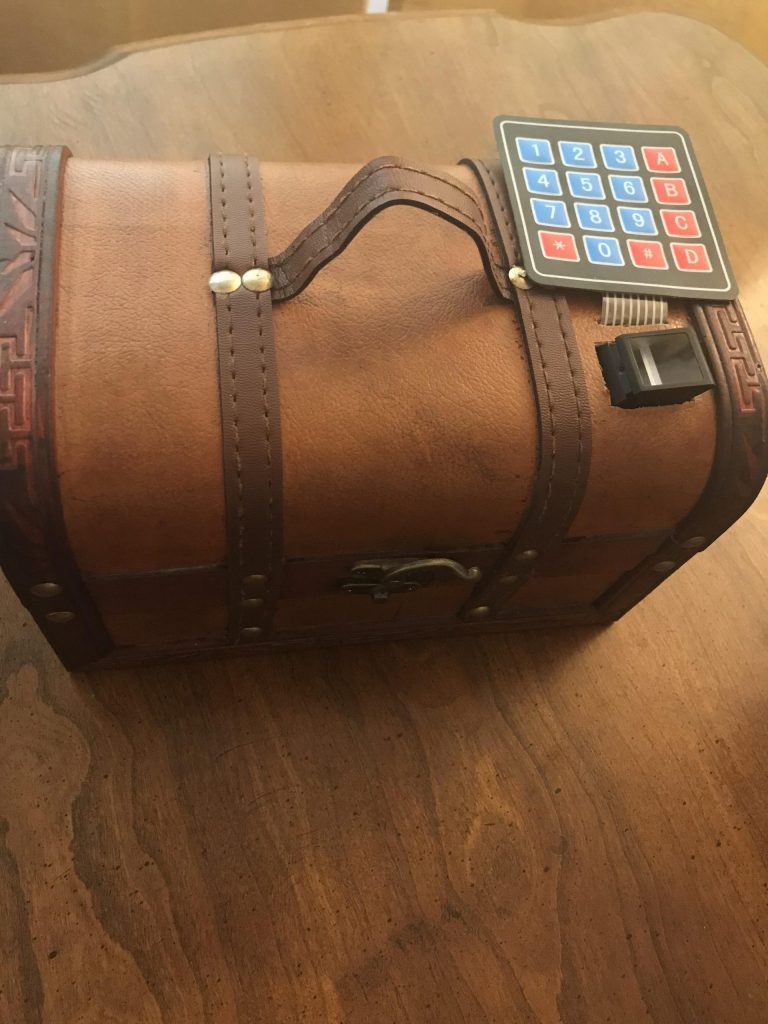
Biometric Safe
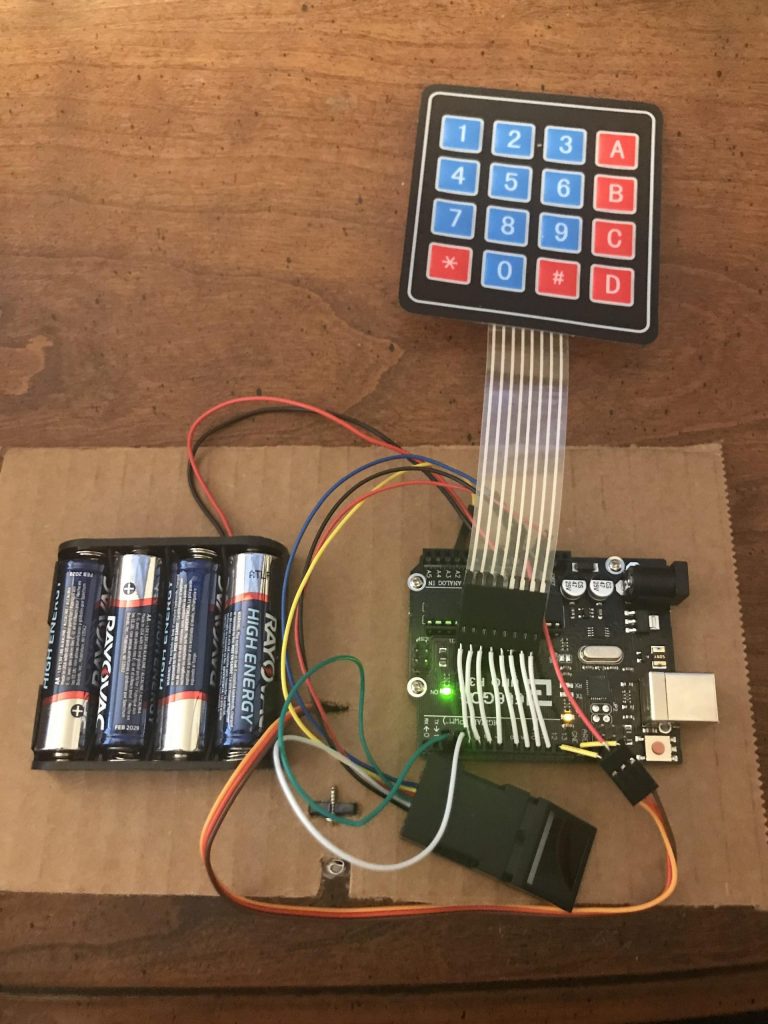
There are 3 components to the Biometric Safe: The biometric fingerprint scanner, the keypad, and the safe itself. The scanner and keypad are both powered by an arduino. The safe will hold and be opened by the scanner and keypad.
Engineer
Giulia C
Area of Interest
Electrical/ Computer Engineering
School
Livermore High School
Grade
Incoming Senior
Third Milestone
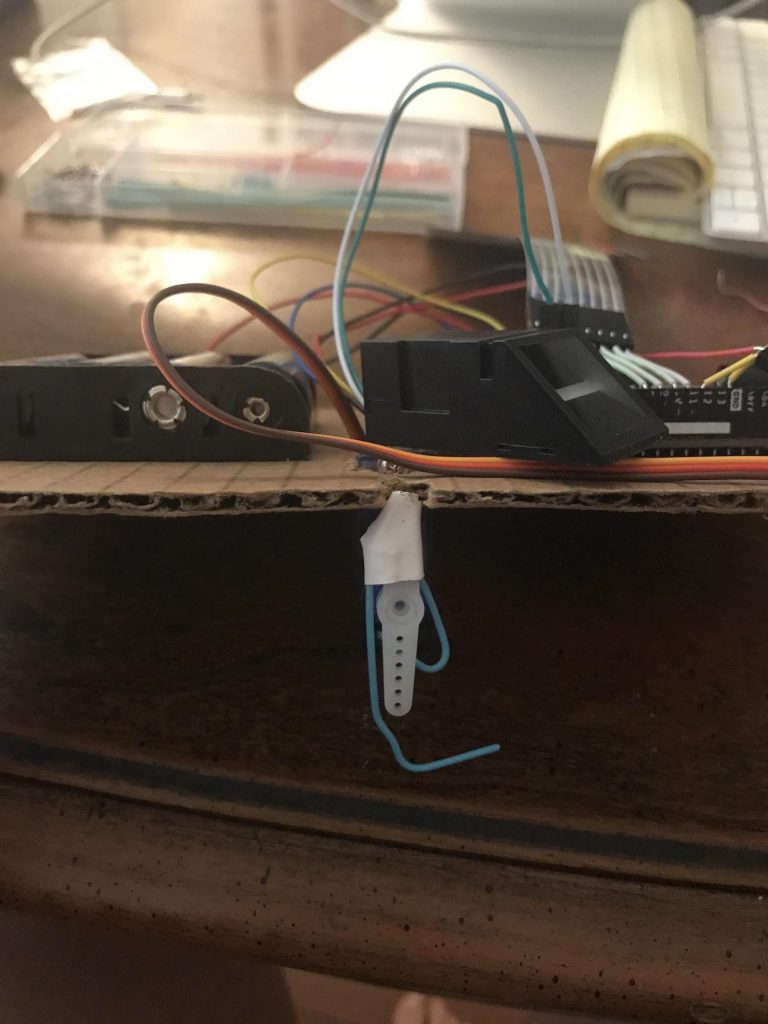
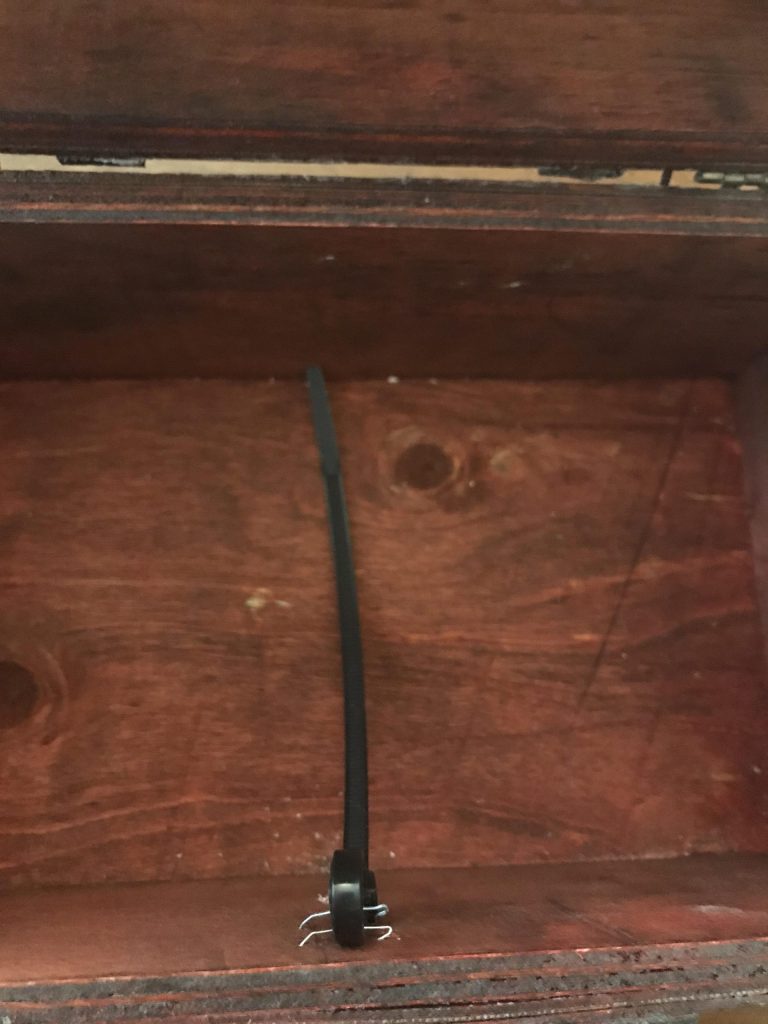
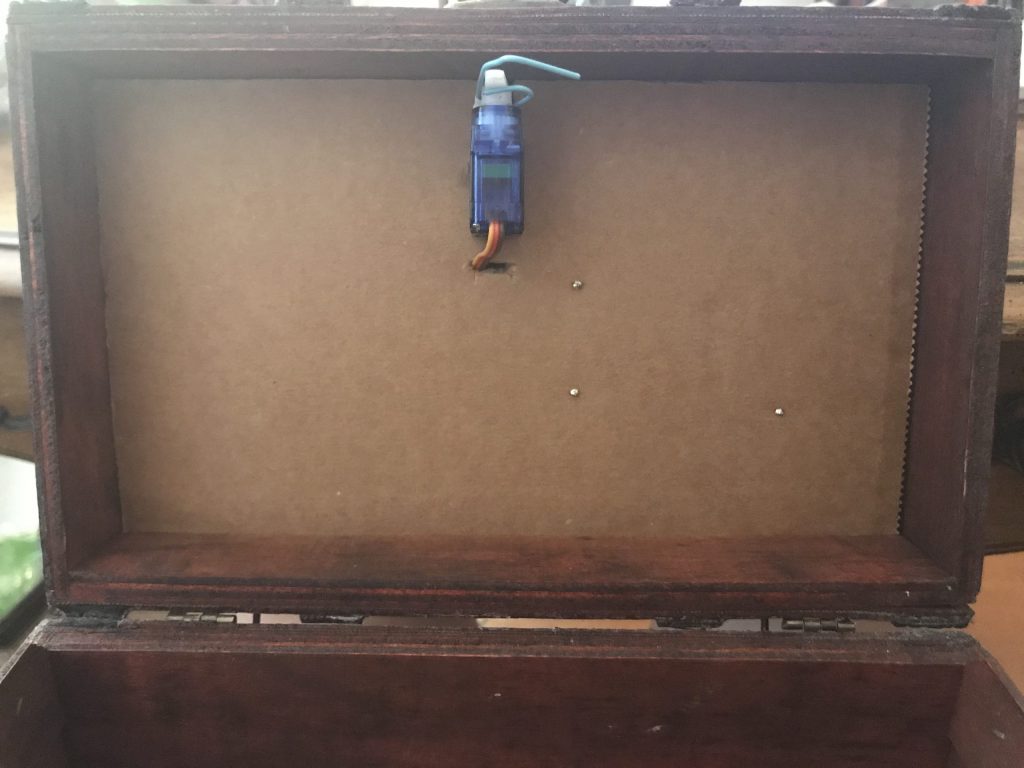
My third milestone was assembling all of the components into the chest. I measured and cut a piece of cardboard to act as a sort of shelf to hold everything. I added a 6V battery pack to power the Arduino. I screwed down the battery and Arduino into the cardboard so it won’t shift when opening the chest. To access the fingerprint scanner and keypad from the outside I cut two holes into the right hand side of the chest. I cut a few holes into the cardboard shelf to attach the servo motor and to string the servo wires through to the Arduino. I stapled a zip tie on the inside of the chest so that it lines up with the paperclip on the servo. This acts as the locking mechanism.
Second Milestone
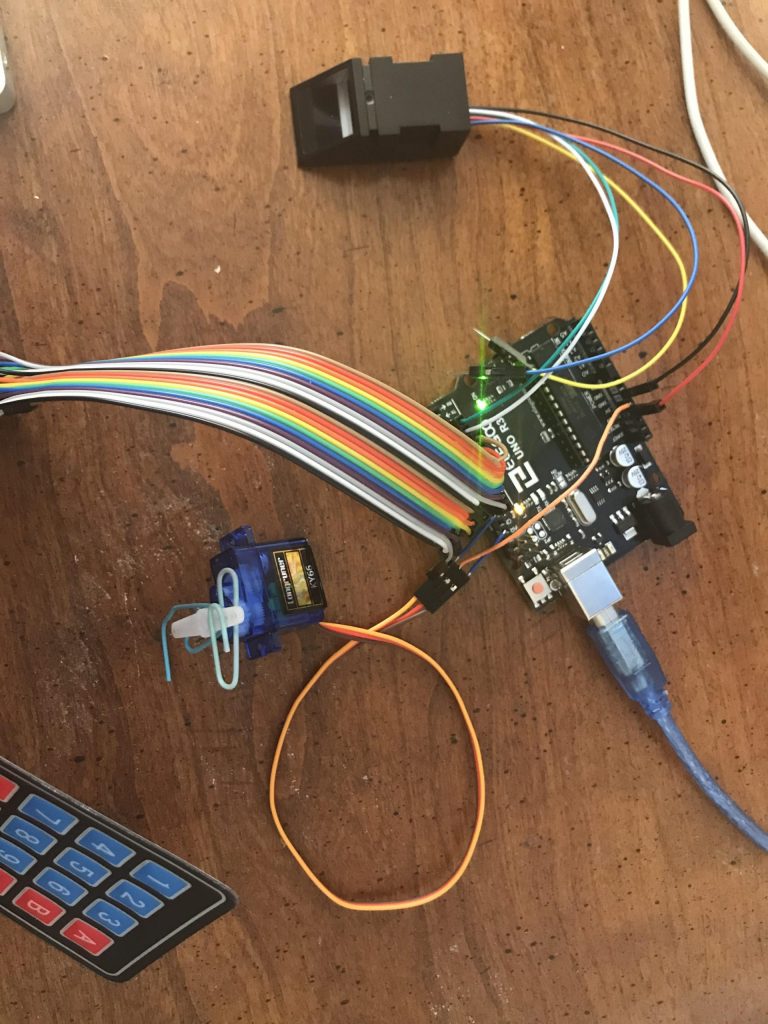
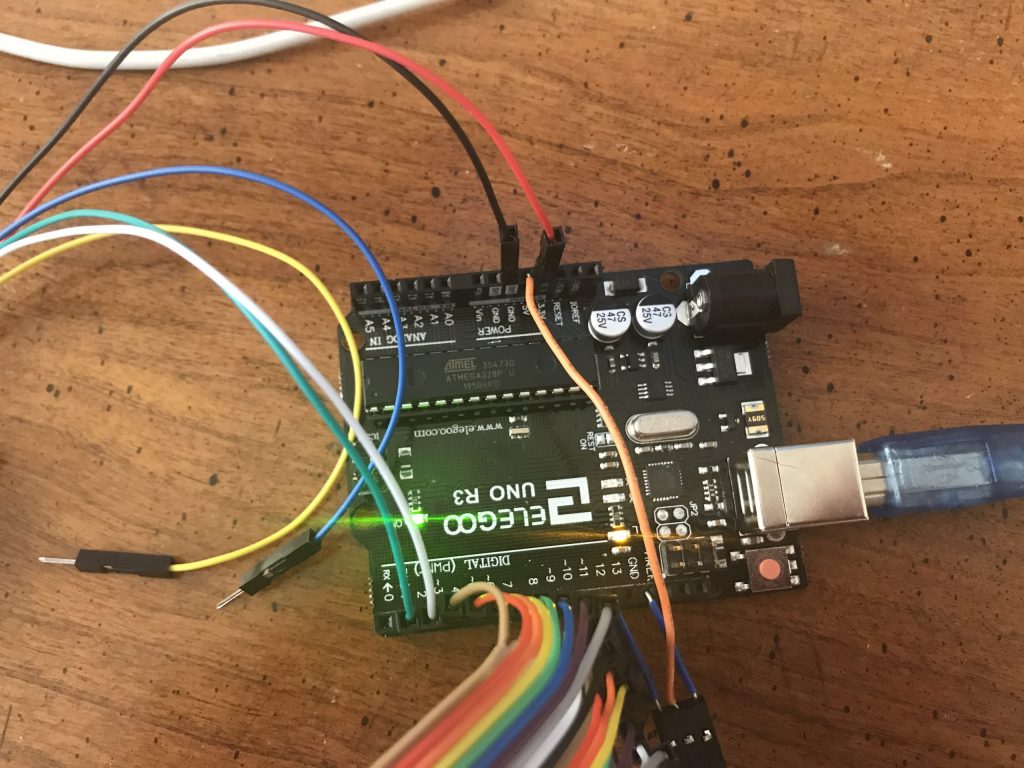
My second milestone was combining the fingerprint sensor with the keypad and motor. When you put your fingerprint on the fingerprint sensor it recognizes your ID, prints your information on the serial monitor, and then starts the keypad code so you can enter the four digit code. Once you put in the right code on the keypad it turns the motor 90 degrees. If you put in the wrong code it turns back. To set up the fingerprint scanner you enroll as many fingerprints as you want. It takes your print and converts it into an image, saving it as your ID. This is separate code from my combined code, so it is completed beforehand. The fingerprint scanner is set to scan for a finger every second. When you scan your finger to unlock the keypad it converts your finger to an image again and then compares it to the IDs it has saved. Once it finds a match, it tells the keypad to start recognizing button strokes. Some issues I ran into for this milestone was understanding the code for the fingerprint scanner and combining it with my existing keypad code. The fingerprint scanner code used a complicated library that made understanding certain unnamed parts difficult. When I combined the fingerprint scanner and keypad code the keypad stopped working. As I was troubleshooting I learned about and added more booleans to make it run smoother. In the end the only issue was the position of a delay. For my next milestone I plan to attach all of the components to the safe.

#include <Adafruit_Fingerprint.h>
#include <Servo.h>
#include <Wire.h>
#include <LiquidCrystal_I2C.h>
#include <Keypad.h>

bool fingerTF = false;

Servo myservo;
int angle = 0;

unsigned long previousTime = 0;
long interval = 5000;

#define Password_Length 5

char Data[Password_Length];
char Master[Password_Length] = "1234";
byte data_count = 0, master_count = 0;
bool Pass_is_good;
char customKey;

const byte ROWS = 4;
const byte COLS = 4;

char hexaKeys[ROWS][COLS] = {
{'1', '2', '3', 'A'},
{'4', '5', '6', 'B'},
{'7', '8', '9', 'C'},
{'*', '0', '#', 'D'}
};

byte rowPins[ROWS] = {11, 10, 9, 8};
byte colPins[COLS] = {7, 6, 5, 4};

Keypad customKeypad = Keypad(makeKeymap(hexaKeys), rowPins, colPins, ROWS, COLS);

LiquidCrystal_I2C lcd(0x21, 16, 2);

#if defined(__AVR__) || defined(ESP8266)
// For UNO and others without hardware serial, we must use software serial...
// pin #2 is IN from sensor (GREEN wire)
// pin #3 is OUT from arduino (WHITE wire)
// Set up the serial port to use softwareserial..
SoftwareSerial mySerial(2, 3);

#else
// On Leonardo/M0/etc, others with hardware serial, use hardware serial!
// #0 is green wire, #1 is white
#define mySerial Serial1

#endif


Adafruit_Fingerprint finger = Adafruit_Fingerprint(&mySerial);

void setup(){
lcd.init();
lcd.backlight();
Serial.begin(9600);
myservo.attach(12);

while (!Serial); // For Yun/Leo/Micro/Zero/...
delay(100);
Serial.println("\n\nAdafruit finger detect test");

// set the data rate for the sensor serial port
finger.begin(57600);
delay(5);
if (finger.verifyPassword()) {
Serial.println("Found fingerprint sensor!");
} else {
Serial.println("Did not find fingerprint sensor :(");
while (1) { delay(1); }
}

Serial.println(F("Reading sensor parameters"));
finger.getParameters();
Serial.print(F("Status: 0x")); Serial.println(finger.status_reg, HEX);
Serial.print(F("Sys ID: 0x")); Serial.println(finger.system_id, HEX);
Serial.print(F("Capacity: ")); Serial.println(finger.capacity);
Serial.print(F("Security level: ")); Serial.println(finger.security_level);
Serial.print(F("Device address: ")); Serial.println(finger.device_addr, HEX);
Serial.print(F("Packet len: ")); Serial.println(finger.packet_len);
Serial.print(F("Baud rate: ")); Serial.println(finger.baud_rate);

finger.getTemplateCount();

if (finger.templateCount == 0) {
Serial.print("Sensor doesn't contain any fingerprint data. Please run the 'enroll' example.");
}
else {
Serial.println("Waiting for valid finger...");
Serial.print("Sensor contains "); Serial.print(finger.templateCount); Serial.println(" templates");
}

}

void loop(){


if (!fingerTF){
fingerTF = getFingerprintID();
delay(1000); //time delay for fingerprint falsh
}
else{


char customKey = customKeypad.getKey();

lcd.setCursor(0,0);
lcd.print("Enter Password:");

customKey = customKeypad.getKey();
if (customKey){
Serial.println(customKey);
Data[data_count] = customKey;
lcd.setCursor(data_count,1);
lcd.print(Data[data_count]);
data_count++;
}

if(data_count == Password_Length-1){
lcd.clear();

if(!strcmp(Data, Master)){
lcd.print("Correct");

myservo.write(0);
delay(1000);

}
else{
lcd.print("Incorrect");

myservo.write(90);
delay(1000);

}

lcd.clear();
clearData();
}
}

}

bool getFingerprintID() {
uint8_t p = finger.getImage();
switch (p) {
case FINGERPRINT_OK:
Serial.println("Image taken");
break;
case FINGERPRINT_NOFINGER:
Serial.println("No finger detected");
return false;
case FINGERPRINT_PACKETRECIEVEERR:
Serial.println("Communication error");
return false;
case FINGERPRINT_IMAGEFAIL:
Serial.println("Imaging error");
return false;
default:
Serial.println("Unknown error");
return false;
}

// OK success!

p = finger.image2Tz();
switch (p) {
case FINGERPRINT_OK:
Serial.println("Image converted");
break;
case FINGERPRINT_IMAGEMESS:
Serial.println("Image too messy");
return false;
case FINGERPRINT_PACKETRECIEVEERR:
Serial.println("Communication error");
return false;
case FINGERPRINT_FEATUREFAIL:
Serial.println("Could not find fingerprint features");
return false;
case FINGERPRINT_INVALIDIMAGE:
Serial.println("Could not find fingerprint features");
return false;
default:
Serial.println("Unknown error");
return false;
}

// OK converted!
p = finger.fingerSearch();
if (p == FINGERPRINT_OK) {
Serial.println("Found a print match!");
} else if (p == FINGERPRINT_PACKETRECIEVEERR) {
Serial.println("Communication error");
return false;
} else if (p == FINGERPRINT_NOTFOUND) {
Serial.println("Did not find a match");
return false;
} else {
Serial.println("Unknown error");
return false;
}

// found a match!
Serial.print("Found ID #"+ finger.fingerID);
Serial.println(" with confidence of "+ finger.confidence);
Serial.println("Enter Code");
bool fingerTF = true;
// return finger.fingerID;

return true;

}

// returns -1 if failed, otherwise returns ID #
int getFingerprintIDez() {
uint8_t p = finger.getImage();
if (p != FINGERPRINT_OK) return -1;

p = finger.image2Tz();
if (p != FINGERPRINT_OK) return -1;

p = finger.fingerFastSearch();
if (p != FINGERPRINT_OK) return -1;

// found a match!
Serial.print("Found ID #"); Serial.print(finger.fingerID);
Serial.print(" with confidence of "); Serial.println(finger.confidence);

return finger.fingerID;
}

void clearData(){
while(data_count !=0){
Data[data_count--] = 0;
}
return;
}
First Milestone
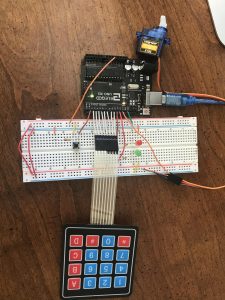
My first milestone was getting the keypad to work with a servo motor. When you input in the correct four digit pass code onto the keypad it sends a signal to the arduino telling the motor to turn 90 degrees. If you put in the wrong passcode it will move back to its original position. This represents the unlocking and locking of the safe. I also added a green and red LED to signal if the passcode was correct or incorrect. Another addition I made was a timer that starts counting down if the data count is less than four. This was so that if someone, for example, put only three numbers in, the keypad would reset after 5 seconds so they can then put in the correct passcode more easily. Some issues I ran into were figuring out a good way to wire the breadboard, understanding the keypad coding and library, and adding the timer to reset the keypad input.
#include <Wire.h>
#include <LiquidCrystal_I2C.h>
#include <Keypad.h>
#include <Servo.h>

Servo myservo;
int angle = 0;
int lightOutput = 11;
int lightOutput2 = 10;

unsigned long previousTime = 0;
long interval = 10000;

#define Password_Length 5

char Data[Password_Length];
char Master[Password_Length] = "9511";
byte data_count = 0, master_count = 0;
bool Pass_is_good;
char customKey;

const byte ROWS = 4;
const byte COLS = 4;

char hexaKeys[ROWS][COLS] = {
{'1', '2', '3', 'A'},
{'4', '5', '6', 'B'},
{'7', '8', '9', 'C'},
{'*', '0', '#', 'D'}
};

byte rowPins[ROWS] = {11, 10, 9, 8};
byte colPins[COLS] = {7, 6, 5, 4};

Keypad customKeypad = Keypad(makeKeymap(hexaKeys), rowPins, colPins, ROWS, COLS);

LiquidCrystal_I2C lcd(0x21, 16, 2);

void setup(){
lcd.init();
lcd.backlight();
myservo.attach(12);
pinMode(lightOutput, OUTPUT);
pinMode(lightOutput2, OUTPUT);
Serial.begin(9600);
}

void loop(){

unsigned long currentTime = millis();
if (currentTime - previousTime > interval){
previousTime = currentTime;
lcd.clear();
clearData();
delay(150);

}

char customKey = customKeypad.getKey();

lcd.setCursor(0,0);
lcd.print("Enter Password:");

customKey = customKeypad.getKey();
if (customKey){
Serial.println(customKey);
Data[data_count] = customKey;
lcd.setCursor(data_count,1);
lcd.print(Data[data_count]);
data_count++;
}

if(data_count == Password_Length-1){
lcd.clear();

if(!strcmp(Data, Master)){
lcd.print("Correct");
delay(500);
digitalWrite(lightOutput, HIGH);
myservo.write(0);
delay(1000);
digitalWrite(lightOutput, LOW);

}
else{
lcd.print("Incorrect");
digitalWrite(lightOutput2, HIGH);
myservo.write(90);
delay(1000);
digitalWrite(lightOutput2, LOW);
}

lcd.clear();
clearData();
}

}

void clearData(){
while(data_count !=0){
Data[data_count--] = 0;
}
return;
}