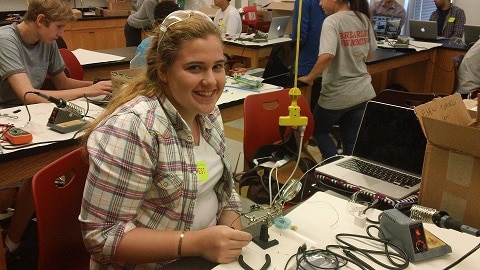
Hi my name is Eden and I am going into my junior year at Birch Walthen Lenox. For my starter and main project I built a Minty Boost charger and a solar powered MP3 player respectively.
_____________________________________________
Final Video
Specifications of the Speaker
My project is finally working! All the components are now connected to the solar panel and all the circuitry now rests inside a 3D case that I built which is able to hold all of them in one place.
Originally I was going to build my case out of wood but I thought it would cause a lot of problems. So I decided to 3D print it. On the front there is a lip for the phone to sit. The solar panel will sit on top. I ended up printing the lid four times. The first time I forgot to leave a hole for the wire of the solar panel and the lid was too big for the box. Then I ended up changing the design of the box part so the lid was too small. Then it was too big and the last and final time it fit.
Most of my problems were getting Sketchup to do the design I wanted. It took me a really long time to learn the program and how to manipulate it. The bottom of my box was sort of a complicated design. The first time I printed it the filament got caught so I had to reprint. Finally it came out nicely. The power jack cable that needs to plug into the phone fit through the hole I made for it but the phone and the cable together did not fit through in the lip I made so I had to reprint it again.
Sketchup bottom design
Sketchup top design
https://drive.google.com/file/d/0B1stI1TyXHCAendsbnRtcGh6TWs/edit?usp=sharing
(helpful for building the case)
http://www.usa.philips.com/c-p/SBA1610_37/portable-speaker/specifications
Bill of Materials
https://docs.google.com/spreadsheets/d/1PKGVDqCYuA6woI7CP7X4MswMn28rZeCDC542uKsyJrY/edit?usp=sharing
_____________________________________________
Milestone Number One
Hi! I am Eden and I have reached my first milestone of my main project!
Firstly I had to open up my speaker so that I could view the internal circuit and find the power source. The power source of the speakers is where the batteries are connected. The way to test the voltage is opening up the speaker and finding the wires that are connected to the battery source (one red one black). Before connecting the VCC and ground wires, I made sure I was getting the right amount of voltage from the speakers with the batteries. At first, I was not getting the right voltage because a resin that is an insulator covered the wires. Then by going under the insulator I got 4.5 volts. The reason why I opened up the speaker is because I would be getting power from my power supply kit after the solar panel changed the solar energy to electrical energy.
The speaker I used was the Philips SBA1610/37 mobile speaker.
The solar panel is connected to the breadboard power supply. The way that the solar panel works is that it takes the sunlight and converts the solar energy into the electrical energy and thus provides the electrical current, which, powers the speaker. This will then go to the power supply circuit that will give a constant of 3.3 volts or 5 volts supply. It is capable of providing both you have to pick how much voltage you want. The voltage regulator makes sure it consistently gives 5 volts. So I soldered the components of the supply circuit and then I connected the power supply to the power source of my speaker. Since my speaker requires 4.5 volts I used 5 volts switch instead of 3.3 volts switch.
The hardest part was figuring out why I was not getting any voltage from the power supply of my speakers. It was because insulators protected the wires and when we heated the insulators up they burned and I was burning the plastic. In the end the multimeter showed that I was getting voltage from the bottom where the plastic that insulates the wires was not protecting the wires. In the future I would not use this speaker because working on batteries it does not play on full volume. So when I am using the solar panel it did not work on full volume.
__________________________________________________________________
Starter Project
Hi my name is Eden and I am going into my junior year at Birch Walthen Lenox.
My starter project at BlueStamp Engineering was the Minty Boost USB charger made by adafruit industries. The way it works is that the batteries give off 1.5 volts each which in total is 3 volts. The boost converter chip helps increase the voltage to 5 volts which charges the device connected.
The Minty Boost USB charger is made up of many different parts. One part is the resistors, they restrict the flow of electrons and thus the current and are measured in ohms. We also have the diode which makes sure that the current only flows in one direction. If the diode is placed in the wrong direction then the Minty Boost USB charger won’t work. Next, I have 2 types of capacitors, electrolytic and ceramic, they store the electrical charge and are measured in farads. The most important part is the boost converter chip and the inductor. The two work together in order to increase the voltage to 5 volts.
I learned that failure is ok and you just have to keep going. While I was building my boost converter chip was heating up, which it is not supposed to do. I just keep trying and did not give up on my project. In the end I just flipped the boost converter chip and it worked. Also I learned it is very important to make sure you place everything in the right direction or it could mess up your whole project.
Up next for me is a solar paneled speaker. I know I will face many challenges but I will keep going and learning
___________________________________________________________________


