Introduction
Hello, my name is Ed B. I am a rising senior at the Bay School of San Francisco. I have always been interested in engineering and computer science and I have been greatly enjoying my time here at BlueStamp. I am working on a voice changer for my starter project and an Arduino RC tank for my main project. Below are the different steps that I took in this project, with the oldest being at the bottom. Here is a link to the bill of materials, and here is a link to the code used for this project.

Main Project Modifications
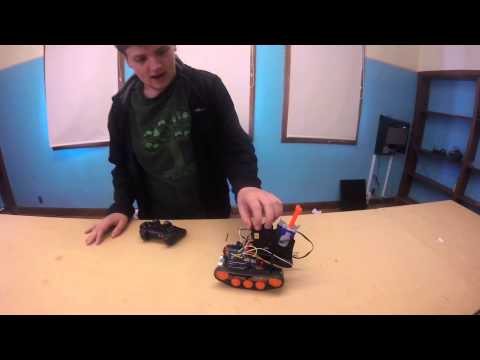
I have now added an ultrasonic sensor and a dart gun to the RC tank. The ultrasonic sensor, based on the sample code from here, is able to stop the tank from running into obstacles by scanning immediately in front of it and stopping if it “sees” something too close to it. I had plans to expand this functionality into fully autonomous movement, but ran out of time to finish that. I was also mounted a dart gun to the top, which is fired using a servo triggered by pressing the X (Cross) button on the PS2 controller. Both devices were not too hard to get working, but were very hard to physically mount on the tank itself. I was eventually able to get them to stay with zip ties, but it is a fragile setup. I also had great difficulty powering them both, as the initial system was made to power just the Arduino, PS2 receiver, and motors. I ended up adding a 9 volt battery in addition to the 4 AA batteries already on the tank, but I still sometimes have some power problems.
Main Project: RC Tank
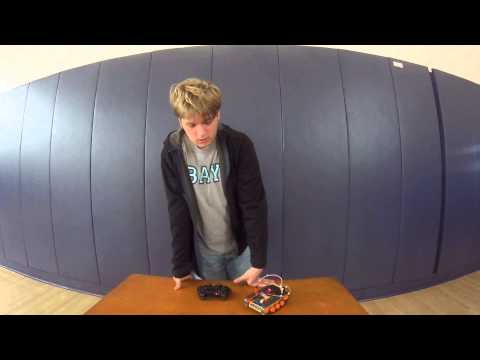
For my main project, I made an RC tank based on this. It uses two small motors and is controlled by a wireless PlayStation 2 controller connected to an Arduino with a motor shield. I began my project by first building the gearbox and chassis. The chassis itself was pretty self-explanatory to setup, I just had to follow the instructions, although the text was largely unhelpful and much of it was in Japanese. The gearbox instructions also suffered from the same language problems, while also having more complicated and difficult to understand pictures, although I was still able to build it after a day of work. I decided to set it to a gear ratio of 114.7:1, as this seemed like a good balance of speed and power. It is not a particularly easy thing to change later on, so it is fairly important to get it right the first time.

I then began to work on the electrical side of the project. I had some experience with Arduino in the past, but I had never used a motor shield before, which required my to learn more parts of Arduino code that I had never used. To make things more complicated, I also had a different motor shield than the instructions I was following used, meaning that the sample code did not work and I had to make my own. I also had to learn how to connect the wireless receiver of the PS2 controller to the Arduino, as well as how to use the PS2X library in order to control it. After running a lot of test code, mainly some for motors on Arduino motor shield from here and the sample code on the Github for PS2X here, I was able to understand how to both receive inputs from the PS2 controller and how to send outputs to the motor in order to control them. I then just more or less combined the code together and adjusted values as needed until it worked as I wanted it to.
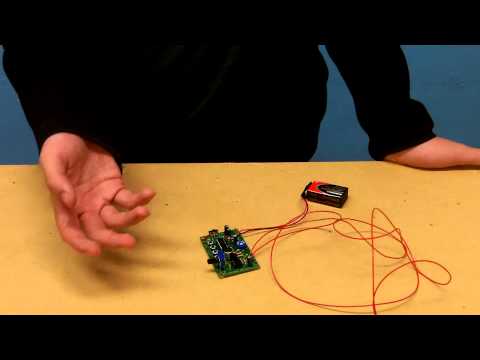
Starter Project: Voice Changer
For my starter project, I built the voice changer. A voice changer is a device that can receive audio inputs through a microphone, alter the sounds in different ways, and then replay the now altered sounds. It can change the pitch of the voice, as well as add vibrato and robot effects. I assembled it using a kit-supplied circuit board and capacitors, LEDs, ICs, zener diodes, switches, buttons, potentiometers, and a microphone. I improved my soldering skills by soldering all of the connections myself, while also learning how to correct any mistakes that I made with desoldering. I also learned about resistor codes and different kinds of capacitors.