Hi! I’m Debjani, a rising junior at The Brearley School, and my main project was to create a virtual reality (VR) experience of the Milky Way Galaxy using Unity3D and Google Cardboard. I also created a physical controller so that a user could navigate through the VR using a 5-way button.
Coming into BlueStamp with a passion for computer programming, I was a bit skeptical about doing hardware engineering for the first time in my life. But I wanted to try something new and challenging in the summer, and BlueStamp readily provided! Not only did I practice basic skills such as how to wire a circuit board properly, but I also learned advanced soldering techniques that saved my crumbling circuit board many times. I developed my programming skills, learning how to write in a new language and use Unity3d. More importantly, however, BlueStamp taught me the value of persistence, efficiency, and dedicated problem-solving. There wasn’t a single day in which I didn’t encounter one roadblock (or three!), and I was often stuck on an issue, whether it be in the code or with my circuit, for multiple days. Since my time at BlueStamp was limited, I had to work quickly to finish my project; there wasn’t any time for me to bemoan my situation or give up, and I realized that every minute counts, especially when an error could pop up when I least expected it.
I learned how to use all my resources so that I could solve my issue as quickly as possible— that meant posting on three different forums, asking my peers and instructors for advice, and sometimes, just thinking out loud or with pen and paper. In the end, I decided that the realm of hardware wasn’t for me, but I’m glad that I tried it out; I certainly enjoyed pushing my own boundaries and seeing how much I could accomplish these three weeks.
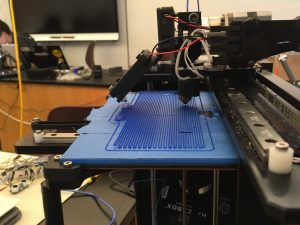
3D printing the case for the controller! Unfortunately, the hinge broke not soon after, so I'll have to re-design!
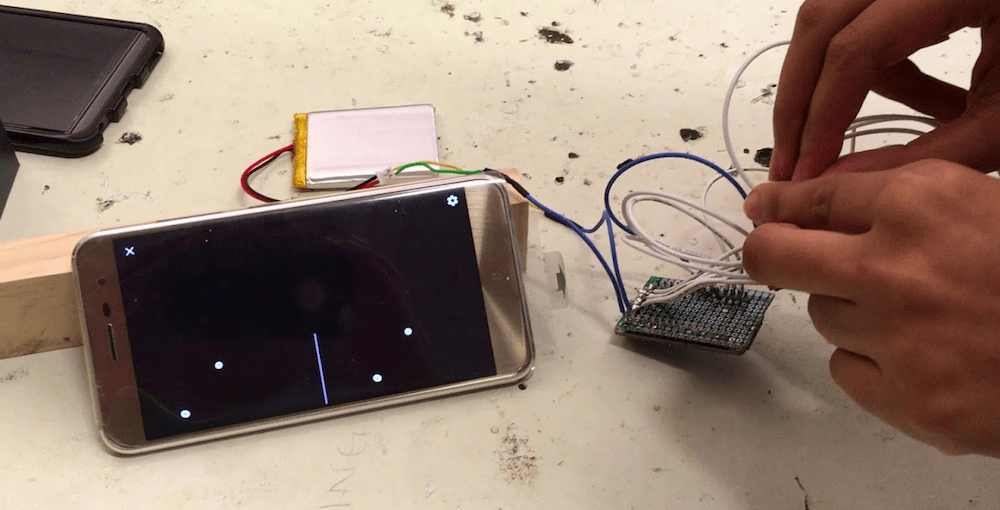
Testing the final product!
Final Milestone
Final Milestone: Connecting the Controller to Unity!
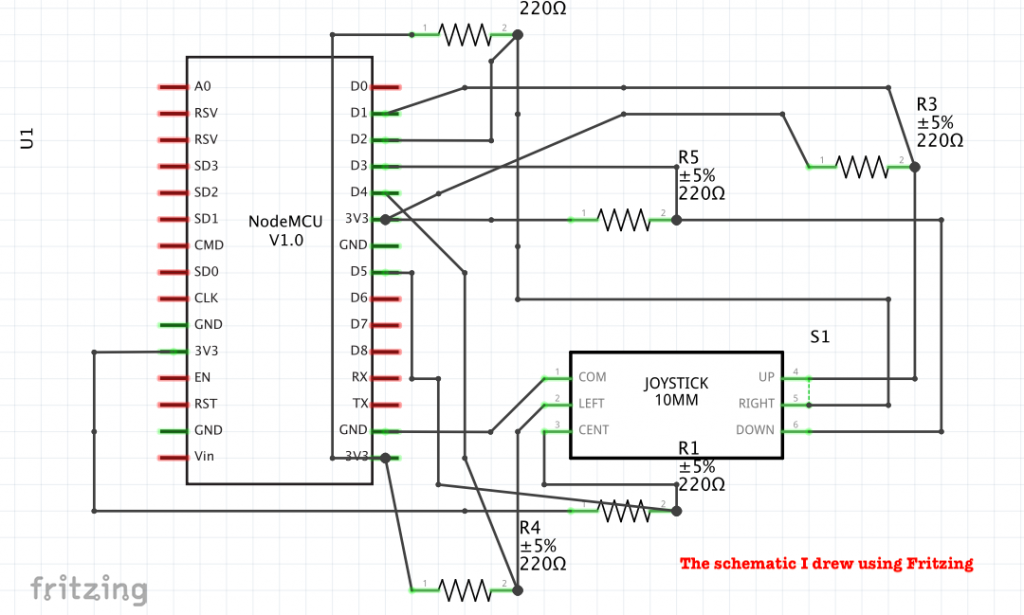
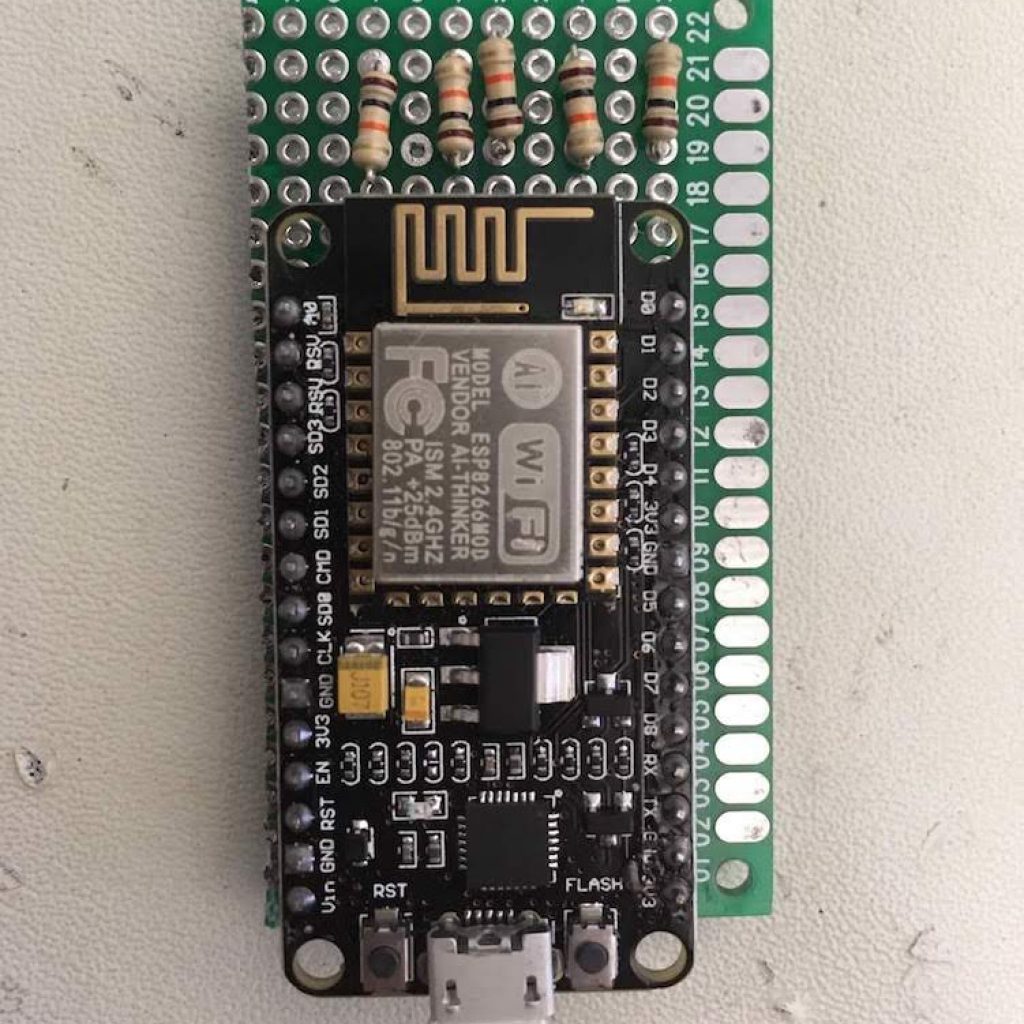
For my final milestone, I connected the navigation button to my Unity program. After soldering together the circuit, I connected the board to the Arduino IDE. I programmed the ESP8266 so that it would print the direction that the button was being pressed in onto an automatically updating web server. Unity would read the direction from the webpage and shift in that direction.
Challenges:
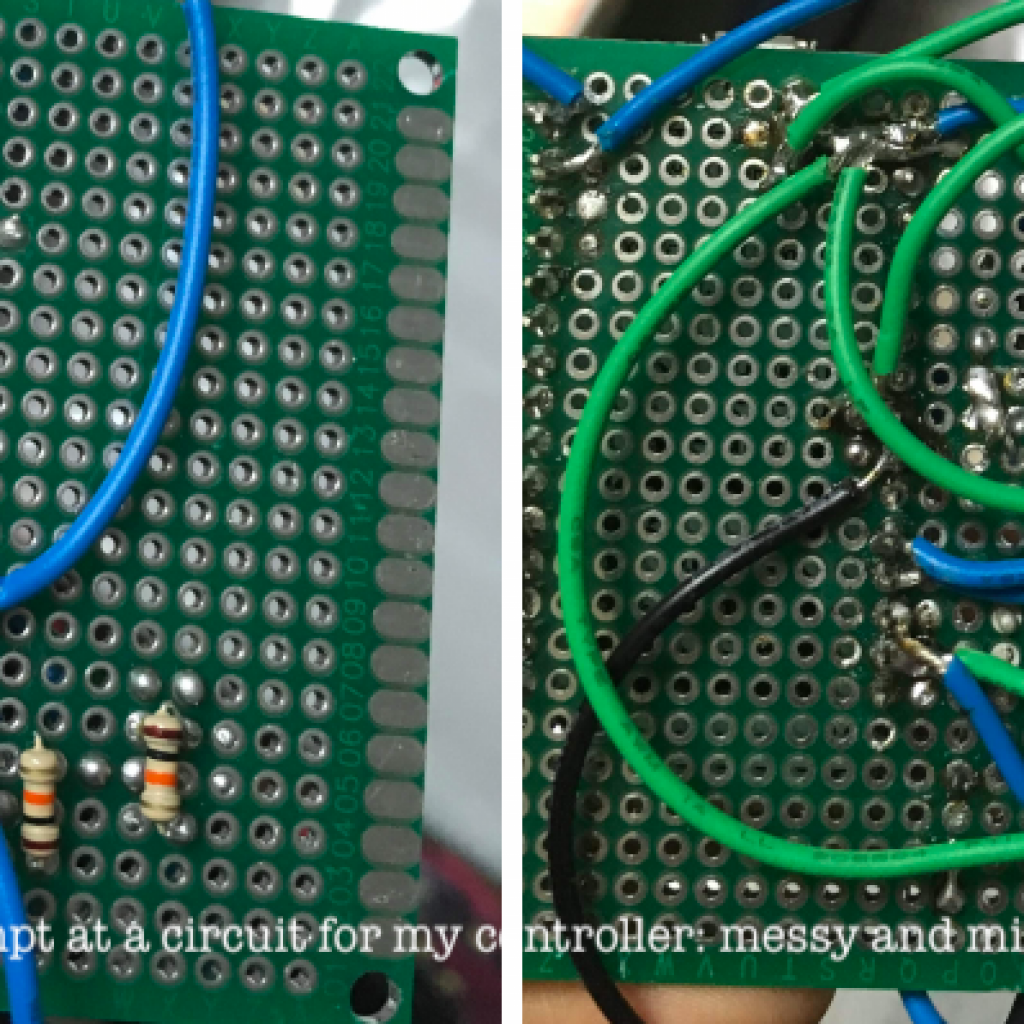
Incorrect wiring
Solution: Understanding how pull-up resistors work and adding them to the circuit
Panning worked on Unity editor but not on phone
Solution: Moving the objects in the scene instead of the player (player settings were overriding my own code)
Next Steps:
3D print a case for the controller to improve user experience!
//this is the code that runs on the ESP8266//associating the directions to the input pinsintupPin=2;//d4intleftPin=4;//d2intcenterPin=5;//d1intrightPin=14;//d5intdownPin=0;//d3// Replace with network credentialsconstchar*ssid="***";constchar*password="***";// Set web server port number to 80ESP8266WebServerserver(80);voidsetup(){Serial.begin(115200);WiFi.mode(WIFI_STA);WiFi.begin(ssid,password);server.on("/",button);server.begin();Serial.println("HTTP server started");}voidloop(void){server.handleClient();button();}voidbutton(){if(digitalRead(rightPin)==LOW){server.send(200,"text/html","<html>\ <head>\ <meta http-equiv='refresh' content='1'/>\ <title>ESP8266 Demo</title>\ <style>\ body { background-color: #cccccc; font-family: Arial, Helvetica, Sans-Serif; Color: #000088; }\ </style>\ </head>\ <body>\ <p>*R^</p>\ </body>\</html>");}//and likewise for the other four directions}
//this is the code that Unity runsprivatestringtextFromWWW;privatestringurl="<INSERT IP ADDRESS>";//this retrieves the direction printed onto the webpage by the ESP...IEnumeratorGetTextFromWWW(){WWWwww=newWWW(url);yieldreturnwww;if(www.error!=null){Debug.Log("Ooops, something went wrong...");Debug.Log(www.error);}else{//...and stores the string into a variabletextFromWWW=www.text;Debug.Log(textFromWWW);}}voidUpdate(){try{//this converts the text found on the webpage into//a single letter string that we can readstringstringText=Convert.ToString(textFromWWW);stringsubstring=stringText.Split('^')[0];intindex=((substring.Length)-1);stringreading=Convert.ToString(substring[index]);//this runs the motion function depending on the directionwhile(up&&reading.Equals("U")){movein();up=false;}//and likewise for the other four directions}}
// Update is called once per framevoidUpdate(){OrbitAround();}voidOrbitAround(){foreach(GameObjectkeyinplanetList)//planetList contains the name of each plotted planet{intindex=planetList.IndexOf(key);vartargetCoord=starList[index];//starList contains the coordinates of each plotted starDebug.Log("PLANET:"+key);Debug.Log("TARGETCOORD:"+targetCoord);key.transform.RotateAround(targetCoord,Vector3.up,speed*Time.deltaTime);
//turns out that this last line contained the error!
//instead of "key.transform.RotateAround()"...
//I had written "transform.RotateAround()"...
//so Unity didn't know what should orbit!}}
//see the GIF (right) to see this code in action!
My second milestone is getting each star’s planet(s) to orbit around the star. I created prefabs of the planets (as I did for plotting the stars) so I could copy them and set their positions by using their orbital radii from the CSV. Getting them to rotate around the stars took a very long time; it took a full day just to code that, and I spent another two days debugging because my planets were orbiting around the wrong stars.
Challenges:
Getting the planets to rotate around the correct stars
The planets were rotating, but their center was not the appropriate star
Solution: Fixing the very last line of the code shown below– turns out that the error was omitting the word “key”!
Next Steps:
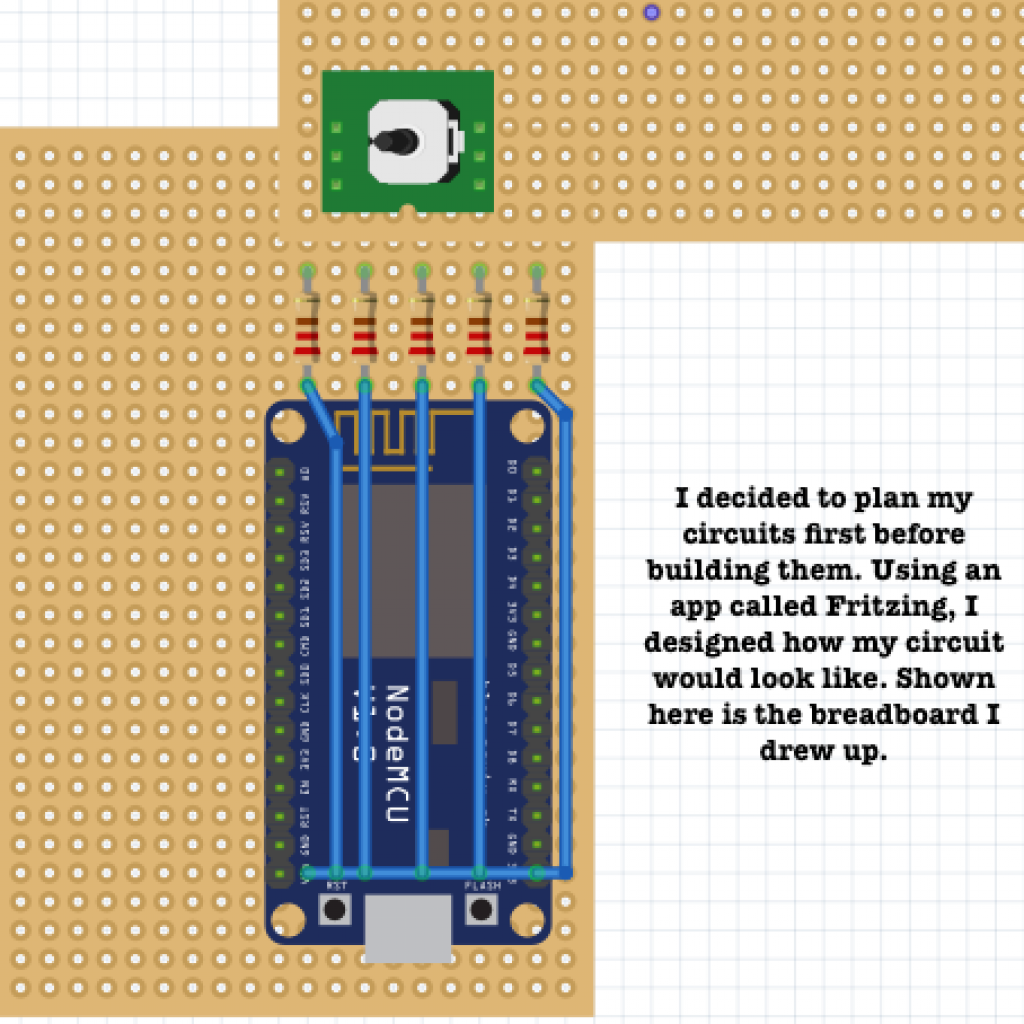
Build the physical controller and get the controller’s navigation button to pan through the VR
//Loop through Pointlist, a list holding all the values from CSV filefor(vari=0;i<pointList.Count;i++){objectdistType=pointList[i][columnDist].GetType();objectteffType=pointList[i][columnTeff].GetType();Typea=typeof(System.String);//if the distance is NaN, removes info from that rowif(distType.Equals(a)){}else{// Get value in poinList at ith "row", in "column" Namedistance=Convert.ToSingle(pointList[i][columnDist]);//ra (right ascension) and dec (declination) are star coordinatesra=Convert.ToSingle(pointList[i][columnRa]);dec=Convert.ToSingle(pointList[i][columnDec]);}//Convert above values from cartesian to spherical coordinatesfloatx=Convert.ToSingle(distance*Math.Cos(dec)*Math.Cos(ra));floaty=Convert.ToSingle(distance*Math.Cos(dec)*Math.Sin(ra));floatz=Convert.ToSingle(distance*Math.Sin(dec));// Instantiate as gameobject variable so that it can be manipulated within loopGameObjectdataPoint=Instantiate(PointPrefab,newVector3(x,y,z),Quaternion.identity);// Make child of PointHolder object, to keep points within container in hierarchydataPoint.transform.parent=PointHolder.transform;stringstarName=Convert.ToString(pointList[i][columnStarName]);// Assigns original values to dataPointNamestringdataPointName=starName;// Assigns name to the prefabdataPoint.transform.name=dataPointName;
For my first milestone, I uploaded the first set of star data into my Unity program. My code, written in C#, allows Unity to read a CSV file (downloaded from NASA archives) with the stars’ x, y, and z coordinates. By instantiating a sphere prefab (a template of a Game Object that can be copied) as a “parent” object and creating a “child” for each star in the data, I was able to plot each star’s relative location in the galaxy based on real data.
Challenges:
Eliminating NaNs (non-numbers) from the dataset
Existing C# method .isNaN() checks for NaNs but only for number (float or int) data types
The NaNs in my dataset were showing up as strings
Solution: Writing a function that checks for string values in the column and eliminating them
Next Steps:
Continue to add to the visualization by improving the stars’ appearance and incorporating planet data
Starter Project
Minty Boost Portable Charger
My starter project was Adafruit’s Minty Boost portable charger, which can charge any device that uses a USB cable. It runs on two AA batteries, but the 3 volts that the batteries provide are not enough to charge a phone or similar device. I therefore used a boost converter to increase the voltage of the batteries. Inside the converter is a transistor that can turn off or on; this transistor enables an inductor to create or destroy a magnetic field. The magnetic field allows the inductor to store energy from the battery; thus when the magnetic field is destroyed, energy is released, and the polarity of the inductor’s left lead becomes negative. This increases the total voltage to approximately 5 volts. I also soldered five resistors (one 3.3K, two 75K, and two 49.9K) and four capacitors (two ceramic and two electrolytic) onto the circuit board to control and stabilize the current. The diode ensures that the current flows in only one direction– from the batteries to the USB port. Finally, using tin snips and a file, I created a hole in the side of the tin case to make the USB port easier to use.