
Hi, my name is Dante. I’m a rising junior and I go to Lowell High School. My starter project was a light organ, and for my main projects I did both an MP3 Player and a video game console. I picked a light organ because it had plenty of lights. I picked an MP3 Player because its output is sound, and I thought finishing it would be very rewarding. I did not expect to finish so quickly and my third idea, the video game console, was what I thought about first when I was picking a new project. I am experienced with hackathons and my video game is the product of one, that I won with. I wanted an excuse to work on my project during the class. I got to work on much more than the game, and in a few weeks, I had an Arduino controller, a Raspberry Pi “server”, several cables and wires, and a box for all of it.

The game and documentation
Source code (decompiled, will not run)
If you want to build this, check out my build plan.
Main Project: Video Game Console
My video game console runs a Java game called “Destiny and Desire” which I developed at a 24 hour hackathon. It is a roguelike, and the game has permanent death and random level generation. It is also a dungeon crawler. In this type of game, the player must move through many rooms to make it to a portal, and encounter many different types of enemies. When the screen and the Raspberry Pi are plugged in, the computer boots and the game runs at startup. The controller communicates with the program, and registers keys. The player can then start playing the game by running around the randomly generated dungeons using special equipment and skills.
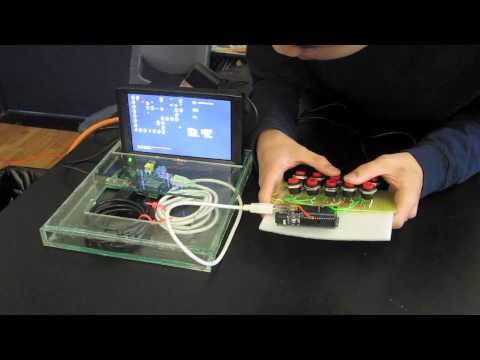
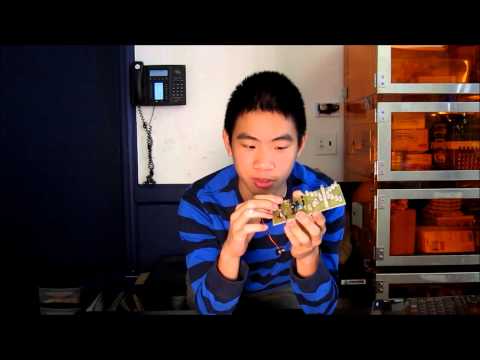
Milestone 2: Finished Controller
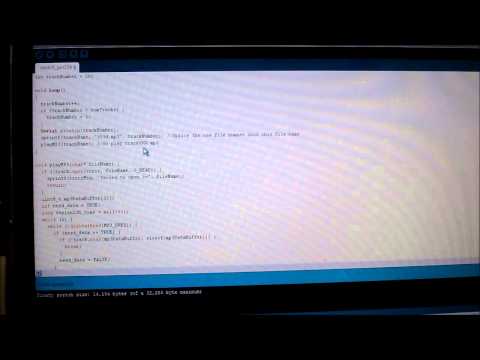
Later on in the program, I was able to make a controller. Arduinos and Raspberry Pis can be connected with an ordinary USB cable and can communicate. I’m going to use this by making the buttons activate pins on the Arduino, which will alert it to send a message to the Raspberry Pi. My controller is a breadboard with 10 buttons. When a button is pressed, it sets its respective pin to high. The Arduino responds to this by writing the correct letter to its own serial monitor. My Java program can communicate with the Arduino through a serial port, with a library called “jssc”. The code reads the Arduino’s serial port for keys every fifty milliseconds. Since Java works on all platforms, I only needed to change the name of port to integrate the controller with the Java project. Note that “/dev/ttyACM1” is the name of the USB port on the Raspberry Pi which I am using.
Controller Code: https://github.com/Parthia/dnd/blob/master/arduinoController.cpp
Java Code (within the main class of my project): https://github.com/Parthia/dnd/blob/master/setupConsoleKeys.java
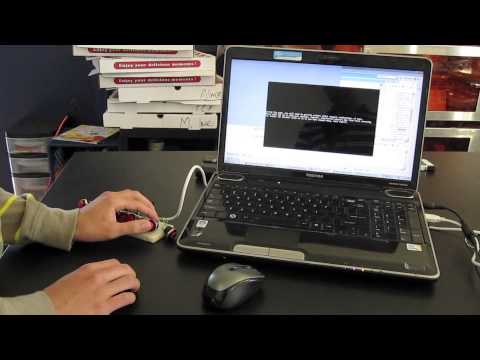
Milestone 1: Got it working on the monitor
I am using Raspberry Pi, a popular Linux computer, to run my Java program. I compiled my Java project on my main laptop into a “.jar” file, or a Java archive file that can be executed. To get the program to run on it, I had to download OpenJDK through the terminal (command prompt). I uploaded the Java program to the SD card which functions as the Raspberry Pi’s hard drive. I ran the program from terminal. I successfully put it into my Raspberry Pi and showed it on the monitor. I used a VGA to HDMI converter to get the smaller monitor to work. So far, the program only responds to a keyboard. Later on, I want my controller to function as a smaller keyboard that will have the layout qwezxasdcv. Here is a demonstration:
Other Main Project: MP3 Player
MP3 is a format for storing compressed, but high quality music. Because humans only hear certain sounds at certain volumes, some sounds can be cut from a file without any noticeable difference. An MP3 stores compressed files at different bit rates, measured in kilobytes per second. The library and shield need MP3s with a bitrate of 192 kbps.
The MP3 player is a SparkFun MP3 Player Shield soldered to an Arduino Uno. It works by using an SD card library (“SDFat”). The shield works by requesting 32 bytes of information from the track, and then waits 100 milliseconds, so that the track doesn’t finish immediately. The square VS1053 chip converts this information into sound which can be heard through earphones or speakers. The program drops the 32 bytes and then repeats. When there is no data left and the song finishes, a new track is played.
Starter Project: Light Organ
My starter project is the light organ. It is a board that takes input from a microphone and then shows output through the colored LEDs. The horizontal trimmer resistors can be adjusted with a screwdriver to control volume sensitivity and speed. The whole board is controlled by two chips, IC1 and IC2, with 8 and 16 pins respectively which are placed into their own sockets. There is a battery snap for power. There are many kinds of resistors on the board that regulate the current to ensure that the LEDs will not blow out, copper wires that connect certain points and complete the circuit, 4 capacitors, and 7 transistors which are used to switch and amplify electricity. I made a mistake and mixed two types of transistors. Fixing the mistake by resoldering these actually produced a boring result. Mixing the transistors is safe and produces a much better result. This happens because the “wrong” transistor changes the current’s path through the board.
Reflections
Looking back on the program, I did feel that, at times, I was stumbled with the most trivial problems. On the third day, I did not realize that some of my parts were soldered in backwards, which caused my light organ to not work. I spent one week learning how to use the Raspberry Pi. While it is a powerful computer for its size and cost, it runs Linux, which is not the most friendly operating system (although I don’t think the RPi Foundation really had a choice). I spent another week just trying to get Java on the Raspberry Pi, and I dealt with concepts like partitions and shell scripts. During this whole time, I was developing my game on my own time. I have some computer engineering skills and my computer science skills are even better. Both will be useful in future hackathons. I am looking forward to the DisruptSF hackathon on September 7th.