Daniel Panchenko
Staten Island Technical High School
Greetings!
Hello everyone, My name is Daniel and I’m a senior at Staten Island Tech. For my main project, I decided to build a 3D printed, glove controlled prosthetic arm based on this instructable. I chose this project because it covers a wide area of engineering such as, electronics, circuit building, mechanical engineering, and programming. This project also serves as the first project of my engineering career.
Reflection
Six weeks ago, I did not know how to solder or code. Thirty minutes after I walked into Bluestamp I not only learned to solder, I was finishing my starter project and observing the electronics that produced it. I can truthfully say that Bluestamp has developed me in a way I would’ve never expected. I’ve learned that there is no problem that cannot be solved, and I have the ability to solve any problem I come across in due time. Overall, I am very proud at what I accomplished throughout this program. Strangely enough, I taught myself the ability to teach myself. I am now immensely motivated by envisioning what I will create in my Engineering career.
Engineer
Daniel P.
Area of Interest
Mechanical Engineer
School
Staten Island Technical High School
Grade
Incoming Senior
Final Milestone
For my last and final milestone, I decided to add a Rock Paper Scissors (RPS) mode as a coding exercise. I also added a button for initialization of this mode. I added another structure to the code so that it sends out the button information such as length held down and if it was pushed. I wanted to use if then statements for the initialization of the mode but it did not work well. The code functioned terribly so I then decided to teach myself how to create a State Machine. The state machine has two states; RPS state and Glove state. The RPS state is activated with a 3 second long button press. Which then makes the prosthetic hand form a closed fist, an open palm, and a scissors sign to symbolize the games song. Then I coded in a Randomseed() function which takes the static from an Arduino’s input, and then picks a value from 1-4. Each value is set to equal a different hand expression. Finally, at the end of the function it waits for a button press to send it into the Glove state which is simply the glove controlling the Hand.
Materials
Code
CAD Prosthetic Hand Files
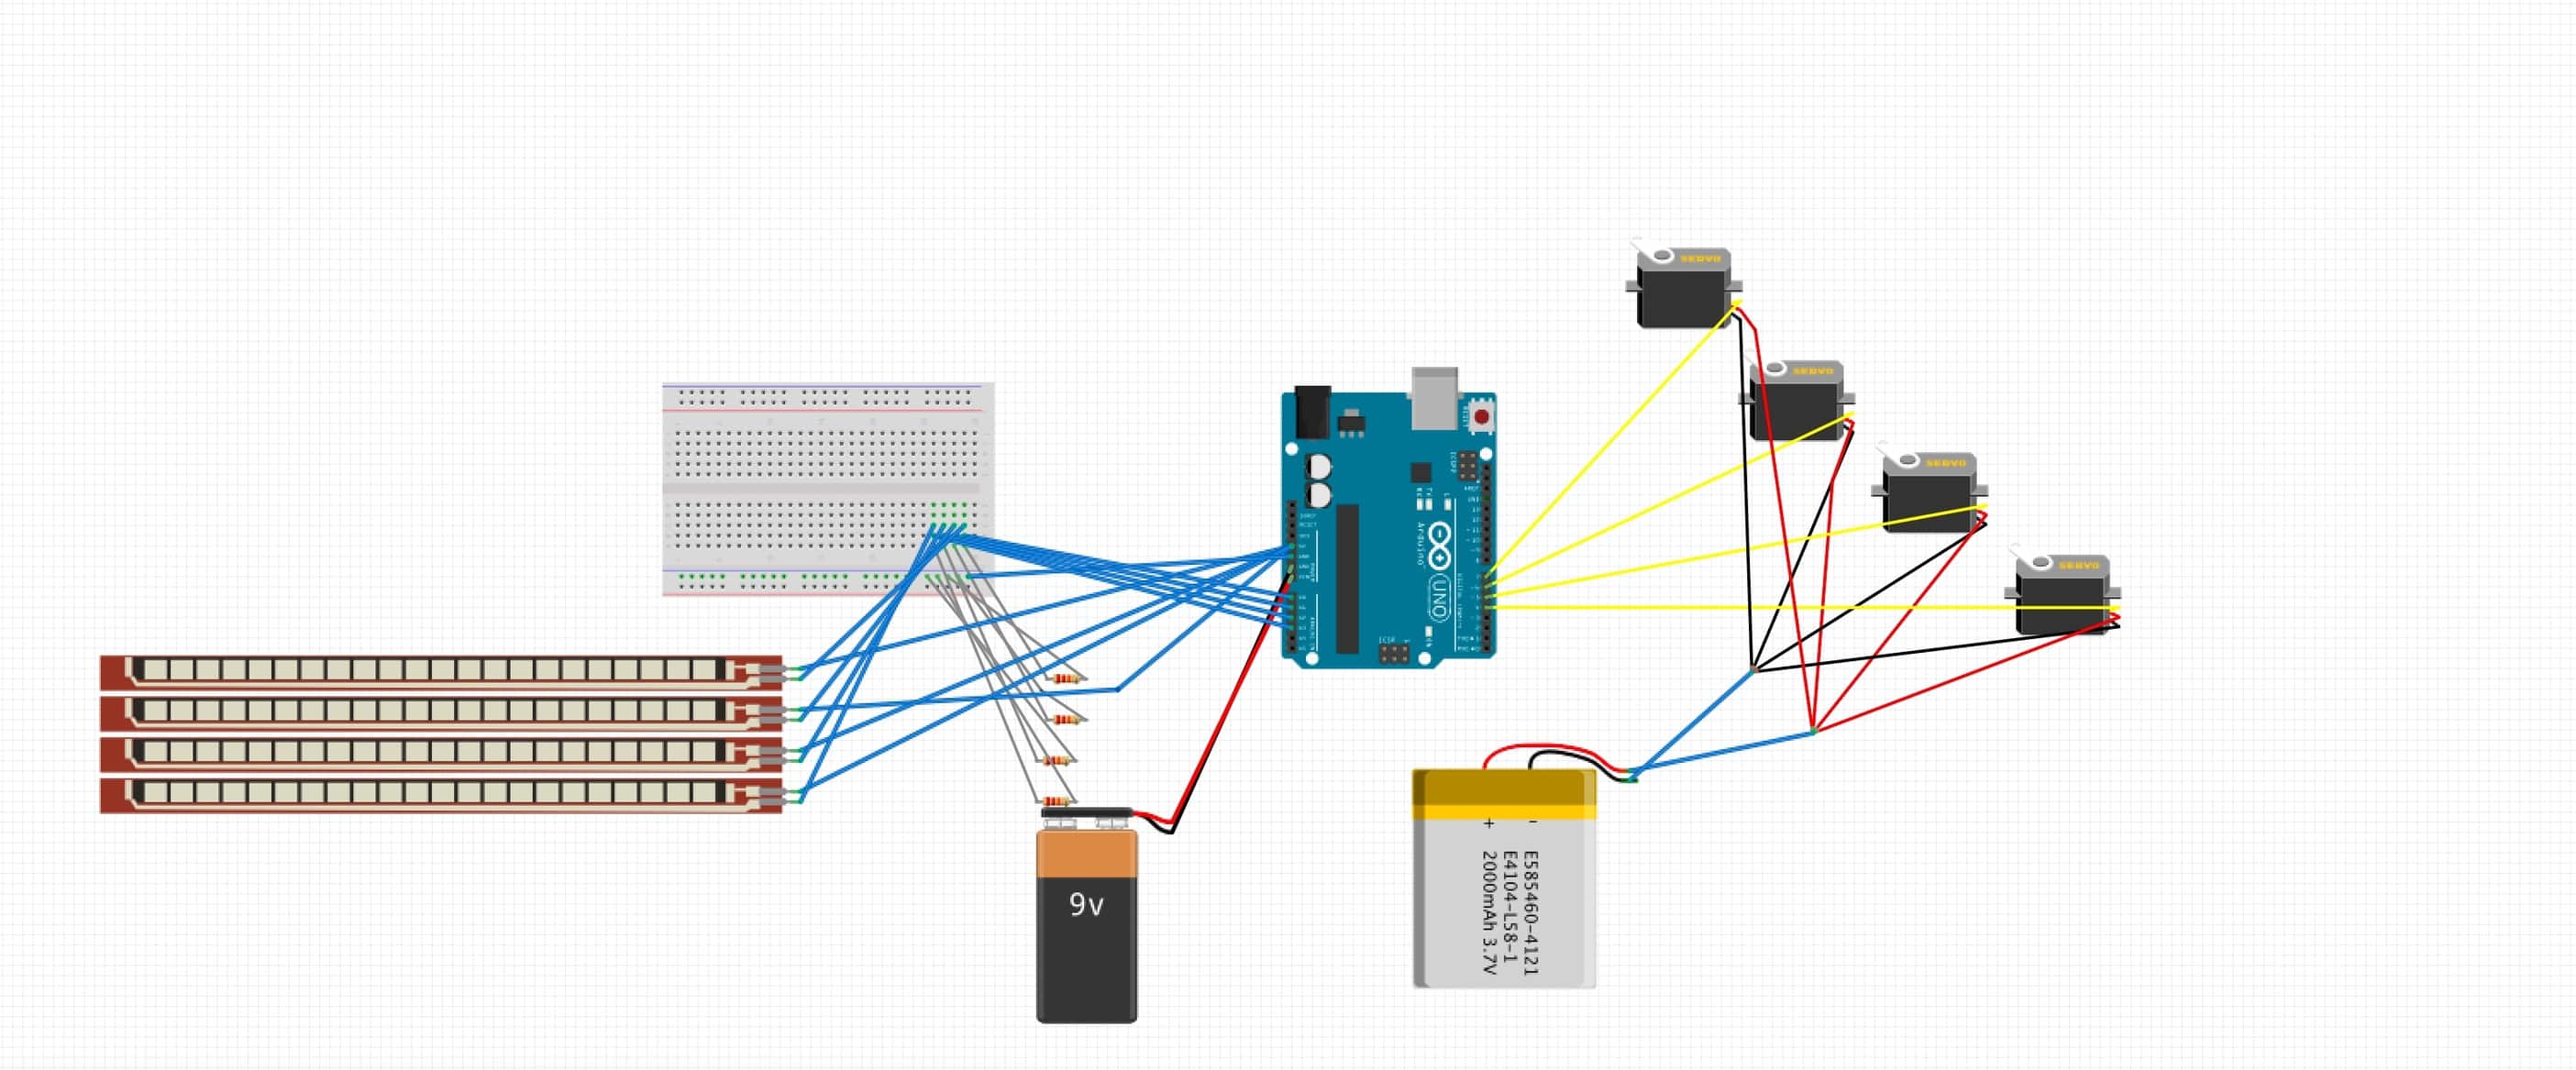
Schematic

Third Milestone
I have completed my third milestone and the prosthetic arm is now wireless. Completing this was a challenge, at first I decided to use xbees. However the xbees did not send the packets fast enough and they were vastly inefficient to use. So I decided to use NRFs which are extremely small and easy to use. Also they can send up to 32 bytes of data per packet which is just what we need for this project. From there I opened a pipeline in the code for receiving and transmitting on each nrf and set the code to initialize communication by having them send out a test signal. Then I created a structure which contained the 4 values that will be sent out. The mapped values get sent out through the NRF to the other NRF and gets delivered into the servos.
Second Milestone
I have completed my second milestone and I am very proud of what I have done, I’ve had no coding experience yet I self-taught myself how to code in Arduino! At first I decided to use a code that simply reads the values from the flex sensors, then maps them and puts them into the servos. However, I wasn’t happy with it, if the values change on the flex sensors I would have to re-map them every time. So, I decided to create a code that has 4 variables: The angle of the finger, the input from the flex sensor, the maximum amount your finger can bend, the minimum amount your finger can bend. Then I created a set of if else functions that declare the minimum and maximum values while running in a loop. By utilizing this, I feel complete because I can fully disconnect from the computer and have faith in my prosthetic arm to work on its own!
For my next milestone I hope to make it wireless!
First Milestone
I finally completed the first part of my project! The first part consists of putting together the 3d printed arm, screwing in the servos to the arm, sewing the flex sensors onto the glove, and connecting it all into an Arduino. Ive had some troubles during each part, yet I never let such troubles overwhelm me. For example, the arm joints would rub into each other and stick together. I overcame this issue by simply sanding it down. Here I learned that sometimes the simple fix is the best fix. Another obstacle that stood in my way was sewing the flex sensors onto the glove. My sewing technique was improper which resulted in the flex sensors falling off the glove. But, by sharpening my skills and some research I employed some new methods and they worked great!
After completing the arm and the glove I only have a few steps left. I left the hardware road of my project and now have no choice but to venture to the coding world!


