
Weather Indicator IoT
Engineer
Daniel C
Area of Interest
Engineering
School
Friends Seminary
Grade
Incoming Junior
Second Milestone
My second milestone was putting what I built into a vase with cotton balls. The cotton balls are there to look like clouds and cover up wires. Before I was powering the particle photon with my computer, but to keep the entire system in the vase I used a portable charger.
First Milestone
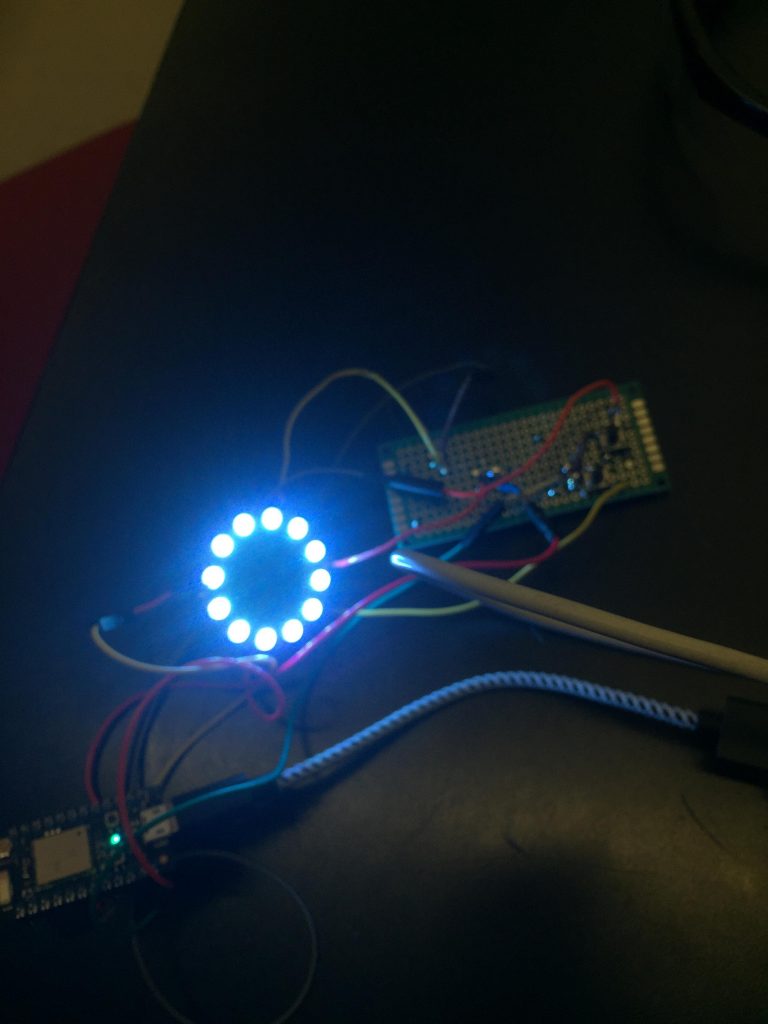

For my first milestone of my Weather Indicator with IoT was to get the neopixel ring to light up corresponding to the weather. My first step in achieving this was to attach the Particle Photon to the Neopixel ring using several wires. I connected them through a breadboard. The Particle Proton was not very cooperative during this stage. The problem occured when I tried to program the Neopixel ring by connecting the particle photon to the internet. The first time I tried to connect the photon to my computer it worked fine; however, I did not have any code to program the neopixel to light up. I turned off the Neopixel while I was trying to find the code of the weather indicator. When I found the code and tried to reconnect the Neopixel it would not reconnect. I getting error messages from my computer. I was able to counter this by downloading an app to my phone that would connect to the Particle Photon. After playing around on the app for a couple minutes I unintentionally lit up one of the lights of the Neopixel ring. However the Particle photon was still not connected to the internet. Then I went on particle website and copy and pasted in a code that was given to me to connect to the internet. Then I had to connect the code to the weather of New York. I created an integrationusing the weather website Dark Sky. Each “weather possibility” had a color assigned to it. I still wanted to test it for other weather. Since it was raining in Houston I wanted to see if it would change colors if I programed it to look for the weather of Houston. However it would not change colors. It took me a very long time to figure out what was wrong. I later realized that rain and clear day had the same color assigned to it, so the problem was with the code not the wiring. I reassigned rain’s color and the neopixel changed colors accordingly.
Starter Project
For my starter project I chose the Sparkfun Binary Blaster. See the fully constructed Binary Blaster in figure 1.
https://learn.sparkfun.com/tutorials/binary-blaster-assembly-guide/all
A Sparkfun Binary Blaster is a game that teaches binary numbers up to 15.
The binary counting system is composed of 1’s and 0’s. In our normal (decimal) counting system each place has ten possible digits, the highest being 9, the lowest being 0. In binary, the highest digit is you can have in a single place is 1. When we get to two we have to shift to the next place over making “10”. If we wanted to represent three we can just add a 1 to the 1’s place. If we wanted to represent a four we would represent it as “100,” as every “1” would shift over. An easier way to describe this would be each place from right to left represents two to the “nth” power where n starts at 0. For example “1101” represents 13. You can also read this as 1 + 4 + 8 = 13.
One = 1
Two = 10
Four = 100
Eight = 1000
Sixteen = 10000
It uses two AA batteries to power four buttons, a piezo buzzer, two resistors, a capacitor and a seven segment display that displays numbers. The piezo buzzer gives off a sound when current passes through the board to the numbers. The two resistors limit the current that traveled throughout the entire system.The capacitor’s stored extra electrons to stabilize the voltage output.
Each button unpressed represents a “0” and each button that is pressed represents a “1”.
So if the screen displays the number “11”, you would press the first, third, and fourth buttons. See the example of a given number in figure 2.
Only when the user pushes the correct combination of buttons, a new number appears. The game shows 15 numbers in a random pattern. If you take to long to press the correct buttons the game will time out and you lose. If you correctly solve all 15 numbers you win. At the end of the game a“score” is shown. This is the number of seconds it took the user to press the buttons for all 15 numbers.
Figure 1: Above you can see the Binary Blaster. The four buttons are on the button and the two switches are in the top two corners.
Figure 2: Pictured above is an example of how the Binary Blaster displays a given number. In this example it is displaying the number “11” or 1011.
I have never made anything like this before so everything I did was a new thing I learned. To be more specific, I learned how to solder and attach buttons into a board. I was happy that I was able to complete this project mistake free.
Figure 1
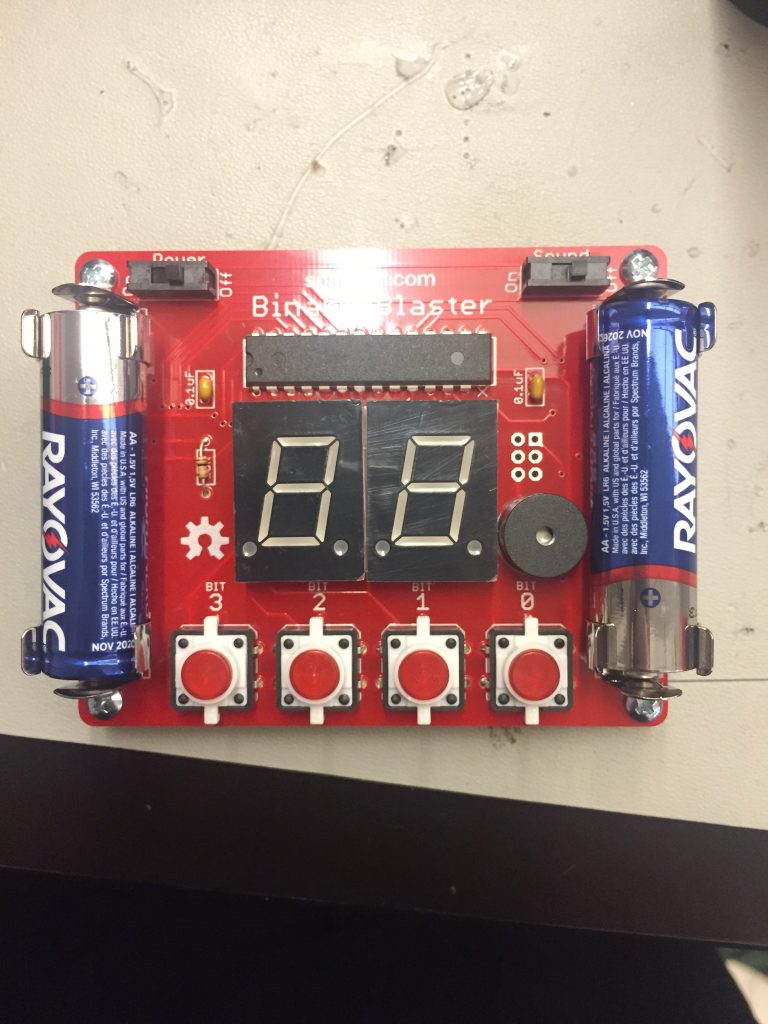
Above you can see the Binary Blaster. The four buttons are on the button and the two switches are in the top two corners.
Figure 2
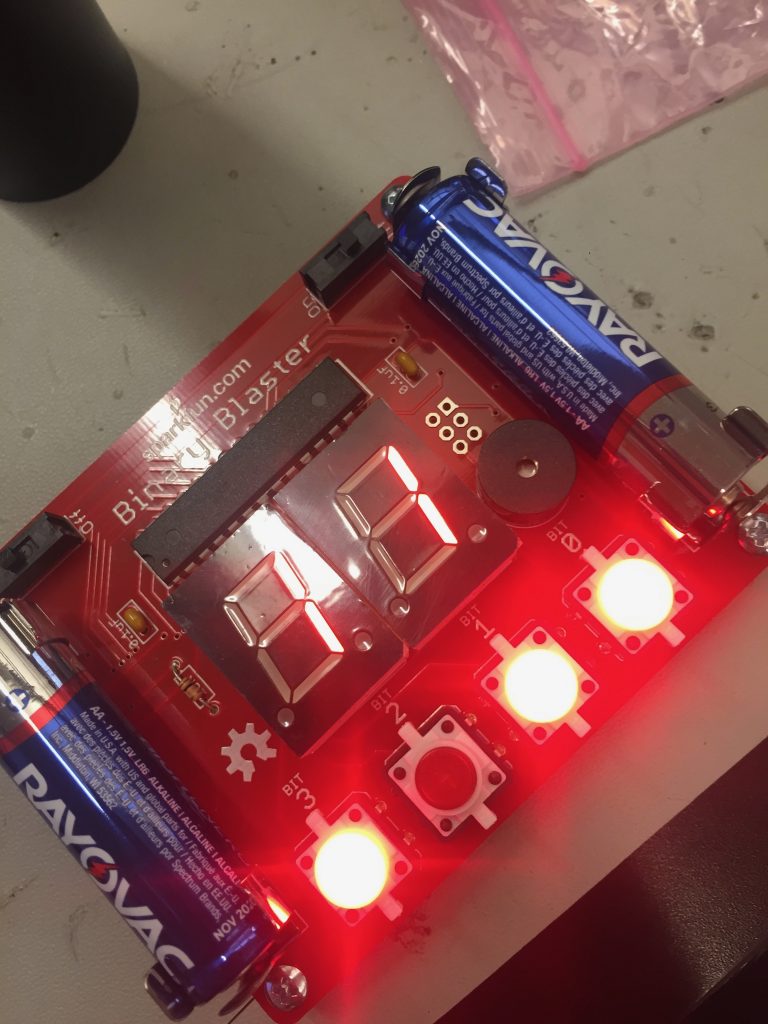
Pictured above is an example of how the Binary Blaster displays a given number. In this example it is displaying the number “11” or 1011.