
Hi, my name is Daniel and I’m a rising junior at Sharpstown High school. My starter project was a laser target kit which had to do with LED lights being powered by a 9V battery and it had a trimmer which made the lights go off and to make them turn on. I would point a laser to the CDS cell (light sensor) and all except for one would turn on with the laser. My main project is the RC Robot Tank and it had many more steps to building it than the starter project. There were difficulties in the RC robot tank assembly but I was able to learn from my mistakes and now everything is in good condition.

--Schematic for the Gearbox and Wireless controller:
--Code for Gearbox, Wireless controller and Glued sketch:
-BOM (Bill of Materials): RC Robot Tank (ignore seconds page)
-Instructions with Mechanical pictures:RC Robot Tank Instructions
-Inspiration for the project from Instructables.
_____________________________________________________________________________________
- My Final Project:
– RC Robot Tank: Milestone Achieved: I was able to complete my project and had it to the point where it was working without a problem. I now have the fully functional robot tank that I have been waiting for and now my next step is to modify and test new attachments like the light sensors and the infrared proximity sensor for short range. I have had a few problems with the tank and these problems made me think that there was a problem in the code while the real problem was on the wiring of the bottom of the protoshield connecting to the gearbox. I found out that the wires were touching and that had made it have a short in the connections that wouldn’t allow the gearbox to operate. So now I have fixed the problems and my RC robot tank seems in good shape and now its time to make good modifications so it can become even cooler. -Next Step: Modifications with the light sensor and the infrared sensor.

- My Second Milestone:
-PS2 Controller: Milestone Achieved: I was able to get the controller working with a code that I found on Bill Porter’s website. I had gotten help from one of my partners doing the same project and I helped him on the gearbox installation. In the beginning of the code, it has the inputs that gives each of the outputs a idea where to go. So the outputs for the controller are: GND, 5V, CLOCK, ATTENTION, COMMAND, and DATA. The inputs were in the Arduino that have to do with the inputs 13-10 and what I had to do with the gearbox inputs was to change the input that had 10 to 3 so everything would be in their own input. After having connected the PS2 controller, I went to the Arduino program and went to Serial Monitor, and started to test out the controller. As I tested the controller it gave me signals that X was pressed and including the other buttons as well. I had gotten] everything to work with the buttons and the side keys to be able to use to control the gearbox later on. -Next Step: Finally being able to control the gearbox with the PS2 controller.

- My first Milestone:
-RC Robot Tank Gearbox: Milestone Achieved: I was able to get the Gearbox working with the Dual Motor and the Arduino. The process of the program running is: Computer code--> to Arduino--> to Dual Motor--> to Gearbox. I was able to get code working and changing the PWM for the two different outputs of each motor which are : BOUT1, BOUT2, AOUT2, and AOUT1. The wiring is connected with the dual motor which is giving the signal to the Gearbox to operate on the amount of PWM on a side of the motor it will operate on. The inputs are: BIN1, BIN2, AIN2, and AIN1. These inputs are for the signals with the Dual motor and the Arduino so the Arduino can tell the Dual Motor what to do. – Next Step: Getting the PS2 Controller working with the Arduino.

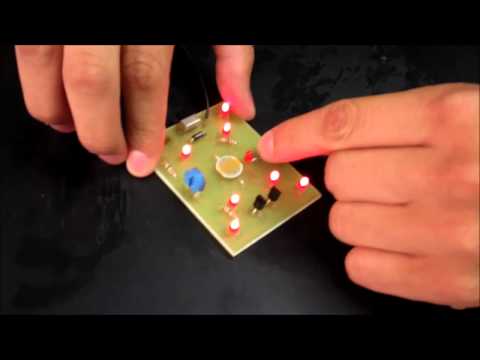
- My Laser Target Kit Starter project:
– The Laser Target kit has 9 small red LED lights that light up when turned on or have a laser point at the Light Sensor turn on the LED lights. – It runs on a 9V battery and it works by having three types of switches which are ON1, OFF, ON2, and a trimmer that blocks the current from the other LED light . With ON1 only 1 of LED lights is off because of the repressor that is acting like a door way to stop the current from turning on the light. With ON2 has all of the LED lights on but when the trimmer is moved it stops the current from all except one LED light which was the one that was off in ON1. To get all the lights to work with the trimmer active, the laser will activate all LED lights by powering the 8 LED lights that were off. – The only problem that I had with my laser tager kit is when I had realized that I had soldered the LED lights the wrong direction.
Reflection: My time in Bluestamp has been awesome and I have really learned many things and now to think that I came to Bluestamp without knowing anything about engineering, I was able to accomplish my project. Bluestamp has changed my knowledge on the life of an engineer and how everything can go wrong and how to be able to handle the failures and the disappointments. I am grateful that I gave up half of my summer to come to Bluestamp to live the life of an Engineer. I have met good and amazing people and now I’m ready to try my best to reach that goal that I have in mind that will be life changing to me and my family. I enjoyed Bluestamp and I will keep on working on my project and make modifications to it so it can be even more epic.