Fingerprint ID safe with keypad
The Fingerprint ID safe with keypad is a safe that has 2 layers of security and can be personalized for each person.
Engineer
Charlotte T.
Area of Interest
Cybersecurity
School
Henry M. Gunn High School
Grade
Rising Junior
Reflection
Throughout my six weeks here at BlueStamp, I have experienced a lot of up and downs but I enjoyed the experience. I realized that engineering isn’t as far fetched as I assumed it would be. I managed to finish a project in six weeks that I would have never tried to do by myself. I listened to six weeks worth of guest speakers and learned the different industries that engineering can be applied to and how the different types of engineering are essential. I also learned that one project can never just be from one field of engineering and through this process I got a glimpse of mechanical and electrical engineering. I really appreciate my time here at BlueStamp and I hope to continue to follow my passion for engineering.
Final Milestone
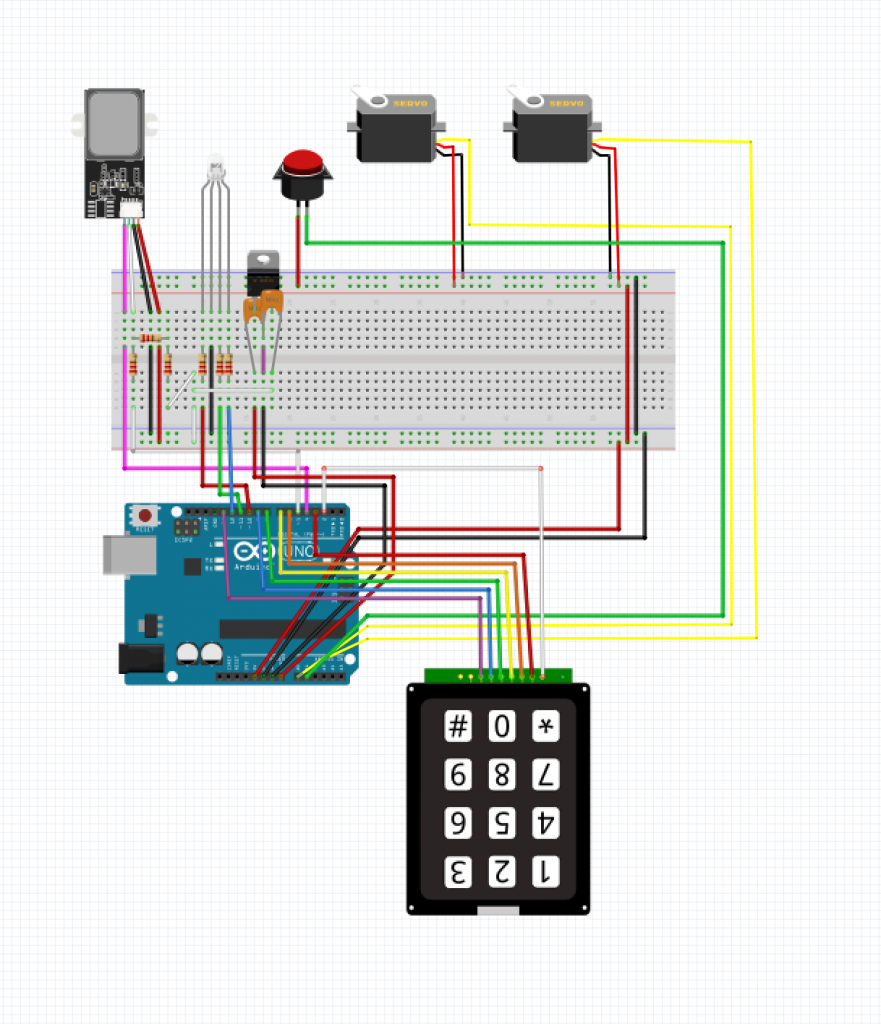
For my third milestone, my goal was to have a functioning safe. The safe functions by having a person switch on the circuit with a switch and then enter a 4 digit passcode. If the 4 digit passcode is correct, the fingerprint sensor will turn on. If the person’s finger is registered in the fingerprint sensor, the LED will light up as a green color. When both are correct, the servos will turn to unlock the box. When the switch is turned off, the servos will turn to lock the box. Over the process of completing my third milestone, I managed to complete my proposed box, but I had a lot of challenges to overcome. At first, after my circuit was completed, I had to learn how to use the Dremel and cut through my metal box. I had to figure out the best places to put each component of my box. After everything had a place, the hardest part of my box was the unlocking and locking portion of the safe. It took me more than two weeks to fully get my servos to work. In the beginning, I managed to get the code for unlocking working, my big problem was the closing. I also had to get the physical part of my servos to work. I connected wires from the servo to the already built in lock and the system proved very weak because it broke a lot of times. In the end, I used a lot of zip ties and rubber band to have it stay connected.
Second Milestone
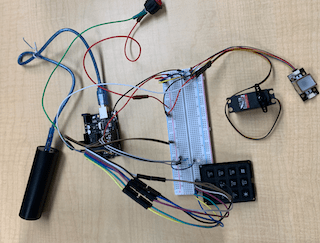
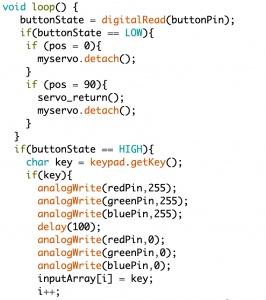
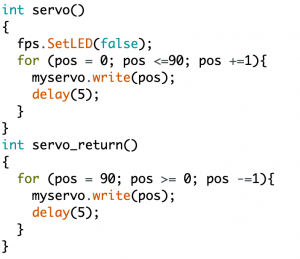
Over the process of completing my second milestone, I learned how a fingerprint scanner works, how to code a servo and how to control it all with a switch. A fingerprint scanner works like an optical scanner. It generates an image from the ridges and valleys of a fingerprint. During the process, I used the examples from the fingerprint scanner library to enroll my fingers into my scanner and implemented the fingerprint identification code into my keypad code. At first, I had a lot of trouble connecting the two code. My problem was that only one of the codes would work, both of them together wouldn’t work. In the end, I was able to overcome this by creating ‘int’ of both options after a code was put in. If the code was wrong, it would automatically go to the ‘int’ that was written for the option of a wrong code and likewise for the correct code. When I finally was able to connect my keypad and fingerprint scanner together, I continued on and add my servo into the mix. At first I had trouble even making the servo move within my code. Later, after I managed to have the servo rotate, I went on to try to write some servo code into my fingerprint scanner code. I created an ‘int’ at first because that was how I overcame my first problem but I didn’t know where to put it in my code. At the end, I found that putting the servo code in my fingerprint ‘int’ code was the best option. After putting the servo code into my fingerprint code, the next problem I encountered was the servo’s rotation and having it rotate the way I wanted. I had to find out which angle was which on the servo. After I finished writing my code for my keypad, fingerprint scanner, and servo, my next step was to add my switch. I realized that my switch button code would be the mother code and I had to put everything inside it. Now my code work by first turning off the circuit by turning on the switch. Then comes the keypad step where you type in the password, once the password is entered, it will check whether or not it is correct and only when it is correct will it show a teal light. If the code is wrong, a red light appears. Once the teal light in shown, the fingerprint scanner will turn on and will require the person to put their finger on it. If the fingerprint is recognized, the LED light will show green and if is isn’t recognized, red would appear. If green is shown, the servo will turn and the safe is open. After closing the safe and turning the circuit off with the switch, the servo will rotate back into ‘lock’ position.
First Milestone
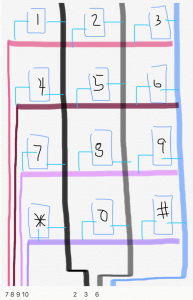
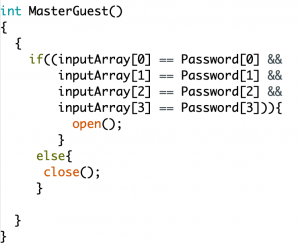
My goal for my first milestone was having a functioning keypad and having a passcode embedded in my code. By completing my first milestone, I learned how a matrix keypad works and how to code a passcode. A matrix keypad signifies that each pin isn’t individual. The buttons in each row are connected to each other and the buttons in a column are all connected to each other. I had a lot of trouble with my code. Initially, my code would have any 4 number code display a white color, which isn’t what I wanted. I wanted a specific code to display one color and all other codes to display another color. All of my previous codes didn’t include an array which I think was my problem because once I put an array in my code, the keypad worked and when my correct password was inputted, the correct color would be shown on the LED light. An array is an element of arduino that contains a list of elements. The elements in my array were the numbers of my passcode. The code runs by collecting the 4 numbers someone inputs and when 4 numbers have been inputted, the code checks it with each element of my array and if each number inputted is the same as it corresponding element in my array, the color would show green and if any number is not the same as the password, the LED light would show red.
Motion Alarm


