Reflections
When I first came to Bluestamp I didn’t have that much experience with Raspberry Pi or python. Through my time at Bluestamp I learnt a lot about python and the raspberry pi, I even learnt about things that I thought I would never need to know. Some examples are how to troubleshoot an OLED, create things with cad, and how to 3D print. Even with the ups and downs of doing a student defined project, I really enjoyed my experience at Bluestamp and learnt a lot.
Final Milestone
#this is the code for the GIF you basically just repeat it
#starts image display again
disp.display()
#takes image which ever one in your sequence
image = Image.open('newsize2').convert('1')
#displays it
disp.image(image)
disp.display()
#takes a break for .1 seconds
time.sleep(.1)
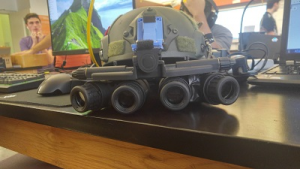
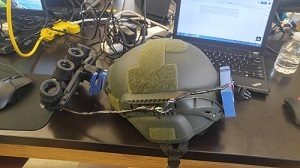
I completed my base project! This is my last milestone before I do modifications. I got the GIF to run on the screen by showing a bunch of pictures really quickly so it looks like a GIF. I used pictures of a youtuber playing a game called PUBG. I got the GIF to run by just repeating the same code over and over but adding a delay and changing the picture. This was my first time coding stuff with python in a while so went the lazy tedious route of just repeating code over and over, instead of making a variable or a loop. I also put some holes in the Raspberry Pi case so I can attach screens and a mouse and keyboard. Finally I connected the wires of the OLED to the pi using a proto board although I did run into a few problems with the soldering. When connecting the two pieces a few wires came out and when I went to resolder the wires I ended up soldering a few wires together, but in the end I managed to fix it all.
Second Milestone
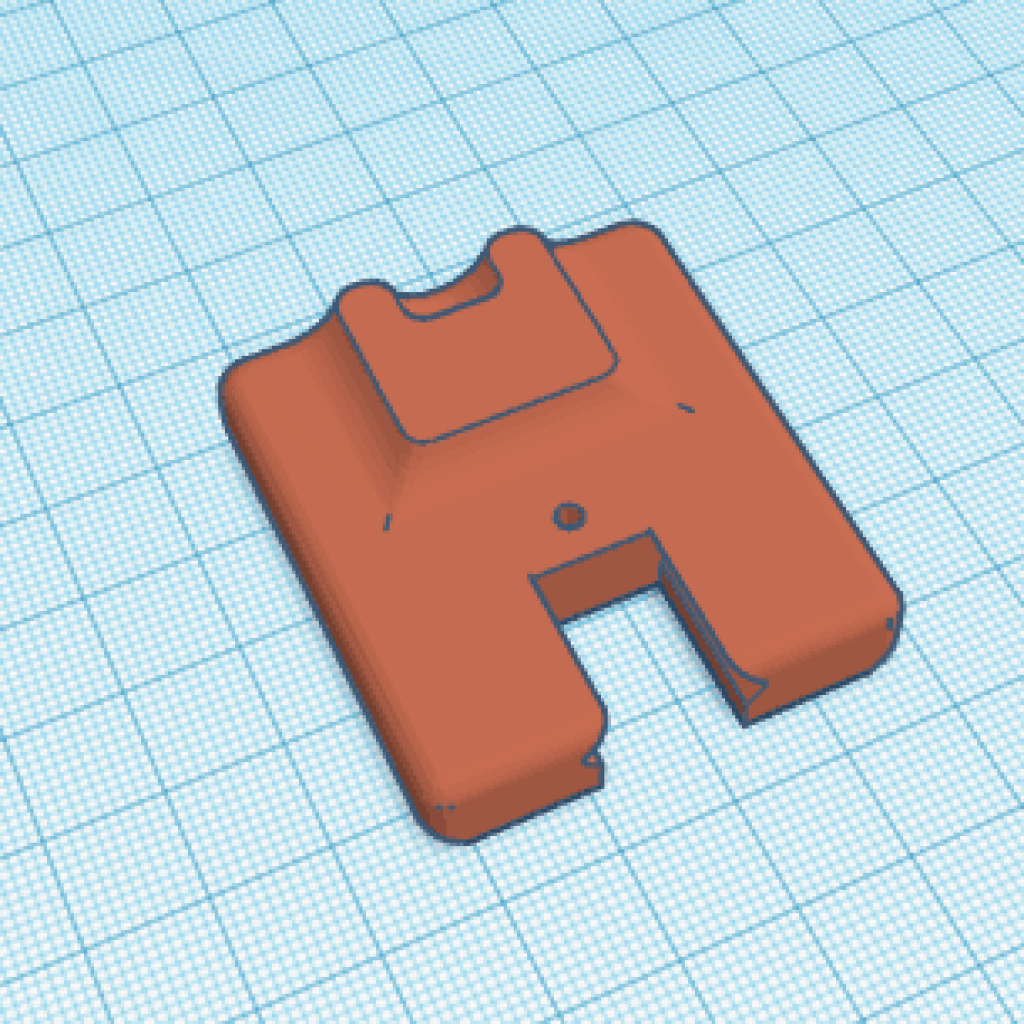
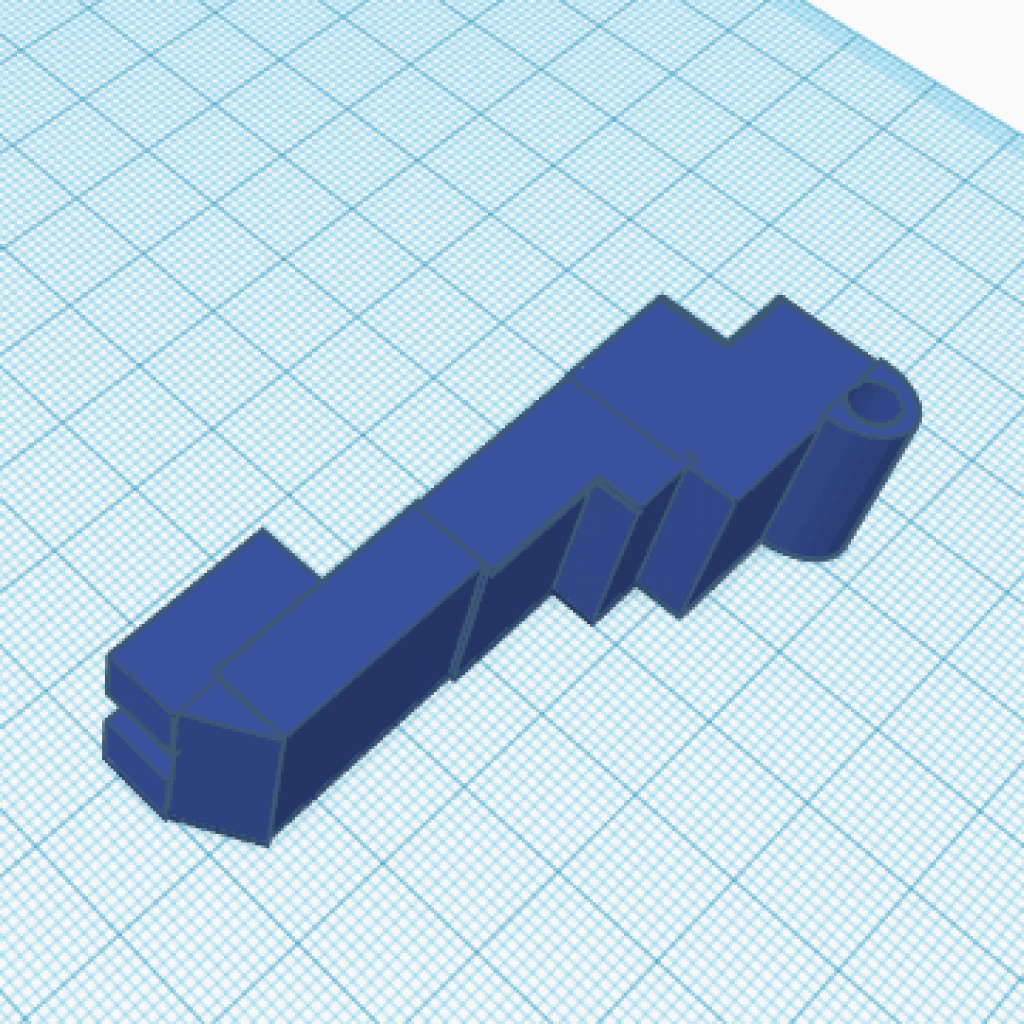
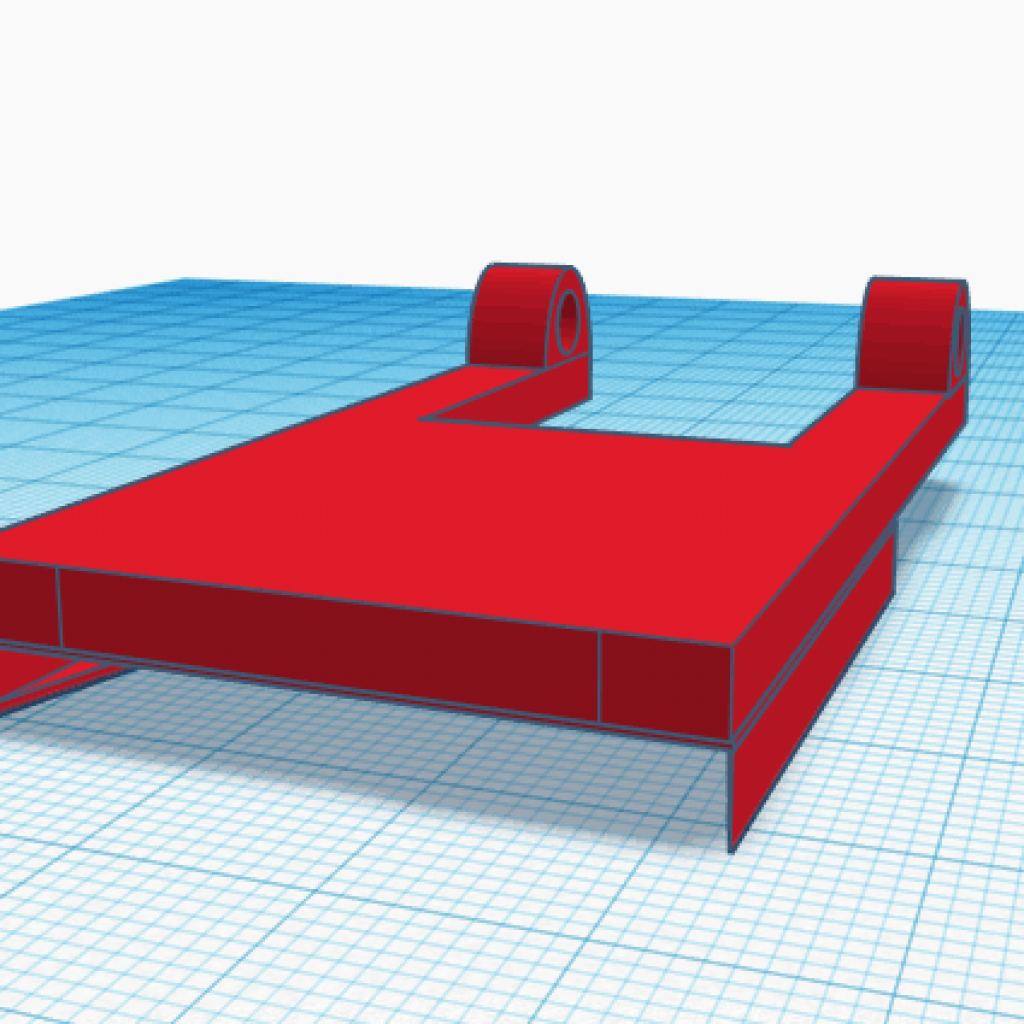
For my second milestone I designed and printed the attachment mount for my goggles. There are three 3D printed parts to the mount. The first piece was the bottom half of a gopro mount that I modified to be flat and not have the gopro attachment. The second part is the replacement part for the gopro mount. It sits on the place of the gopro attachment but has two holes on the bottom to attach to the third part on the goggles. The third part is attached to the top of the goggles and the helmet. The way I attached the third part and helmet mount is with a screw and a nut. I put Velcro on the meeting place of the two sides of the mount so that they stay up when placed there. Because I was in the spirit of 3D printing things I also printed a box for my pi. It’s nothing special I just wanted to use the 3D printer more, but I did run into problems when printing a few things. I incorrectly measured my pi and size of goggles so I printed two things to small. But I have learnt how to use a 3D printer so that was a lot of fun for me.
First Milestone
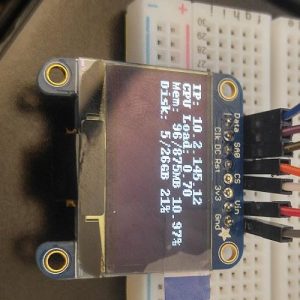
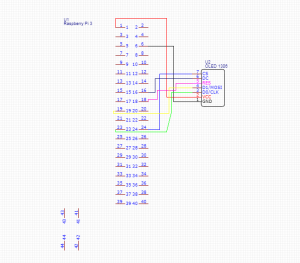
For my first milestone I set up the pi and connected my OLED display. I set up the pi using noobs. Noobs is arduinos easy to install operating system installer. I downloaded the zip file form the raspberry pi website and extracted it into the folder, I had no problems setting up my pi. My OLED was interesting to say the least, the first one we got didn’t really work with pi that well. There were also no instructions on how to get it to work with pi. Once the second screen came we got it working in a day. It was a lot simpler to set up than the first. The wiring was a little different than what was shown in the instruction as it was for the raspberry pi 2 and not the 3. I just moved the wires to the correct places on the board. I was able to then run the programs on the board that I downloaded when setting up the board. I was able to learn how to set up a pi, how to use python to code an OLED and the importance of checking for compatibility before you get parts. A few problems that I ran into when doing this were, my first OLED was not compatible and that caused a lot of problems and two weeks of going in circles. My second problem was when first running my second OLED the wiring diagram from the tutorial was for a pi 2 and not the 3 so I plugged in the wires into the wrong pins.
Useless machine
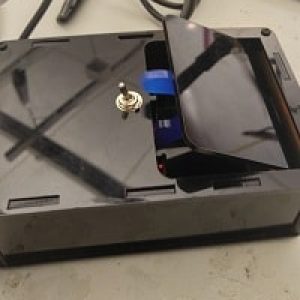
My project was the useless machine. It’s a box that reverses a circuit by itself. When you push the double pole, double throw (DPDT) switch on top of the box it moves the DC motor one direction moving an acrylic arm and turns on a green LED, letting you know which direction the current is going. When the arm retracts it hits another switch which stops the arm from moving until the switch is pushed again.
How it works
The useless machine is powered by three triple A batteries. When the double pole double throw (DPDT) switch is flicked the motor moves the acrylic arm out of the box to push the switch closed. A DPDT switch is two single pole double throw (SPDT) switches put together controlled by one switch. The SPDT is a switch that controls two outputs with one input. When the acrylic arm hits the switch the circuit is reversed because the H bridge is reversed in the DPDT switch. When this happens the acrylic arm moves back into the box and once it gets in the box it hits another switch. That then shuts of the circuit. When the arm is moving out of the box the LED turn green and when it moves back into the box the LED turns red. The LED indicates the direction of the circuit.
I started with a DC motor, the acrylic pieces of the case 2 screw terminals a snap switch, a DPTP switch, a dual LED, two resistors, power supply and a board. I soldered the DPTP switch to the board then the LED and the resisters. I then attached the LED second STDP switch and the two screw terminals. When attaching the LED I accidentally melted some part of the screw terminal. I had to replace it with a new one and get new wires.Then I attached the power supply and motor to the screw terminals. Once that was all sorted out I attached the board to the acrylic stand and attached the motor to the stand. Then I attached the stand to the floor of the box and Velcroed the battery pack to the floor. Then I built the rest of the box without a problem.
This project I learned how to desolder and that melting some parts isn’t good. I made a few mistakes by melting a part then I had to replace it with a bigger one. But the wires would not fit so I had to strip them from their connectors and just attach them to the board.


