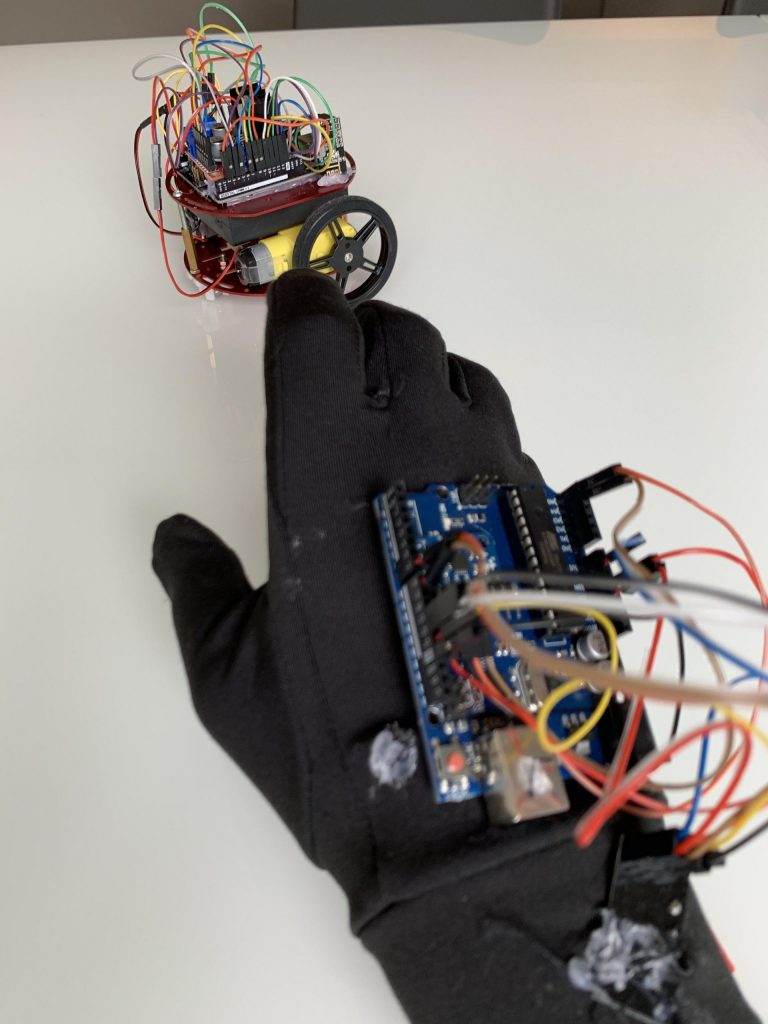
Demo Night
First Milestone
// Motor A connections
int enA = 9;
int in1 = 8;
int in2 = 7;
// Motor B connections
int enB = 3;
int in3 = 5;
int in4 = 4;
void setup() {
// Set all the motor control pins to outputs
pinMode(enA, OUTPUT);
pinMode(enB, OUTPUT);
pinMode(in1, OUTPUT);
pinMode(in2, OUTPUT);
pinMode(in3, OUTPUT);
pinMode(in4, OUTPUT);
// Turn off motors – Initial state
digitalWrite(in1, LOW);
digitalWrite(in2, LOW);
digitalWrite(in3, LOW);
digitalWrite(in4, LOW);
}
void loop() {
directionControl();
delay(1000);
speedControl();
delay(1000);
}
// This function lets you control spinning direction of motors
void directionControl() {
// Set motors to maximum speed
// For PWM maximum possible values are 0 to 255
analogWrite(enA, 255);
analogWrite(enB, 255);
// Turn on motor A & B
digitalWrite(in1, HIGH);
digitalWrite(in2, LOW);
digitalWrite(in3, HIGH);
digitalWrite(in4, LOW);
delay(2000);
// Now change motor directions
digitalWrite(in1, LOW);
digitalWrite(in2, HIGH);
digitalWrite(in3, LOW);
digitalWrite(in4, HIGH);
delay(2000);
// Turn off motors
digitalWrite(in1, LOW);
digitalWrite(in2, LOW);
digitalWrite(in3, LOW);
digitalWrite(in4, LOW);
}
// This function lets you control speed of the motors
void speedControl() {
// Turn on motors
digitalWrite(in1, LOW);
digitalWrite(in2, HIGH);
digitalWrite(in3, LOW);
digitalWrite(in4, HIGH);
// Accelerate from zero to maximum speed
for (int i = 0; i < 256; i++) {
analogWrite(enA, i);
analogWrite(enB, i);
delay(20);
}
// Decelerate from maximum speed to zero
for (int i = 255; i >= 0; –i) {
analogWrite(enA, i);
analogWrite(enB, i);
delay(20);
}}
For my first Milestone I wanted to get the motor driver connected to the wheels and the Arduino. I used this Link to help me connect the motor driver to the wheels, the Arduino, and the battery pack: https://lastminuteengineers.com/l298n-dc-stepper-driver-arduino-tutorial/
Second Milestone
For my second milestone I decided to put all the components on the hand piece. I connected the N.R.F. to the Arduino nano but when I tried to upload code to the nano it said that there was an error. So I tried many other ways to upload the code and it still said that there was an error. After a long while of me trying to upload the code, I came to the conclusion that the nano was broken. So I needed to get another Arduino but instead of getting another nano I got an uno, which is just like a nano but bigger. Once it came I finally could upload the code. Once I uploaded the code the N.R.F.s connected so I could start sewing. For me sewing was really easy because I sewed a couple times before. Once I finished sewing the N.R.F. and the Arduino it was time to connect the accelerator, which is the thing that senses your movement. I only had one issue but it wasn’t really an issue. When I went to the serial monitor it was printing a bunch of gibberish but when I asked what was going on Skye, my instructor, said that my baud rate was incorrect so when I changed it it started printing out the axis the accelerator was on. Once I saw that working I used a hot glue gun to stick the accelerator to the Arduino. When I was done the hand piece was completed and I just needed to add the code and my project would be finished. I thought it was really fun making my code. I did take some of Sohan’s code but only the glove side. I also made some adjustments to the hand movements in Sohan’s code. Once I finished the code my project was completed.


